
Technical data


Table Of Contents
- Agilent 3000 Series Oscilloscopes-At a Glance
- In This Book
- Contents
- Figures
- Tables
- Getting Started
- Step 1. Inspect the package contents
- Step 2. Turn on the oscilloscope
- Step 3. Load the default oscilloscope setup
- Step 4. Input a waveform
- Step 5. Become familiar with the Front Panel Controls
- Step 6. Become familiar with the oscilloscope display
- Step 7. Use Auto-Scale
- Step 8. Compensate probes
- Step 9. Use the Run Control buttons
- Displaying Data
- Capturing Data
- Making Measurements
- Saving, Recalling, and Printing Data
- Oscilloscope Utility Settings
- Specifications and Characteristics
- Service
- Safety Notices
- Index
2 Displaying Data
50 Agilent 3000 Series Oscilloscopes User’s Guide
To specify the probe attenuation
For correct measurements, you must match the oscilloscope’s probe
attenuation factor settings with the attenuation factors of the probes being
used.
The probe attenuation factor setting changes the vertical scaling of the
oscilloscope so that the measurement results reflect the actual voltage
levels at the probe tip.
1 If the channel’s menu is not currently displayed, press the channel
button (1
, 2).
2 In the Channel menu, press Probe to select between:
• 1X — for 1:1 probes.
• 10X — for 10:1 probes.
• 100X — for 100:1 probes.
• 1000X — for 1000:1 probes.
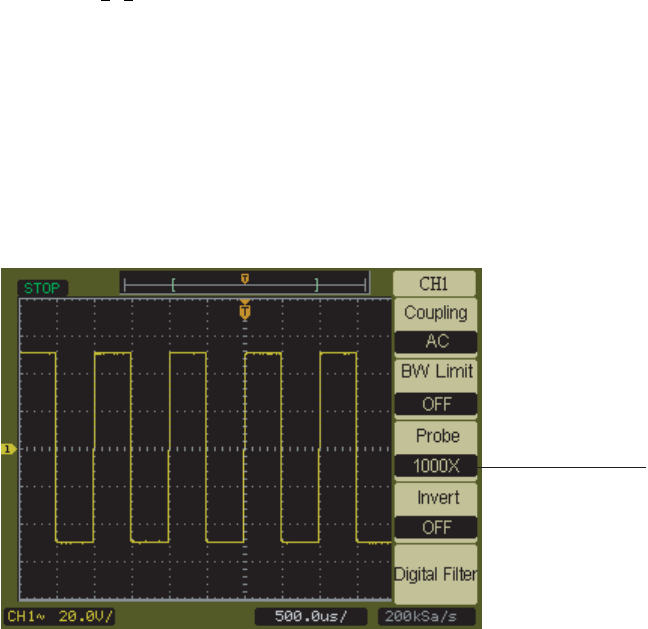
Figure 21 shows an example selecting the probe attenuation factor for a
1000:1 probe.
Figure 21 Probe Attenuation Set to 1000:1
Probe Attenuation