
Technical data


Table Of Contents
- Agilent 3000 Series Oscilloscopes-At a Glance
- In This Book
- Contents
- Figures
- Tables
- Getting Started
- Step 1. Inspect the package contents
- Step 2. Turn on the oscilloscope
- Step 3. Load the default oscilloscope setup
- Step 4. Input a waveform
- Step 5. Become familiar with the Front Panel Controls
- Step 6. Become familiar with the oscilloscope display
- Step 7. Use Auto-Scale
- Step 8. Compensate probes
- Step 9. Use the Run Control buttons
- Displaying Data
- Capturing Data
- Making Measurements
- Saving, Recalling, and Printing Data
- Oscilloscope Utility Settings
- Specifications and Characteristics
- Service
- Safety Notices
- Index
2 Displaying Data
36 Agilent 3000 Series Oscilloscopes User’s Guide
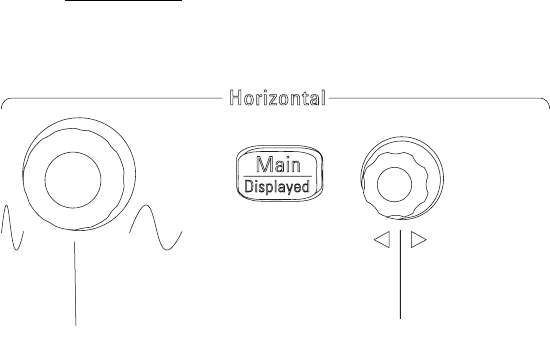
Using the Horizontal Controls
The horizontal controls consist of:
• The horizontal scale knob — changes the oscilloscope’s time per division
setting using the center of the screen as a reference.
• The horizontal position knob — changes the position of the trigger point
relative to the center of the screen.
• The Main/Delayed
button — displays the Main/Delayed menu which lets
you display the delayed time base, change the time base mode, reset the
trigger offset, adjust the trigger holdoff, and reset the trigger holdoff.
Figure 11 shows the screen icon descriptions and control indicators.
Figure 10 Horizontal Controls
Scale knob
Position knob