
Technical data


Table Of Contents
- Agilent 3000 Series Oscilloscopes-At a Glance
- In This Book
- Contents
- Figures
- Tables
- Getting Started
- Step 1. Inspect the package contents
- Step 2. Turn on the oscilloscope
- Step 3. Load the default oscilloscope setup
- Step 4. Input a waveform
- Step 5. Become familiar with the Front Panel Controls
- Step 6. Become familiar with the oscilloscope display
- Step 7. Use Auto-Scale
- Step 8. Compensate probes
- Step 9. Use the Run Control buttons
- Displaying Data
- Capturing Data
- Making Measurements
- Saving, Recalling, and Printing Data
- Oscilloscope Utility Settings
- Specifications and Characteristics
- Service
- Safety Notices
- Index
1Getting Started
32 Agilent 3000 Series Oscilloscopes User’s Guide
High Frequency Compensation
For the supplied passive probes:
1 Using the BNC adapter, connect the probe to a square wave generator.
2 Set the square wave generator to a frequency of 1 MHz, an amplitude of
3 Vp- p, and an output termination of 50Ω.
3 Press the Auto-Scale
front panel button.
4 If waveform does not appear like the Correctly Compensated waveform
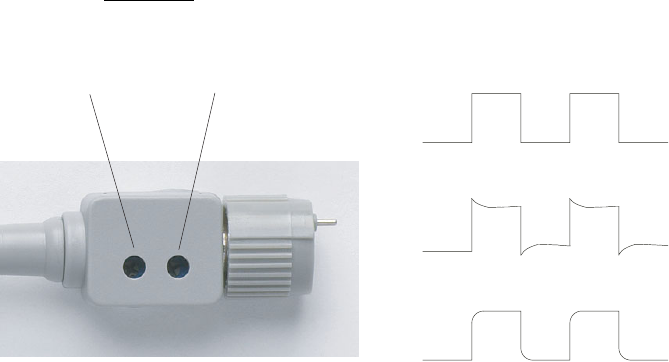
shown in Figure 8, then use a nonmetallic tool to adjust the 2 high
frequency compensation adjustments on the probe for the flattest
square wave possible.
Figure 8 High Frequency Probe Compensation
High frequency compensation adjustments
Over Compensated
Under Compensated
Correctly Compensated