
User`s guide


36
Operation
Using the 11970A, Q, U, V, and W Mixers with the X- Series Signal Analyzers (Option EXM)
Down loading the conversion loss .csv files to the analyzer corrections array
1. Install the CD ROM provided with the mixer, into a PC and view the contents of the CD.
2. Locate the 70xxxxxx_X.csv file.
NOTE For the 11970A, 11970Q and 11970V, this is the conversion loss file used for
almost all applications. However, for the mixer model numbers listed above, there
are two other 70xxxxxx_.csv files on the CD that may be used in special cases.
As an example, on the 11970Q mixers, the additional two files are
70Qxxxxxx_8.csv and 70Qxxxxxx_10.csv. The 70Qxxxxxx_8.csv file contains
conversion loss data for the 8th harmonic only, and this data allows the 8th
harmonic to be used to a slightly higher tuned frequency than the normal 40 GHz
transition from the 8th to the 10 harmonic. However, only a portion of Q band can
be covered by the 8th harmonic. See the 70Qxxxxxx_8.csv file for the exact
frequency coverage.
The 70Qxxxxxx_10.csv file contains conversion loss data for the 10th harmonic
only, and this data allows the 10th harmonic to be used to a lower tuned frequency
than the normal 40 GHz transition from the 8th to the 10 harmonic. The conversion
loss will be worse below 40 GHz compared to using the normal 70Qxxxxx_X.csv
file.
The reason you may want to use one of these special files is when making
measurements that span the normal 40 GHz, 8th to 10 harmonic mixing transition.
The two files provide conversion loss data that allow calibrated measurements
when you need to measure slightly above or below the normal transition
frequency, and want the measurement to be made using a single harmonic.
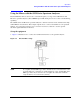
3. Copy the .csv file to a USB memory device.
4. Insert the USB memory stick into one of the USB ports on the signal analyzer.
5. It is recommended that you connect a mouse and keyboard to the signal analyzer.
6. Press
Input/ Output, More, Corrections, Select Correction.
7. Choose a correction array from the list of Correction 1 through Correction 6. Correction 1 has a
provision to store antenna corrections, so if antenna corrections are required, reserve this array for
that use. If you want to see if anything is already stored in a particular correction, press
Correction,
Edit. To delete a correction table, press Return, assure the Select Correction key corresponds to the
correction you want to delete, and press
Delete Correction.
8. Once the correction array number is selected, press
Recall, Data (import), Amplitude Correction
and chose one of the correction array numbers.
9. Press
Open, use the pull down arrow in the "look in" box to navigate to the USB memory stick, and
locate the 70xxxxxx_X.csv file.
10.Select the 70xxxxxx_X.csv file and click
Open. The conversion loss data will now load into the
specified corrections array. To view the contents of the corrections array in the conversion loss table,
press
Input/ Output, More, Corrections, select the corrections array number, and press Edit. Press
Return to go back to the measurement screen.