
User`s guide


31
Operation
Using the Mixers with the E4440A, E4446A, or E4448A PSA Series Spectrum Analyzer (Option
AYZ)
Amplitude Calibration
The conversion loss versus frequency data can be entered on your analyzer from one of three sources.
•From a Conversion Loss Data Disk, supplied with your mixer. See “Using a Conversion-Loss Data
Disk” on page 27.
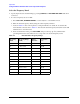
• Data from the calibration sheet supplied with your mixer. The 11970A, Q, and V band mixers
calibrated after May 2011 have two calibration sheets. Use the sheet that contains the text "Not for
use with the Agilent X-Series Signal Analyzers’. An example of the calibration sheet is shown in
Figure 2-20 on page 58.
• From conversion-loss data located on the mixer body label.
Using a Conversion-Loss Data Disk
The conversion-loss data for your mixer can be quickly loaded in the memory of an ESA or PSA series
analyzer from a floppy disk. The following process works with the floppy disk provided by the factory
with your new mixer, or with one that you have stored the correction data. This process eliminates the
time consuming and sometimes error-prone process of manually entering the data from a table.
Loading Data
1. Insert the conversion-loss data disk (from the factory or your own) into the floppy drive of the analyzer.
2. Press
File, then Load.
3. Press
Type, More, then select Corrections.
4. Press
Directory Select, highlight drive -A-, then press Directory Select again.
5. Use the down arrow to select the file. The factory supplied disk has a file with the OTH extension which places
the data in the corrections set “other” location.
6. Press
Load Now to load the conversion loss values into the correction table of the analyzer.
Viewing Data
1. Press
Amplitude, More, Corrections, Other (ON) and Edit to view the correction values.
2. Use the front-panel knob or up/down arrows to scroll through the list of correction values.
Manually Entering Conversion-Loss Data
1. The analyzer frequency band will be set to
26.5 – 40 GHz (A). To choose a different band, press Ext
Mix Band
and then press the desired band frequency range/letter key. For this example, we will use
band A, which ranges from 26.5 GHz to 40 GHz.
NOTE To correct for the conversion-loss of the harmonic mixer in use, the analyzer
amplitude correction feature is used.
2. Press
AMPLITUDE Y Scale, More, Corrections. Select a correction set for use with external mixing.
The recommended set to use is
Other although any available set could be used.
3. Press
Edit to enter the appropriate conversion loss data for the mixer in use. These values are listed
on the mixer, or a calibration sheet that is supplied with the mixer.