815 Basic Operation Guide
CONTENTS 1 Installation ...................................................................................................... 1-1 Unpacking ...........................................................................................................................1-1 Installing the Toner Container .............................................................................................1-3 Turning the Machine on ............................................................................................
Document Processor ............................................................................................................... 5-1 Acceptable Originals .......................................................................................................... 5-2 Originals to Avoid ............................................................................................................... 5-2 Names of Parts ...............................................................................................
Making Full Use of This Machine’s Advanced Functions 1 Enlarging/reducing copies to a desired size between 50 % and 200 % Zoom mode (See page 4-7) 2 Copying at a previously registered zoom ratio Standard zoom mode (See page 4-6) 3 Making clear reproductions of photographs Image quality selection (See page 4-2) 50 % 200 % 4 7 9 • Saving on toner use EcoPrint mode. Refer to Chapter 1 in Advanced Operation Guide, EcoPrint.
Caution No liability is assumed for any damage caused by improper installation. Notice The information in this guide is subject to change without notification. Additional pages may be inserted in future editions. The user is asked to excuse any technical inaccuracies or typographical errors in the present edition. No responsibility is assumed if accidents occur while the user is following the instructions in this manual.
Agfa Japan License Agreement 1. “Software” shall mean the digitally encoded, machine readable, scalable outline data as encoded in a special format as well as the UFST Software. 2. You agree to accept a non-exclusive license to use the Software to reproduce and display weights, styles and versions of letters, numerals, characters and symbols (“Typefaces”) solely for your own customary business or personal purposes at the address stated on the registration card you return to Agfa Japan.
We have determined as a participating company in the International Energy Star Program that this product is compliant with the standards laid out in the International Energy Star Program. About the International Energy Star Program International Energy Star Program has as its basic goals the promotion of efficient energy use and the reduction of the environmental pollution that accompanies energy consumption by promoting the manufacture and sale of products that fulfill program standards.
Please read this Operation Guide before using the machine. Keep it close to the machine for easy reference. Please read this Operation Guide before using this machine. Keep it close to the machine for easy reference. The sections of this guide and parts of the machine marked with symbols are safety warnings meant to protect the user, other individuals and surrounding objects, and ensure correct and safe usage of the machine. The symbols and their meanings are indicated below.
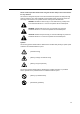
The following symbols indicate that the related section includes information on actions which must be performed. Specifics of the required action are indicated inside the symbol. .... [Alert of required action] .... [Remove the power plug from the outlet] .... [Always connect the machine to an outlet with a ground connection] Please contact your service representative to order a replacement if the safety warnings in this Operation Guide are illegible or if the guide itself is missing.
IMPORTANT! PLEASE READ FIRST. CAUTION LABELS Caution labels have been attached to the machine at the following locations for safety purposes. Be sufficiently careful to avoid fire or electric shock when removing a paper jam or when replacing toner. Note Do not remove these labels. Label 1 High temperature inside. Do not touch parts in this area, because there is a danger of getting burned. ........... Label 2 High temperature inside.
INSTALLATION PRECAUTIONS Environment Caution Avoid placing the machine on or in locations which are unstable or not level. Such locations may cause the machine to fall down or fall over. This type of situation presents a danger of personal injury or damage to the machine. .............................. Avoid locations with humidity or dust and dirt. If dust or dirt become attached to the power plug, clean the plug to avoid the danger of fire or electrical shock. .................
Power supply/Grounding the machine Warning Do not use a power supply with a voltage other than that specified. Avoid multiple connections in the same outlet. These types of situations present a danger of fire or electrical shock. ........................................................................................................... Plug the power cord securely into the outlet. If metallic objects come in contact with the prongs on the plug, it may cause a fire or electric shock. .......................
If the machine becomes excessively hot, smoke appears from the machine, there is an odd smell, or any other abnormal situation occurs, there is a danger of fire or electrical shock. Turn the power switch off ({) immediately, be absolutely certain to remove the power plug from the outlet and then contact your service representative. If anything harmful (paper clips, water, other fluids, etc.) falls into the machine, turn the power switch off ({) immediately.
Do not look directly at the light from the scanning lamp as it may cause your eyes to feel tired or painful. Cautions when handling consumables Caution Do not attempt to incinerate the toner container. Dangerous sparks may cause burns. Keep the toner container out of the reach of children. ................................................ If toner happens to spill from the toner container, avoid inhalation and ingestion, as well as contact with your eyes and skin. ........................................
SAFETY OF LASER BEAM 1. Safety of Laser Beam This copier has been certified by the manufacturer to Class 1 level under the radiation performance standards established by the U.S.DHHS (Department of Health and Human Services) in 1968. This indicates that the product is safe to use during normal operation and maintenance. The laser optical system, enclosed in a protective housing and sealed within the external covers, never permits the laser beam to escape. 2.
1815 COPIER LIMITED WARRANTY 1. Kyocera Mita America, Inc. and Kyocera Mita Canada, Ltd. (both referred to as "Kyocera Mita") warrants the Customer's new Multifunctional Product (refferred to as "MFP"), and the new accessories installed with the initial installation of the MFP, against any defects in material and workmanship for a period of one (1) year, or 100,000 copies/prints from date of installation by an Authorized Kyocera Mita Dealer for the 1815, whichever first occurs.
Introduction This Basic Operation Guide has following chapters: 1 Installation Contains initial installation and set-up procedures. 2 Names of Parts Identifies the names and functions of the machine and operation panel. 3 Preparations Contains explanations on loading paper and attaching the Face-up Tray. 4 Basic Operation Explains how to make simple copies and prints and how to scan originals. 5 Optional Equipment Describes the available optional equipment.
Guides included The following guides are included with this machine. Refer to the guide that corresponds to your particular objective. Basic Operation Guide (This guide) This Basic Operation Guide contains explanations on the initial installation and set-up of this machine, the procedure to connect it to a computer, and the basic procedures for using this machine as a copier, printer, and scanner as well for resolving problems if trouble occurs.
Conventions This manual uses the following conventions: 1 2 3 4 xviii 1 Bold indicates key names. 2 Courier indicates content of the message display. 3 Note, Important, and Caution contain important information aside from the text. 4 Italic refers to another page or other guide.
1 Installation Be sure to perform the following installation procedure prior to using this machine. Unpacking 1 Remove all of the components to the machine from the box. 1 2 4 5 3 6 1 Toner Container Cautions 2 4 One-touch Key Sheet 2 Power Cord 5 Basic Operation Guide (this guide) and CD-ROMs 3 Main Body 6 Cleaning Cloth • Be sure to hold both the front and rear sides of the machine when carrying it, as shown in the illustration.
Installation 3 Open the original cover. 4 Remove the 8 pieces of packing tape (C), the 2 pieces of protective packing (D) and the protective sheet (E). (D) (D) (C) (C) (C) (C) (C) (C) (C) (C) (E) 1-2 5 Pull the cassette out of the machine. 6 Remove the protective packing (F) from inside the cassette.
Installation 7 Turn the yellow transport pin (G) on the left side of the machine counter-clockwise to remove it and the paper tag (H). (Refer to page 1-3 for information on where and how to store the pin.) 8 Open the top cover (I). 9 Open the front cover (J). (H) (G) (I) (J) 10 Note Store the yellow transport pin (G) [that you removed in step 7] on the inside of the front cover as shown in the illustration.
Installation Important 2 • Place the process unit on a clean, level surface. • Never expose the process unit to any sort of impact or shock. • The drum in the process unit is sensitive to light. Never expose the drum even to normal office lighting (500 lux) for more than five minutes. Move the lock lever (L) towards you until it is in its unlocked position (marked UNLOCK).
Installation 6 Push the lock lever (L) back into its locked position (away from you). (L) 7 Set the process unit into the machine by aligning the pins (N) on both sides of the process unit with the guides inside the machine, and then slide the process unit into the machine until it stops. (N) 8 (N) Close the front cover and top cover. Turning the Machine on 1 Connect the power cord. 2 Turn the power switch to the machine on ( | ). The machine will begin replenishing the toner.
Installation Using the One-Touch Key Sheet The one-touch key sheet allows you to record destination information registered under the one-touch keys. Place the sheet next to the one-touch keys. Enter the destinations onto the one-touch key sheet. (four spare one-touch key sheets are included with the machine.
2 Names of Parts Main Body 1 7 8 3 4 2 5 6 9 10 11 1 Original Cover — Open/close this cover when you are setting the original on the platen. 2 Platen — Set originals onto the platen. Be sure to lay originals face-down and align them flush up against the left rear corner of the platen. 3 Original Size Indicator Plate — Be sure to align originals flush up against this plate when setting them on the platen. 4 Operation Panel — Perform operations using the keys.
Names of Parts 12 13 14 15 15 17 17 16 18 19 12 Output Tray — Finished copies or printouts can be ejected and stored on this tray. 13 Stopper Extension Lock — Use this lock when loading Folio or Oficio II size paper in the cassette. 14 Paper Stopper — Adjust this stopper to fit the length of the paper in the cassette. 15 Paper Width Guides — Adjust these guides to fit the width of the paper in the cassette. 16 Cassette — This cassette has a storage capacity of 250 sheets of standard paper (80 g/m²).
Names of Parts 20 21 22 23 25 24 26 27 20 Document Processor Connector — Attach the connection cable here when installing the optional document processor. 21 Parallel Interface Connector — Use a parallel cable to connect the connector with a parallel port of your computer. 22 USB Interface Connector — This USB interface conforms to Hi-Speed USB2.0. Use a USB cable to connect this connector with a USB port of your computer.
Names of Parts Operation Panel 1 2 5 4 6 7 8 9 10 11 12 13 14 Ready to copy. 3 15 17 16 19 18 * A4 100% Zoom Set: 1 A4 20 21 23 24 22 27 26 28 29 25 1 Status/Job Cancel Key and Indicator — Press this key to light the indicator to access the Status menu screen. For details, refer to Chapter 4 in Advanced Operation Guide. 2 Copy Key and Indicator — Press this key to use the copier functions of this machine.
Names of Parts 14 Main Power Indicator — This indicator lights red when the power switch is turned on ( | ). 15 Original Quality Key and Indicator — Press this key to light the indicator to select the original quality. See page 4-2. 16 Original Size Key and Indicator — Press this key to light the indicator to select the size of the original. For details, refer to the Advanced Operation Guide. 17 Exposure Key and Indicator — Press this key to light the indicator to change the exposure setting.
Names of Parts Message Display The following examples explain the messages and icons used on the message display. 1 2 3 4 5 Ready to copy. Set : 1 A4 A4 100% Zoom 6 7 8 9 12 Copier Screen Ready to send. Dest. : 1 :h_pttr@owl-net.net Left Off Placemnt Subject 10 11 13 Scanner Screen Reference number Meaning 1 Indicates the current status of the machine. Also displays the title of the current menu whenever the operation panel is being used.
3 Preparations Loading Paper Paper can either be loaded into the cassette or set on the MP tray. For details on the media types that can be used, refer to the Advanced Operation Guide. Notes Important • After taking new paper out of its packaging, be sure to fan through them a few times to separate the sheets before loading the paper into a cassette or setting it on the MP tray.
Preparations 2 Adjust the paper stopper in the rear portion of the cassette by pressing in on the release buttons and sliding the paper stopper to the fit the size of the paper being loaded. The paper sizes are marked on the bottom of the cassette. The factory default setting is A4/Letter size paper. For information on adjusting the paper stopper for Folio or Oficio II size paper, see Adjusting the Paper Stopper for Folio or Oficio II Size Page on page 3-3.
Preparations 6 Register the paper size loaded in the corresponding cassette above by using the operation panel. For detail, refer to Chapter 5 in Advanced Operation Guide, Selecting Paper Size and Media Type. Adjusting the Paper Stopper for Folio or Oficio II Size Page Perform the following procedure to adjust the paper stopper to load Folio or Oficio II size paper into the cassette.
Preparations Loading Paper on the MP Tray Standard paper (60 to 90 g/m²), thick paper (90 to 163 g/m²), color paper, transparencies, and letterhead paper can be set on the MP tray. Always use the MP tray when copying and printing onto special paper.
Preparations 2 Pull out the MP tray extension and then flip it open. 3 Adjust the paper width guides to fit the width of the paper. 4 Slide the paper all the way in, along the paper width guides, as far as it will go. When you are setting paper on the MP tray, make sure that the side to be copied or printed onto is facing upward. Notes • Only load the MP Tray when you are planning to use it. Do not leave paper in the MP tray for long periods of time.
Preparations Using the Face-up Tray When copying and printing onto special paper, such as thick paper (90 to 163 g/m²), and transparencies, always use the face-up tray. The face-up tray has a storage capacity of approximately 30 sheets of standard paper (80 g/m²) but only 1 sheet of special paper should be stored there at one time. Note 3-6 To avoid paper jam or damage to the machine, do not leave more than approximately 30 sheets of standard paper or one sheet of special paper in the face-up tray.
Preparations Connecting the Cables The machine has the connectors for connection with either network or directly to a computer. Connecting the Network Cable To connect the machine to a network, use an network cable (10Base-T or 100Base-TX). 1 Turn the power switch located on the rear side of the machine off ({), and remove the power cord from the outlet. 2 Connect the network cable to the network interface connector at the rear side of the machine.
Preparations 2 Connect the printer cable (not included) to connector located at the rear side of the machine. Parallel Cable USB Cable 3 Connect the other end of the printer cable to the parallel interface connector or USB interface connector on your computer. Connecting the Power Cord Connect the power cord to the power cord receptacle at the rear side of the machine. Connect the other end of the power cord to a power outlet.
Preparations Turning the Power Switch On Turn the power switch on ( | ). The machine will begin to warm up. Once warm-up is completed, the basic screen is displayed. Ready to copy.
Preparations Network Settings Registering the IP Address Perform the following procedure to assign the IP address. Notes 3-10 • To connect the machine to the network using TCP/IP protocol, you must set the IP address on the machine. The IP address must be unique to the machine and should be obtained from your network administrator. • Any changes made to the network settings will become valid after you turn the power to the machine off and then back on again.
Preparations 5 Press the Enter key. 6 Press the S key or the T key to select TCP/IP Setting. 7 Press the Enter key. 8 Press the S key or the T key to select IP Address. Network Setting: *Back AppleTalk Set. TCP/IP Setting Exit TCP/IP Setting: *TCP/IP DHCP IP Address Exit 9 Press the Enter key.
Preparations 10 Use the keypad to enter the IP address. Enter the first segment of the IP address. IP Address: 0. 0. 0. 0 0. 0 Cancel 11 Press the X key and enter the second segment of the IP address. IP Address: 10. 0. Cancel 12 Press the X key and enter the third segment, then press again and enter the last segment. IP Address: 10. 168. 0. 123 Cancel 13 Press the Enter key. The message display shows Completed and returns to the TCP/IP Setting copy basic screen.
Preparations 2 Press the Enter key. 3 Enter the Subnet Mask address, starting the first segment. Next, perform the following procedure to assign the Default Gateway. Subnet Mask: 255. 255. 255. 0 Cancel Registering the Default Gateway To assign the Default Gateway, repeat steps 1 to 7 in the above procedure. 1 Press the S key or the T key to select Default Gateway. 2 Press the Enter key. 3 Enter the Default Gateway address, starting the first segment.
Preparations 4 3-14 When you finish making all of the network setting, press the right select key. The message display returns to the basic screen.
Preparations Setting the Time Zone Perform the following procedure to select the time zone. You can also make this setting using COMMAND CENTER. For details on COMMAND CENTER, refer to Chapter 5 in Advanced Operation Guide, Time Zone. 1 Press the System Menu/Counter key. 2 Press the S key or the T key to select Date/Timer Set. 3 Press the Enter key. 4 Press the S key or the T key to select Time Zone. Sys. Menu/Count.: *System Setting Adjust Date/Timer Set. Exit Date/Timer Set.
Preparations 3-16 5 Press the Enter key. 6 Press the S key or the T key to select the time zone that you are in. 7 Press the Enter key. The message display shows Completed and returns to the Date/Timer Set. screen. 8 Press the right select key. The message display returns to the basic screen. Auto Sleep: -05:00 Indiana -05:00 Bogota -05:00 Estn Time Cancel Date/Timer Set.
Preparations Setting the Date and Time Perform the following procedure to set the current date and time. You can also make this setting using COMMAND CENTER. For details on COMMAND CENTER, refer to Chapter 5 in Advanced Operation Guide, Date and Time. 1 Press the System Menu/Counter key. 2 Press the S key or the T key to select Date/Timer Set. 3 Press the Enter key. 4 Press the S key or the T key to select Year/Time. Sys. Menu/Count.: *System Setting Adjust Date/Timer Set. Exit Date/Timer Set.
Preparations 3-18 5 Press the Enter key. The Date Setting screen (year/month/date) is displayed. 6 Press the S key or the T key to register the current year. 7 Press the X key. 8 Press the S key or the T key to register the current month. 9 Press the X key.
Preparations 10 Press the S key or the T key to register the current date. 11 Press the Enter key. The time setting screen (hour:minute:second) is displayed. 12 Press the S key or the T key to register the current hour. 13 Press the X key. 14 Press the S key or the T key to register the current minute.
Preparations 3-20 15 Press the X key. 16 Press the S key or the T key to register the current second. 17 Press the Enter key. The message display shows Completed and returns to Date/Timer Set. screen. 18 Press the right select key. The message display returns to the basic screen. Time Setting: Hour Min Second c 50 11 : 45 : (Time Zone :Greenwich ) Cancel Date/Timer Set.
Preparations Summer Time Setting Perform the following procedure to turn the summer (daylight saving) time setting on and off. You can also make this setting using COMMAND CENTER. For details on COMMAND CENTER, refer to Chapter 5 in Advanced Operation Guide, Summer Time. Note This setting is valid only in the area where summer time is observed. 1 Press the System Menu/Counter key. 2 Press the S key or the T key to select Date/Timer Set. 3 Press the Enter key.
Preparations 5 Press the Enter key. 6 Press the S key or the T key to select either On or Off. Summer Time: * *Off On Cancel 3-22 7 Press the Enter key. The message display shows Completed and returns to the Date/Timer Set. screen. 8 Press the right select key. The message display returns to the basic screen. Date/Timer Set.
Preparations Default Operation Mode Use the following procedure to set the operation mode selected when the machine is powered on. Modes available are Copy Operation, Scanner Operation or Status Operation. It is recommended you select the most commonly used mode as the default. 1 Press the System Menu/Counter key. 2 Press the S key or the T key to select Common Setting. 3 Press the Enter key. 4 Press the S key or the T key to select Default Operat. 5 Press the Enter key. Sys. Menu/Count.
Preparations 3-24 6 Press the S key or the T key to select the default operation mode from among Copy, E-mail or Status. 7 Press the Enter key. The message display shows Completed and returns to Common Setting. 8 Press the right select key. The message display returns to the basic screen. Default Operat.: *Copy E-mail Status Cancel Common Setting: Language Default Operat.
Preparations Character Entry To enter e-mail address, etc., the characters are entered using Keypad. To move the cursor, use the W, S, T, and X keys. Keys Used for Entering Characters 1 2 3 4 Address Entry: h_pttr@ Cancel 5 ABC Text 6 7 11 9 8 12 13 10 1 Cursor — Characters are entered in the location of the cursor. To delete a character, move the cursor to the location of the corresponding character and then press the Stop/Clear key.
Preparations Available Characters The following characters are available for entering characters. Press the right select key to switch between types of characters. Type Available Characters Alphabetic/Symbol Text Æ ABC Refer to List of Character Assignments below. Numeric Text Æ 123 Symbol Text Æ Symbols Special characters, etc., can be entered from the Symbol List. ! ” # $ % & ’ ( ) * + , - .
Preparations Entering Characters This section explains the procedure to enter characters such as for e-mail address, etc. The example here uses the List of Character Assignments on page 3-26 to enter the e-mail address (h_pttr@owl-net.net). The displayed character will change each time a particular key is pressed, so you must press the X key or another key on the keypad in order to register each individual character. This operation is then repeated until all of the desired characters are entered.
Preparations 4 Press the j key. t is displayed. Address Entry: h_pt * Cancel 5 Press the X key. The cursor will move one space to the right. To repeatedly enter the same character, press the X key to move the cursor and then enter that character again. Address Entry: h_pt Cancel 6 Press the j key. t is displayed. Press the i key 3 times. r is displayed. Press the c key 2 times. @ is displayed.
Preparations 9 Enter the rest of the characters in the same way, and press the Enter key. Registered will appear and the message display returns to the basic screen. Address Entry: h_pttr@owl-net.net Cancel ABC Text Selecting Message Language You can select the language of the messages display by following the procedure given below. You can optionally download messages in other languages. Contact your dealer for information.
Preparations 3-30
4 Basic Operation This chapter contains explanations on the following procedures and modes. Refer to the Advanced Operation Guide for details on other functions. • Basic Copying Procedure • Canceling Copy • Zoom Copies • Collate Mode • Low Power Mode • Auto Sleep • Basic Scanning Procedure • Selecting Color Scan Mode • Basic Printing Procedure Basic Copying Procedure 1 Turn the power switch on ( | ). At the end of warm-up, the Start indicator will light.
Basic Operation Notes • For details on selecting the paper size and media type to be used in the cassette and MP tray, refer to Chapter 1 Advanced Operation Guide, Copying Functions. • You can change the default setting for which cassette will be automatically selected. For details, refer to Chapter 5 Advanced Operation Guide, System Settings. 4 Press the Original Quality key. The Original Quality screen is displayed. 5 Press the S key or the T key to select the desired mode and press the Enter key.
Basic Operation 7 Enter the number of copies required. Up to 999 can be entered. 8 Open the original cover and set the original face-down onto the platen. Be sure to align the original flush up against the left rear corner of the platen. 9 Press the Start key. Copying begins immediately once the Start key will light. To cancel copying, press the Stop/Clear key. See Canceling Copy on page 4-4. 10 Notes Finished copies are delivered to the output tray.
Basic Operation Canceling Copy Perform the following procedure to cancel copying. 1 Press the Stop/Clear key. The Pausing Job List screen, which shows a list of copying jobs being processed, will be displayed. 2 Press the S key or the T key to select the copying job to cancel. 3 Press the left select key. 4 The message display indicates Cancel Job. Are you sure?. Press the left select key. Pausing Job List: 0008 Copy-A 0009 Copy-B Doc-1 0010 Cancel Resume Cancel Job.
Basic Operation 7 Press the right select key. The Status Menu screen is displayed and processing of jobs are resumed. 8 To enable copying again, press the Copy key. The message display returns to the basic screen.
Basic Operation Zoom Copies It is possible to change the zoom ratio in order to make copies of an enlarged or reduced size. The following modes are available for selecting the desired zoom ratio. Mode Description Standard Zoom Copies can be made at one of the fixed zoom ratios.
Basic Operation 3 Press the S key or the T key to select Standard Zoom. 4 Press the Enter key. 5 Press the S key or the T key to select the desired zoom ratio. 6 Press the Enter key. The message display shows Completed and returns to the basic screen. The new zoom ratio is registered. Zoom: *100% Auto Standard Zoom Cancel Destination: *200% 141% A5 >> A4 129% STMT >> LTR Cancel To start copying, place the original on the platen and press the Start key.
Basic Operation 2 Press the left select key. 3 Press the S key or the T key to select Zoom Entry. 4 Press the Enter key. 5 Press the S key or the T key, as appropriate, to change the displayed zoom ratio to the desired ratio. Ready to copy. * Set : 1 A4 A4 100% Zoom Zoom: Auto Standard Zoom Zoom Entry Cancel Zoom Entry: * (50 ~ 200) 150 % Cancel 6 Press the Enter key. The message display shows Completed and returns to the basic screen. The new zoom ratio is registered.
Basic Operation Collate Mode Multiple originals can be collated in the desired number of copies. To use the collate mode turn the continuous scan function on. For details, refer to Chapter 1 Advanced Operation Guide, Continuous Copying. Original Notes • The maximum number of originals to scan depends on the available memory in the machine.
Basic Operation 4 Press the Enter key. 5 Press the S key or the T key to select On. Collate: * Off *On Cancel 6 Press the Enter key. The message display shows Completed and returns to the Function screen. 7 Press the right select key. 8 4-10 Use the numeric keys to enter the desired number of copies.
Basic Operation 9 Set the original. 10 Press the Start key. Scanning of the first original will start. A message will be displayed telling you to set the next original. 11 Replace the first original with the next one and press the Start key. Scanning will start. 12 Once all of the originals have been scanned, press the right select [End Scan] key. Copying starts. Scanned pages are printed. Set original and * press Start key. Job No.: 123 Page: 1 End Scan Cancel Set original and * press Start key.
Basic Operation Low Power Mode The machine has a Low Power Timer that is used to conserve power when the machine is not copying, scanning, printing, or receiving data. You can adjust the timer timeout time, the length of time (between 1 minute and 240 minutes) the machine waits before entering low power mode in the absence of data. The factory default time is 5 minutes.
Basic Operation Basic Scanning Procedure This section explains the basic procedures required when scanning documents. The following procedure explains the method for attaching scan data to e-mail for transmission. Notes • A network environment in which this machine can connect to a mail server is required in order to use the e-mail function. It is recommended that the machine be used in an environment wherein it can connect to the mail server at any time over a LAN (Local Area Network).
Basic Operation 4 Press the Enter key. 5 Enter the destination e-mail address. Refer to Character Entry on page 3-25 for information on entering characters. Address Entry: h_pttr@owl-net.net * Cancel 6 Once you have finished entering the information, press the Enter key. 7 To enter a subject and/or message, press the right select key. If you do not need subject and message, go directly to step 10 without pressing the right select key.
Basic Operation 9 Note Press the Enter key. The Registered screen is displayed, and the message display returns to the scanner basic screen. To use scanner advanced functions, such as original quality and scan resolution. Refer to Chapter 2 Advanced Operation Guide, Scanning Functions. 10 Set the original. 11 Press the Start key. Scanning will begin immediately once the Start key will light. The scanned image is sent to the entered destination e-mail address as an attachment.
Basic Operation Selecting Color Scan Mode The following color modes are available for scanning: Notes 4-16 Mode Description Full Color The original will be scanned in full color. The scanning exposure will be set to Manual. Grayscale The shading of the original will be reproduced. The scanning exposure will be set to Manual. Monochrome The original will be scanned in monochrome. The resulting file size for the scan data will be smaller in comparison with the other color modes.
Basic Operation Basic Printing Procedure Make sure that the machine’s printer cable and network cable and the power cord are properly connected. Installing the Printer Driver To use the printer function, the printer driver must be installed. For information on how to install the printer driver software, refer to the KX Printer Drivers Operation Guide. Printing from Application Software The following procedure explains how to print from Microsoft Word as an example.
Basic Operation 5 Click the Properties button to access the Properties dialog box. 6 From the Media tab, click the Page Size drop down list and select the page size that matches the document to print. The example below shows A4-size selected. For best results when printing on transparencies or recycled paper (the back side of paper which has already been printed on), click the Media Type drop down list and select the media type. For details, refer to the KX Printer Driver Operation Guide.
5 Optional Equipment Available Options The following optional equipment are available for use with your machine. Document Processor Expansion Memory Paper Feeder Document Processor The document processor automatically feeds and scans multiple sheet originals one by one. Important Be sure that the document processor is closed whenever transporting the machine.
Optional Equipment Acceptable Originals • Use sheet originals only • Paper weight: 50 to 120 g/m² • Paper sizes: 8 1/2 × 14"/Legal and Folio (Maximum), 5 1/2 × 8 1/2"/Statement and A5R (Minimum) • Maximum number which can be set at one time: 50 sheets (50 to 80 g/m²) Originals to Avoid Be sure not to use the following as originals in the document processor. • Originals with punched holes or perforations. • Transparencies.
Optional Equipment Important 2 Important • Before setting new originals, make sure that there are no other originals remaining on the original eject table. Originals left on the eject table can cause other originals to jam. • Be sure to fan through the originals a few times to separate the sheets before setting them in the document processor. Arrange the originals in order and set them face up on the original table.
Optional Equipment Placing a Book, etc. on the Platen When copying from an original which cannot be set in the document processor (books, magazines, etc.), lift open the document processor and set the original directly on the platen. Note Shadows may appear around the edges and up the middle of copies made from open-faced originals (such as books, etc.). Caution Do not leave the document processor open as there is a danger of personal injury.
Optional Equipment Installing DIMM Contact your dealer for information on purchasing DIMM that is best suited for use with this machine. Insert DIMM into the socket as follows: 1 Turn off the machine, disconnect the power cord and disconnect the machine cable. 2 Remove the screw from the rear of the machine and remove the side cover. 3 Remove DIMM, carefully pull end stoppers outwards, then pull DIMM out of the socket.
Optional Equipment 5-6
6 MaintenanceImportant Cleaning the Machine Caution For safety purposes, always remove the power cord from the outlet when performing cleaning. Lift open the original cover and wipe platen and original cover, as shown in the illustration, with a soft cloth dampened with alcohol or mild detergent. Important Never use thinner or other organic solvents to clean the original cover.
MaintenanceImportant Toner Container Replacement If Replace Toner appears on the message display, replace the toner container. In addition, perform the appropriate cleaning operation whenever you replace the toner container, see Cleaning the Charger and the Registration Roller on page 6-4. Replace Toner. Help Online Help Messages With the online help message function, this machine can display the procedure to replace the toner container on the message display.
MaintenanceImportant Important • Place the process unit on a clean, level surface. • The drum in the process unit is sensitive to light. Never expose the drum even to normal office lighting (500 lux) for more than five minutes. • Never stand the process unit on end. 4 Pull the lock lever towards you into its release position (marked UNLOCK), then pull the toner container release lever to the right as indicated by the arrow (Î) in the illustration. 5 Gently remove the old toner container.
MaintenanceImportant 7 Remove the orange protective seal. 8 Align the knob on the left side of the container with the groove in the process unit and set the toner container into the process unit. Push on the PUSH HERE marks on the toner container until the container clicks into place. 9 Push the lock lever back into its locked position (away from you). Cleaning the Charger and the Registration Roller Perform the following cleaning operation whenever you replace the toner container.
MaintenanceImportant Important After cleaning, make sure you restore the charger cleaner to its home position. If the charger cleaner is not restored to the CLEANER HOME POSITION, a black band will appear on subsequent copies. 2 Use the cleaning cloth that is supplied with the new toner kit to wipe off any paper dust and dirt that has accumulated on the metal registration roller (A) inside the machine. (B) (A) Important 3 While cleaning, be careful to avoid touching the black transfer roller (B).
MaintenanceImportant 6-6
7 Troubleshooting General Guidelines The table below provides basic solutions for problems you may encounter with the machine. We suggest you consult this table to troubleshoot the problems before calling for service. Symptom Check Item Corrective Action Reference Page Nothing lights on the Is the power plug connected to an operation panel when the AC outlet? power switch is turned on. Connect the plug to an AC outlet.
Troubleshooting Symptom Check Item Black or white vertical bands appear on the copies. Is the charger cleaner in its home Remove the process unit and return position (marked CLEANER HOME the charger cleaner to its home POSITION)? position. 6-4 If you are using the optional Clean the slit glass. document processor, is the slit glass It is also possible to use the Scan dirty? Noise Reduction function to make black lines on the copies less apparent.
Troubleshooting Maintenance and Error Messages When any of the following messages appears on the message display, perform the procedure provided below. Message Procedure Add paper to (paper source). The paper has run out. Supply paper according to the paper source that is Casset. 1 or Casset. 2 (with option paper feeder) and MP Tray. Reference Page 3-1 The cassette is not properly closed. Make sure the cassette is closed securely.
Troubleshooting Message Procedure Place original and press Start key. The machine will attempt to make copies from any originals that remain uncopied. Reference Page — Reset all of the originals on the original table and try to copy again. Print overrun The data transferred to the machine was too complex to print on a This page isn't complete. page. — To continue printing, press the right select key. To cancel printing, press the left select key. Remove originals in Document Processor.
Troubleshooting Message Procedure Send error. An error has occurred during e-mail transmission. The possible error codes and their descriptions are as follows. #### Reference Page 1101: The server name of the SMTP server is not set correctly. Use COMMAND CENTER and register the SMTP server name correctly. Refer to Chapter 6 in Advanced Operation Guide, Advanced Page. — 1105: The SMTP protocol setting is turned off. Use COMMAND CENTER and turn on the SMTP protocol setting.
Troubleshooting Paper Jam If a paper jam occurs, a message will be displayed about the jam and copying or printing will stop. Leave the power switch on ( | ) and refer to MP Tray and Inside Machine on page 7-7 to remove the jammed paper. * Paper JamJam at Paper Cassette1. Help JAM11 Jam Location Indicators 1 Original jam in the optional document processor. See page 7-10 2 Paper jam inside the machine See page 7-7 3 Paper jam in the MP tray. See page 7-7 4 Paper jam in the upper cassette.
Troubleshooting MP Tray and Inside Machine Note If there are any printouts on the output tray, remove them first before performing this procedure. 1 Open the top cover. 2 Open the front cover. 3 Take the process unit out of the machine. 4 If the leading edge of the jammed paper is visible, pull it out towards you. If the paper is not visible at all, perform the Cassette procedure.
Troubleshooting 6 Close the front cover. 7 Close the top cover. 1 Pull out the cassette that is currently being used. 2 Remove the jammed paper. Cassette Note 3 7-8 If a paper jam occurs in the optional paper feeder, the procedure to remove jammed paper is the same as with the included cassette. Push the cassette back in firmly.
Troubleshooting 4 Open and then close the top cover. The misfeed indications will disappear. 1 Open the rear cover. 2 Remove the jammed paper. Face-up Tray Caution The fixing unit is extremely hot. Take sufficient care when working in this area, as there is a danger of getting burned. 3 Close the rear cover.
Troubleshooting 4 Open and then close the top cover. The jam indications will disappear. Optional Document Processor 1 Remove all of the originals remaining on the original table. 2 Open the left cover to the document processor. 3 Remove the jammed original. If the original is caught in the rollers or difficult to remove at all, proceed to the next step. 4 7-10 Open the document processor.
Troubleshooting 5 Remove the jammed original. 6 Close the document processor. 7 Reset the originals.
Troubleshooting 7-12
Appendix Specifications Note Specifications are subject to change without notice. Main Body Item Specification Printing system Electro-photographic Originals Sheets of paper, books and 3-dimensional objects Copy sizes Cassette A4, A5, ISO B5, JIS B5, Folio, 16K, 8 1/2 × 14"/Legal, 8 1/2 × 11"/Letter, 7 1/4 × 10 1/2"/Executive, and 8 1/2 × 13"/Oficio II MP tray 3.15 to 8.50 inches × 5.83 to 14.02 inches 80 to 216 mm × 148 to 356 mm Print margin loss 0.5 to 5.
Appendix Copying Functions Item Specification Copying speed Platen (1:1) 8 1/2 × 11"/Letter/A4: 18 copies/min. A5: 10 copies/min. 8 1/2 × 14"/Legal: 10 copies/min. Document Processor (1:1) 18 copies/min. (8 1/2 × 11"/Letter/A4) First copy Approx. 10 sec.
Appendix Document Processor (Option) Item Specification Original feed system Automatic feeding Originals Sheets of paper Original sizes Maximum: 8 1/2 × 14"/Legal and Folio Minimum: 5 1/2 × 8 1/2"/Statement and A5R Original paper weight 50 to 120 g/m² Maximum number of originals 50 (50 to 80 g/m²) Dimensions (W) × (D) × (H) 17 15/16 × 13 1/16 × 3 11/16" 455 × 331 × 93 mm Weight Approx. 5 lbs. Approx. 2.
Appendix Appendix-4
Index Index A Application software ....................................................................................................... 4-17 C Canceling copy ............................................................................................................... 4-4 Cassette .................................................................................................................. 1-2, 3-1 Caution labels .....................................................................................
Index M Maintenance ................................................................................................................... 6-1 Maintenance messages ................................................................................................... 7-3 Message display ............................................................................................................. 2-6 MP tray .............................................................................................................
Index T Text mode ...................................................................................................................... 4-2 Text+Photo mode ............................................................................................................ 4-2 Time zone .................................................................................................................... 3-15 Toner container ..............................................................................................
Index Index-4
Memo
For best print results and machine performance, we recommend that you use only KYOCERA MITA original supplies for your KYOCERA MITA products.
©2004 is a trademark of Kyocera Corporation
Revision 1.1 2004.