
User Manual
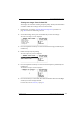


Table Of Contents
- Table of contents
- About this manual
- Introducing the Drystar 5500
- Basic operation (operator mode)
- Advanced operation (Key-operator mode)
- Overview of Key-operator functions
- Stopping the printing process
- Viewing printer information
- Changing the configuration settings
- Printing images
- Saving the configuration settings
- Restoring the configuration settings
- Performing the calibration procedures
- Installation
- Quality control for general radiography applications (DT 2 B & DT 2 C)
- Quality control for mammography application (DT 2 Mammo) (optional)
- Controlling the Drystar 5500 via a remote PC (with browser)
- System description
- Preventive maintenance and replacements
- Troubleshooting
- Equipment information sheet
- Drystar media density response data
- Quality Control Charts
- Remarks for HF-emission and immunity
- Remarks for HF-emission and immunity
- This device is intended for operation in the electromagnetic environment given below. The user of the device should ensure that it is used in such an environment.
- This device is intended for operation in the electromagnetic environment given below. The user of the device should ensure that it is used in such an environment.
- This device is intended for operation in the electromagnetic environment given below. The user of the device should ensure that it is used in such an environment.
- This device is intended for operation in an electromagnetic environment in which the radiated high frequency disturbance variabl...
- Remarks for HF-emission and immunity
- Index

104
2900H EN 20071108Advanced operation (Key-operator mode)
DRYSTAR 5500/5503 REFERENCE MANUAL
9 Press the Confirm key to confirm the number of copies.
The ‘Copying and Queuing file’ screen will be shown to indicate to the operator that
the (printing) action is accepted and in progress:
After about 20 seconds the following screen appears:
10 Remove the floppy disk from the drive and press the Confirm key to continue.
The print job is stored in the print queue.
Alternatively, you can print images directly from a connected Remote PC to the
printer. Refer to ‘Starting the remote session’ on page 173 .
<filename>