
User and Installation Guide

39
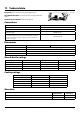
INSTALLATION
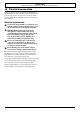
Check the appliance is electrically safe when you have nished.
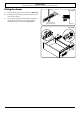
Side panel
Bottom panel
Fig. 13.1
Fig. 13.2
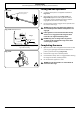
13. Removing the side panels
DISCONNECT THE ELECTRICAL SUPPLY.
You will need the following equipment to remove the side
panels:
• Cross-head screwdriver
• Flat head screwdriver
• Allen keys (provided in pack).
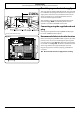
Removing the storage drawer
1. Pull the drawer out to its furthest point.
2. Push the ends of the plastic clips (Fig. 13.1 and Fig.
13.2) to release the catches holding the drawer to the
side runners. At the same time pull the drawer forward
and away from the side runners.
n
For safety make sure the drawer runners are out of
the way.
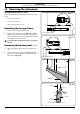
Removing the bottom panel (toe kick)
1. After removing the drawer open the left-hand oven
door.
2. Unscrew the two allen head screws (Fig. 13.3), lift the
bottom panel up and slightly rotate the panel away
from the pins (Fig. 13.4).
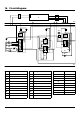
Bottom panel
Side view at the front base of the cooker
Lift
1
Rotate
2
Pin
Locating
washer
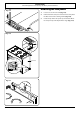
Side panel
Down on the left-hand side.
Up on the right-hand side
Fig. 13.3
Fig. 13.4
Toe kick
Toe kick