
Users Manual User Manual

38
New AB Pattern
Use the following procedure to create a new pattern. The following example explains how to create an
AB line.
Note: Pattern options other than SmartPath and Straight AB are explained in full detail on “About Guidance
Patterns” on page 44.
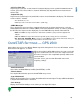
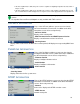
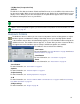
1. Press New Pattern
At the Guidance screen, press the New Pattern button.
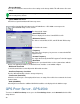
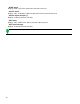
2. Select Pattern
The New Pattern Screen appears.
Select from the following available guidance patterns:
• SmartPath
For more information, see
“SmartPath” on page 40.
• Straight AB
• Pivot
For more information, see
“Pivot” on page 45.
• Adaptive Curve
For more information,
see
“Adaptive Curve” on page 46
and
“Adaptive Curve” on page 47
.
• Identical Curve
For more information, see
“Identical Curve” on page 46.
Note: If you would like to use an A+ Heading pattern option, check the Use A+ Heading check box and use
the number pad to enter in the heading (in degrees). For more information, see “A+ Pattern” on page 44.
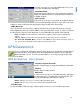
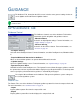
3. Change Guidance Width (optional)
In addition to these Guidance Options, a default Guidance Width is shown, based on the Implement Width
that you specified in Implement Configuration. If you wish to change this Guidance Width, enter the new
number using the numeric keypad. Press the green check mark box when finished.
Note: Guidance Width allows you to use guidance lines independent of implement width.
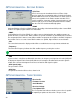
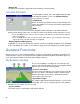
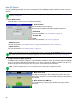
4. Mark the A Point
The Map Screen appears, with a point marker box in the center
marked A, as shown. Press the Set A button when you wish to mark
your A point.
5. Drive distance of AB Line
The place where you marked your A point now appears with a
green ball.