
User`s guide


BEFORE
YOU BEGIN
20
INTRODUCTION
IMPORTANT
PRECAUTIONS
ASSEMBLY
BEFORE
YOU BEGIN
ELLIPTICAL
OPERATION
LIMITED
WARRANTY
TROUBLESHOOTING
& MAINTENANCE
CONDITIONING
GUIDELINES
ASSEMBLY
ELLIPTICAL
OPERATION
BEFORE
YOU BEGIN
ASSEMBLY
21
INTRODUCTION
IMPORTANT
PRECAUTIONS
ELLIPTICAL
OPERATION
CONDITIONING
GUIDELINES
TROUBLESHOOTING
& MAINTENANCE
LIMITED
WARRANTY
ELLIPTICAL
OPERATION
ASSEMBLY
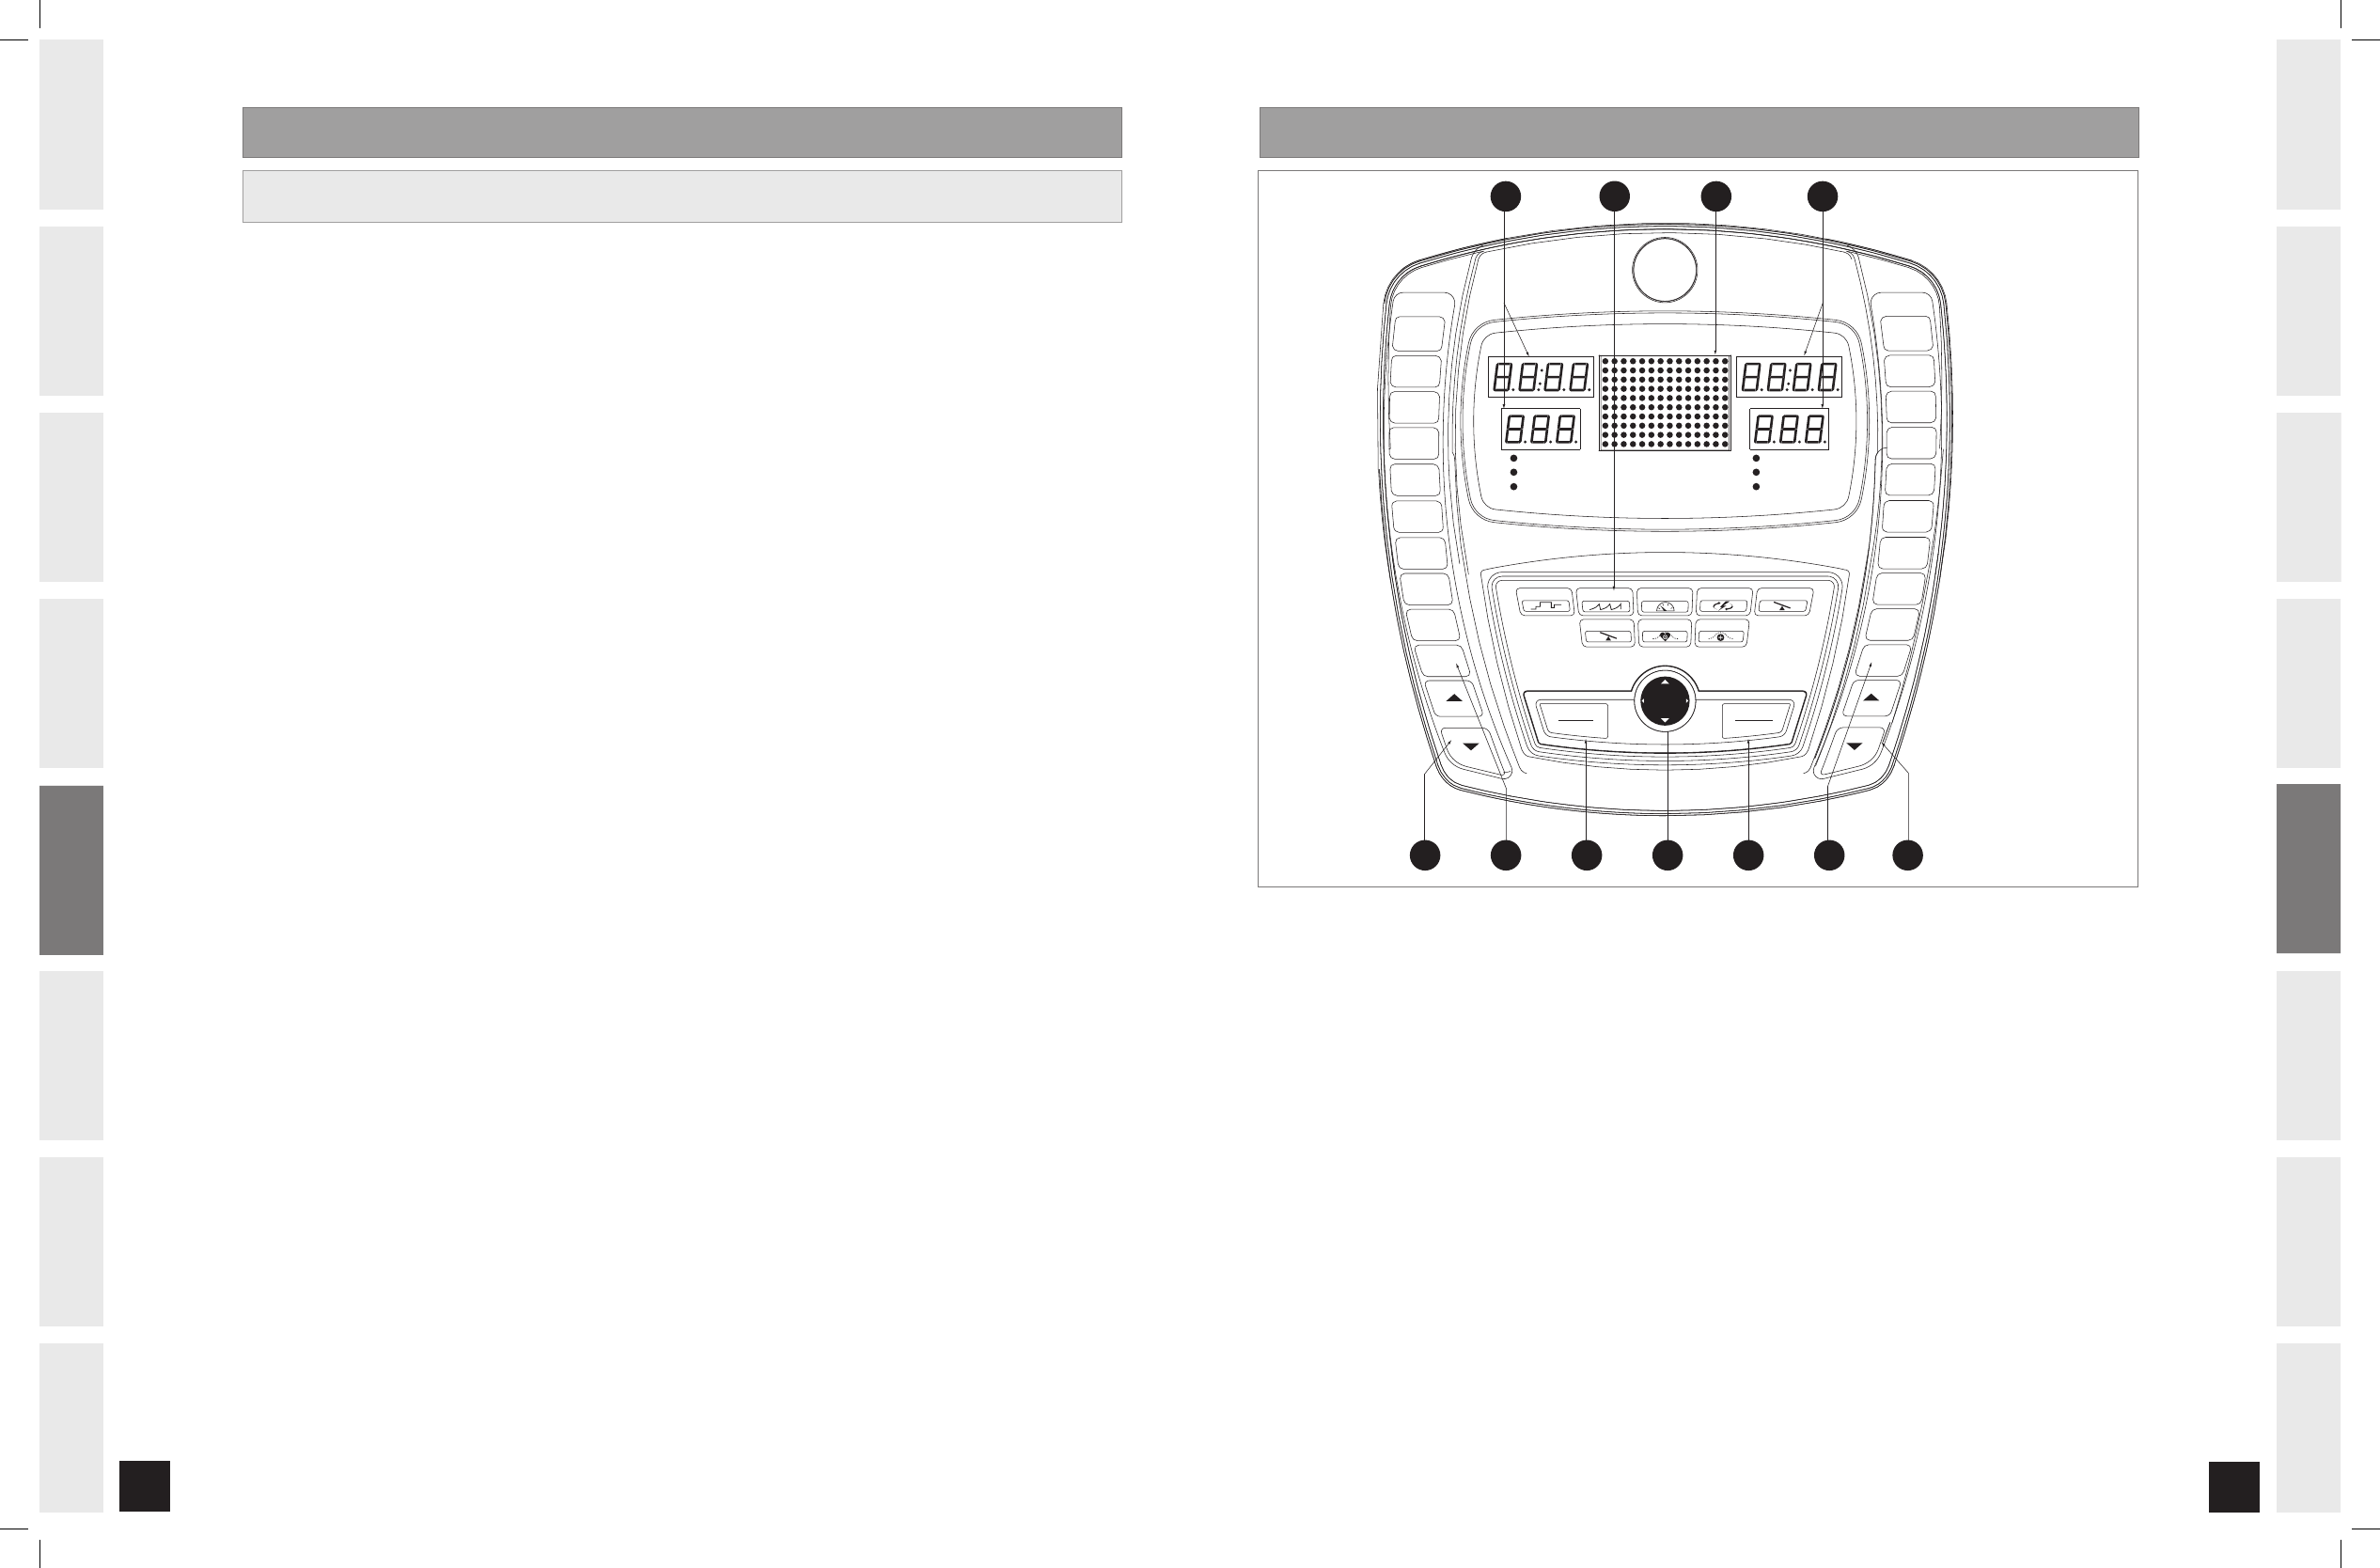
4.0AE CONSOLE DISPLAY
C H A N G E D I S P L AY
S T A R T
QUI CK S TA RT
S T O P
HOL D TO R ES ET
E NT ERB AC K
S P E E D
H E A RT RAT E
I N C L I N E
C A L O R I E S
L E V E L
WAT T S
T I M E
D I S TANCE
A AB
CD EFH
J
G I
I N C L I N E %
10
20
30
40
50
60
70
80
90
100
L E V E L
2
4
6
8
10
12
14
16
18
20
P6. INCLINE 2 P7. THR ZONE P8. CUSTOM
P4. CONSTANT WATTS
P5. INCLINE 1P3. WEIGHT LOSSP2. INTERVALSP1. MANUAL
A) MONITOR DISPLAY: Speed, Time, Heart Rate, Distance, Calories, Incline, Watts and Resistance Level.
B) LARGE LED WINDOW: Display program profiles.
C) STOP: Press to pause/end your workout. Hold for 3 seconds to reset the elliptical.
D) START: Press to begin exercising, start your program, or resume exercising after a pause.
E) PROGRAMMING BUTTON: Used to select Program, Level, Time, and other options. Press to change display
feedback during workout.
During programming:
ARROWS: Scrolls through programs and adjusts program settings.
ENTER: Confirms setting and advances to next step.
BACK: Returns to previous step.
F) ONE-TOUCH INCLINE KEYS: Used to reach desired incline more quickly.
G) ONE-TOUCH LEVEL KEYS: Used to reach desired resistance more quickly.
H) INCLINE ARROW KEYS: Used to adjust incline in small increments.
I) LEVEL ARROW KEYS: Used to adjust resistance level in small increments.
J) QUICK PROGRAM KEYS: Used to select programs more directly.
SCAN VIEWING WINDOWS
To have the display windows rotate continuously (Speed, Heart Rate, Incline, Calories, Level and Watts), hold
the ENTER button for 4-5 seconds. Press ENTER again to turn off scan feature.
SELECTING THR ZONE PROGRAM
3.0AE CONSOLE OPERATION
1) Select THR ZONE using the PROGRAM QUICK KEY and press ENTER.
2) Set TIME using the ARROW KEYS on the programming button and press ENTER.
• At this time, your program has been successfully saved into memory and can be used for future workouts.
3) Set desired HEART RATE using the ARROW KEYS on the programming button and press ENTER.
4) Press START to begin the program.
In this program, the large LED dot matrix window displays your heart rate during exercise. The middle row
represents your target heart rate (THR) and the other rows equal +/-2 heart beats. If you are working out
beneath your THR, the LEDs BELOW the middle row will illuminate. If you are over, the LEDs ABOVE the middle
row will illuminate. Your current heart rate is represented by the flashing column and the window will refresh
every 5 seconds.
NOTES:
1) There is a 4-minute warm-up built into this program at level 1 resistance.
2) After 4 minutes the resistance will automatically adjust to bring your heart rate within 5 beats of the
target number you selected at the beginning of the program.
3) If there is no Heart Rate detected, the unit will not change resistance levels up or down.
4) If your Heart Rate is 25 beats over your Target Zone the program will shut down.
5) To RESET your program information and delete it from memory, press and hold the ENTER key for 5
seconds (after you have selected the THR ZONE program).
3.0_4.0 AE_Rev.1.6.indd 20-21 8/27/07 3:36:47 PM