
User manual


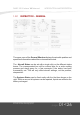

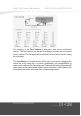
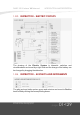
Table Of Contents
- 1: Cover
- 2: Cover Back
- 3: Introduction
- 4: Development Team
- 5: Installation
- 6: Configuration
- 7: Menus
- 8: Operation Mode
- 9: Initiation Mode
- 10: Controls
- 11: Effects Lighting and Sounds
- 12: Effects Vibrations
- 13: Preflight
- 14: Ground Equipment
- 15: Walkaround Check
- 16: Trimtabs
- 17: Oil Liquids
- 18: Payload
- 19: Maintenance
- 20: Equipment
- 21: Workshop
- 22: Service
- 23: Instructor
- 24: Instructor General
- 25: Engine and Liquids
- 26: Fuel System
- 27: Electrical System
- 28: Handling
- 29: Handling Concepts
- 30: Handling Concepts

DA20-100 ‘Katana’ 4X Manual
1.7.4
MAINTENANCE - WORKSHOP
Neither the software nor the documentation may
be used for real aviation and training purposes.
01<23
page
The Workshop is the place for all repairs and replacements of different
systems and devices. It is advisable to visit this place from time to time if you
are operating in Realistic Mode.
The first button can be used to start an inspection of all systems
listed in the workshop window. The icon will start to move and the
progress bar will indicate the status of the inspection. As soon as the
bar is completed the icon will freeze and different systems may be
marked with a yellow or red square.
Yellow markings indicate that the corresponding system is not in the
best condition and should be maintained sooner or later.
Red markings indicate that the corresponding system is in bad
condition and immediate maintenance is necessary.
Markings will disapear as soon as there is an maintenance action
started. So this does not mean, that the system is back in good
condition. Another inspection can be done to be sure.
The Tool Button is used to start the maintenance of a system. That
is indicated my the moving icon and can be observed by the progress
on the bar. There can only be one action at a time. The progress bar
does not represent the status of the system nor is the system in
perfect condition if the progress has been completed. It is just an
indicator for working on the system. You can stop the action by
clicking on the button again. The system is now at least in some
better condition than before.
The Replacement Button is used to start the replacement of the
corresponding system. The progress is indicated by the movement
of the icon and the progress bar. In contrast to the maintenance
action, the replacement has to be completed. Otherwise the system
has not been exchanged. Replaced systems are always in perfect
condition, new batteries are charged etc.
INTRODUCTION AND DESCRIPTION