
Step by Step Guide

A318/319/320/321
Profesional
Step-By-Step Tutorial
Vol
6
06-01- 109
11. Dezember 2018
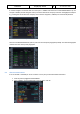
10.1 Adjusting views:
If you want to adjust one of the various available views first open it e. g. it becomes the active window. Then the
following key combinations are available:
• CTRL + Return - Forward
• CTRL + Backspace - Backwards
• CTRL + SHIFT + Return - Left
• CTRL + SHIFT + Backspace - Righ
• SHIFT + Return - Higher
• SHIFT + Backspace - Lower
• SPACE BAR + Mouse wheel - Zoom in or out
• SPACE BAR + Mouse - Changing the view angle
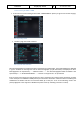
10.2 Keeping / saving adjusted views
After you adjusted the views (using the aforementioned key combinations) during the whole flight e. g. until you
close the P3D respectively change to another aircraft, those adjustments will be kept.
10.3 Working with real Flight Plans:
On the Internet there are several pages where “real” flight plans (like the one we used in this tutorial) are
available. Two of the addresses are
• http://vatroute.net or at
• http://rfinder.asalink.net/free/
On those pages you will find a lot of plans but you should know the airport codes (like in our example EDDF for
Frankfurt or LOWW for Vienna). But those codes can be found also using the Microsoft FS Flight Planner. Those
plans like in our example can be used for all Aerosoft A318/319/320/321 types.
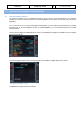
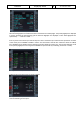
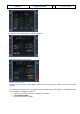
10.4 „Capturing“ the ILS-Glide Path:
Sometimes the chosen flight path reaches the last waypoint before capturing the ILS glide path (13OEZ) in a way
that the angle would be too big to capture it. The ideal angle should not be greater than 45 degrees and in such
cases you then should fly a manually set course (see yellow dotted line) to catch the glide path the right way.
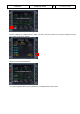
In the following example – Angle „capturing“ a glide path - (before we reach WW671) please press LOC so that
the lateral glide path will be caught. After catching the lateral glide and the vertical glide path starts moving (please
see Error! Reference source not found.) press APPR (to also catch the vertical glide path) and prepare for a smooth
landing.
Angle „capturing“ a glide path
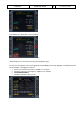
10.5 Transfer this document to the iPad
If you do not want to print out this document (and have an iPad in your possession), another way to have it always
available during the flight is: Transfer it to your iPad. The easiest way to do this is:
• Download the ACROBAT Reader for the iPad from the Apple Store (it is for free) and install it on your iPad.
An ACROBAT icon will be created on your iPad.
• Connect / synchronize your iPad with the PC using iTunes.
• In iTunes select the iPad and change to the APPS page.
10. Tips and Tricks: