
User's Manual

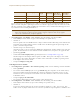
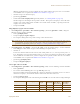
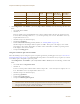
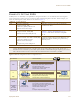
Table Of Contents

Deployment Guide 111
EXAMPLE 3: PROVIDING GUEST ACCESS
Loading Customized Captive Web Portal Files
To load your edited or new files onto one or more HiveAPs, you first create a directory on HiveManager and then
upload the files from your management system or SCP (Secure Copy) server into that directory. From there, you can
send the files to one or more managed HiveAPs when you push the configuration that references the files.
To create a directory on HiveManager and upload files into it, do the following:
1. In the HiveManager GUI, click Configuration > HiveAP File Management.
2. In the HiveAP File Management window, select Captive Portal Page for file type.
Two display areas (Available Directories and Available CWP Files) and a new field (Directory Name) appear.
3. In the Directory Name field, type a name such as guestCWP, and then click Create.
A directory named "guestCWP" appears in the Available Directories list.
4. Depending on how you upload the files, select
guestCWP
, enter one of the following, and then click
Upload
:
To load files from a directory on your local management system:
•Local File: (select); type the directory path and a file name; or click Browse, navigate to one of the files,
and select it.
or
To load a file from an SCP server:
•SCP Server: (select)
• IP Address: Enter the IP address of the SCP server.
• SCP Port: Enter the port number of the SCP server (the default port number for SCP is 22).
• File Path: Enter the directory path and file name. If the files are in the root directory of the SCP server, you
can simply enter the file name.
• User Name: Type a user name with which HiveManager can access the SCP server.
• Password: Type a password with which HiveManager can use to log in securely to the SCP server.
5. Repeat either the Local or SCP method of uploading each file you need into the guestCWP directory.
Note: After you load a file, it appears in the Available CWP Files display area. If you accidentally load the
wrong file, select the file name and then click Remove.