
Use and Care Manual


2
02-999-1773 – (Rev - )
INTRODUCTION
Your evaporative air cooler was thoroughly tested and inspected
before leaving the factory. This is your guide to economical, trouble
free comfort cooling over the years with reasonable care and regular
maintenance. Failure to follow these instructions may damage your
cooler, impair its operation and/or void the warranty.
Read it carefully.
PREPARATION FOR ASSEMBLY
Unpacking the unit
Remove the pad frames by slightly lifting the pad frame from the
bottom, pull outwards until clear of cabinet bottom pan, then
downwards until frame clears cabinet top. Remove the following
items from the cooler:
1. Box containing swivel casters and attachment hardware.
2. Plastic bag containing small parts, float valve, garden hose
adapter, hose nut, hose washer, o-ring.
3. Bag with hose adapter for float valve (roll-around use)
Gather tools required to assemble & install unit
The following tools are required to assemble the unit:
7/16” box or open end wrench 6” crescent wrench
3/8” box or open end wrench 1/4” nut driver
SETUP FOR ROLL-AROUND USE
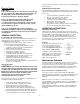
1. Open parts box & remove casters from parts bag. Assemble
each caster (Fig.1) per caster plate using supplied 1/4-20 nuts &
carriage bolts.
2. Place casters w/ brakes on the front of the unit, and the casters
without the brakes should be mounted on the back of the cooler. Use
4 of the 1/4-20 bolts from the parts bag to secure all 4 of the casters
to their respective caster plates. Apply brakes before lifting cooler
upright to complete
assembly.
Figure 1
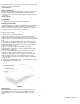
Install drain bushing and standpipe
Install overflow drain bushing in bottom
of cooler. Slide rubber washer over drain
bushing, push drain bushing through
bottom of cooler, and tighten nut. Screw
plastic overflow standpipe into the drain
bushing and tighten snugly (hand-tight)
to prevent leakage. Where conditions
allow for drainage, connect a drain line
(garden hose) to drain bushing and drain
Figure 2
Install float valve and hose adapter
Attach the float valve to the cabinet as shown in The garden
hose adapter attaches to the brass inlet fitting on the float valve
(see). NOTE: verify that the hose washers are correctly in place.
Water connection and float adjustment
Move cooler to desired location (this should be a level area for
proper operation of the cooler).
1. Locate a knock-out in the bottom of any of the four corner posts.
2. Connect to water supply using a commercial grade of water
hose(not supplied with cooler, obtained separately) to the adapter on
the float valve and turn water on. CAUTION: water inlet pressure
should be limited to a maximum of 65 PSI to avoid rupturing the
water hose. If pressure exceeds this value, an inline pressure
regulator should be installed (obtainable from a local plumbing or
hardware store).
3. Check that all connections are tight by visually inspecting hose,
float valve, etc. for leakage.
4. Set float valve for a water depth of 2.5”. The float is adjusted by
lightly bending the float rod.
Figure 3
Cooler checkout and first time start-up
Congratulations, once you re-install the pad frames, your roll-around
Master Blaster cooler will be complete and ready for use. Please
proceed to the Pre-startup inspection checklist on page 3 before
starting unit for the first time.
Motor and blower wheel check
Check motor mounting to be sure all screws and nuts are tightened
down properly. Rotate blower wheel by hand to see that it moves
freely without rubbing against housing.
Figure 4