
User`s manual

Aegis Wireless Web Tablet
7
a) Display Quality/Properties set up (optional)
i) Click on Display icon. The Display Properties window will appear. You can use choose to
configure parameters associated with configuration of the display Background, Appearance
and Backlight.
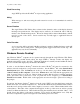
ii) Click on Brightness icon to adjust the brightness of the display.
b) Stylus Setup and Calibration (optional)
i) Double-click Stylus; the Stylus Properties window will appear.
ii) You can test Double-Tap function; you have to follow the instructions to double click the
two squares right of the Window. If it is correct, then click on OK at the top of the window
for confirmation.
iii) If you want to recalibrate or if your device is not responding properly to your stylus taps,
select Calibration and follow the prompts to recalibrate. When you are done, click on OK
to continue.
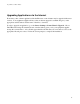
c) Network Configuration (optional)
This feature should only be used if you do not have success configuring the 802.11b connection
through the icon on the task bar. Double-click on Network and Dialup Connections icon.
The displayed window will guide the configuration or provide information largely identical to
accessing the Network icon displayed in the Taskbar when a supported network adapter is
inserted and detected into the Aegis Wireless Web Tablet.
In general, for an “Adapter” selected, click on Properties.
iv) You have two options: Obtain an IP address via DHCP or Specify an IP address.
v) When you select Obtain an IP address via DHCP, you are expecting that an IP address
can be automatically assigned to this device.
vi) When you select Specify an IP address; you have to ask your network administrator for an
address and type it in the space provided (IP Address, Subnet Mask, and Default Gateway).
In addition to that you have to specify additional WINS or DNS in Name Servers, then
click on “OK” at the top of the window for confirmation.
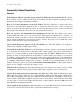
c) System Properties Set Up (optional)
Click on System; the System Properties window will appear.
i) Click on General, the System information will be displayed. Then click on OK at the top
of the window for confirmation.
ii) Click on Memory, you can adjust the allocation of unused RAM to run programs or for
storage (by moving the arrow to right or left). After changes, click on OK at the top of the
window for confirmation.
iii) Click on Device Name, you can provide a unique name to the device as identification for
network resource access such as file sharing, etc.
iv) For additional applications, Compact Flash memory may be obtained at most computer
stores and installed in the upper right slot in the web tablet.