Model AEG-WR Wireless Receiver Installation Manual Downloaded from - http://www.guardianalarms.
CONTENTS DESCRIPTION 3 COMPATIBLE TRANSMITTERS 3 INSTALLATION 4 OPERATION 5 RESET MEMORY 9 AEGIS SET UP 9 CONTROLLER INDICATIONS 10 FCC NOTICE 11 2
DESCRIPTION The Model AEG-WR Supervised Wireless Receiver allows up to 64 unique wireless security transmitters to report information to an Aegis automation controller. The wireless transmitters replace wired door and window sensors, as well as wired smoke, motion, and glassbreak detectors. These transmitters report status information to the AEG-WR Receiver which, in turn, processes the information and reports it to the controller.
up to four transmitters assigned to it depending on the number of addresses assigned to the receiver. The 64 transmitters are divided into 4 groups of 16, with the transmitters in each group numbered 1-16. One or more groups respond to each address assigned to the receiver. When multiple groups respond to the same address, the corresponding transmitters in each group are combined to determine the status to be reported for a zone.
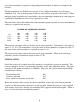
Place the cover on the receiver and install the antenna onto the antenna connector. Connect the receiver to the controller using 4 conductor 22 gauge or larger wire as follows: OPERATION The two operating modes of the receiver are "Run" and "Set Up". In Run mode, with the receiver connected to the controller, the Mode LED should blink once per second. The receiver monitors the status of each transmitter.
(not ready) or that have trouble. The transmitter number flashes on the display followed by the status condition(s). LED DISPLAY 1.10 A L C O S F L O INFORMATION ABOUT THE LED DISPLAY Displays the number of the transmitter with a change in condition. Displays that the current transmitter is "NOT READY". Displays that the cover was removed from the current transmitter. Displays that the current transmitter has a supervision failure. Displays that the current transmitter has reported a battery low.
The Set Up mode is used to configure the general operation of the receiver, to program a transmitter into the receiver, and to change the characteristics of a programmed transmitter. The Mode LED does not blink in Set Up mode. To enter the Set Up mode, press and hold the Mode/Advance switch for approximately two seconds. You are first prompted to enter a four digit code. "C" is shown on the left of the display and the digit for each code number is shown on the right of the display.
The next four items allow you to change each digit of your security code. The Set switch is used to increment the value of each digit. The Mode/Advance switch is used to enter each digit and advance to the next. Next, the programmed characteristics of each transmitter is displayed. The transmitter number is shown in the LED Display. If no transmitter is programmed for an address, neither the Mode LED nor the Type LED will be lit.
Once a transmitter is programmed into an address, the transmitter address will briefly turn off whenever a transmission from that transmitter is received. This can be used to verify that the correct transmitter has been programmed and is operating reliably. NOTE: The current status of each transmitter is ignored by the controller while the receiver is in Set Up mode.
If Expansion Enclosures are also being used, set "NUMBER OF EXP ENCL:" to the number of expansion enclosures plus the number of addresses used by the receiver. Set the addresses for the expansion enclosures and receiver so that they don't overlap. After the receiver has been enabled, you can press the down arrow (ò) key to set the zone types for each of the expanded zones.
FCC NOTICE This device complies with FCC Rules Part 15. Operation is subject to the following two conditions: (1) This device may not cause harmful interference, and (2) This device must accept any interference received, including interference that may cause undesired operation. Verified to comply with the limits of a Class B digital device pursuant to Part 15 of the FCC Rules.
QUICK-REFERENCE SETUP GUIDE To Enter Set Up mode, press and hold the Mode/Advance switch for 2 seconds. DISPLAY C 0 C 0. C.0 C.0. A 1 n 1 C 1 C 1. C.1 C.1.