AdventistSat Installation Guide GEOSATpro DVR1000ci Digital Video Recorder System Reception of Satellite AMC4 45+ Hours Record Capacity Dish Aiming Information for Zip Code ____________ . Compass Azimuth _______._______° LNBF Rotation _______.
Important Installation Notice: The Federal Communications Commission (FCC) has ruled that local government zoning or homeowner’s associations may not prevent the installation of satellite antennas one meter (39”) or smaller in diameter, unless legitimate safety restrictions such as fire codes are in effect. For more information: www.fcc.gov/cgb/satellite.
Table of Contents Advent V.
©2006 Adventistsat.
The receiver has a serial number located on the rear panel. Record the model and serial numbers and retain for your records. Model Name or Number _____________________________ Serial number _____________________________________ AdventistSat requires that you carefully read through these pages before beginning the installation.
AdventistSat System Parts Reflector (1) LNBF ARM (1) Installation Kit (1) Post (1) Satellite DVR Receiver (1) Tripod Support Leg (2) Dish Accessory Kit (1) LNBF (1) Tools Required Phillips Screwdriver 10, 11mm Socket Drill and Bits Measuring Tape Hammer ©2006 Adventistsat.
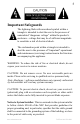
Important Safeguards The lightning flash with arrowhead symbol within a triangle is intended to alert the user to the presence of uninsulated “dangerous voltage” within the product’s enclosure—voltage that may be of sufficient magnitude to constitute a risk of electrical shock. The exclamation point within a triangle is intended to alert the user to the presence of *important* operational and maintenance (servicing) instructions in the literature accompanying the appliance.
Example of Antenna Grounding NEC, ANSI/NFPA 70 CAUTION: Read all of these Instructions. Save these Instructions for later use. Follow all Warnings and Instructions marked on the equipment. Read Instructions All the safety and operating instructions should be read before the product is operated. Retain Instructions The safety and operating instructions should be retained for future reference. Heed Warnings All warnings on the product and in the operating instructions should be adhered to.
Accessories Do not place this product on an unstable cart, stand, tripod, bracket, or table. The product may fall, causing serious injury to a child or adult, and serious damage to the product. Use only with a suitable cart, stand, tripod, bracket, or table. Any mounting of the product should follow the manufacturer’s instructions, and should use a mounting accessory recommended by the manufacturer. A product and cart combination should be moved with care.
Outdoor Antenna Grounding When an outside antenna or cable system is connected to the product, be sure the antenna or cable system is grounded so as to provide some protection against voltage surges and built-up static charges.
Servicing Do not attempt to service this product yourself as opening or removing covers may expose you to dangerous voltage or other hazards. Refer all servicing to qualified service personnel. Modification to the hardware or software without authorization by AdventistSat the will result in voiding any warranty. Service assistance may be arranged by contacting AdventistSat technical support at 866-552-6882.
10 Site Survey If you feel comfortable with drilling holes in the walls and/or roof of your home, climbing ladders, attaching wires to the utility ground according to NEC and local codes and following step-by-step instructions, you might consider installing your own system. The satellite is located over 23,000 miles away and the installation does require precise tuning and a great deal of patience to correctly install.
11 Where Is The Satellite? Generally the dish will point towards the South, Southeast or Southwest. The satellite is located south of Texas and Mexico directly over the equator. That means if you live in Miami, you must have a clear line of sight to the Southwest; if you live in San Francisco, you must have a clear line to the Southeast. Compass Azimuth Reading: _______________ www.adventistsat.
12 How High Up in the Sky is the Satellite? Depending on where you live, the satellite will be at an elevation angle between 30 and 60 degrees. Southern US point more toward 60 degrees; northern US point more toward 30 degrees.
13 Dish Mounting Options We recommend ground mounting the dish on a 1 5/8” heavy wall galvanized post set in cement. Attach a bolt or muffler clamp to the bottom of the post to prevent the post from twisting in the hardened cement. These items are readily available at any hardware store. Filling the post with a wet cement mixture will provide greater rigidity. The post must be perfectly plumb, level on all sides. Posts standing higher than 7 feet should be stabilized to prevent movement during high winds.
14 Dish Assembly Once a suitable dish mounting location has been chosen it is time to set up the dish. Use the large cardboard shipping box as a working surface to prevent damage to the dish components during assembly. We recommend assembling the dish first and then installing on the post mount. Important Note: An assembled dish will not be accepted for refund. Dish Reflector Accuracy Before assembling the dish it is extremely important to verify that the reflector was not warped during shipping.
15 If the reflector edges are not laying perfectly flat, pick up the dish by the edges like a steering wheel and quickly thrust the reflector away from your body while holding the edges of the dish. This action will cause the reflector to flex and it will spring back into the factory pressed shape. Lay the reflector face down and observe if the edges are now laying perfectly flat. If not, repeat the flexing process until the reflector edges are uniform and laying perfectly flat against the surface.
16 Attach the LNBF Arm to the Elevation Bracket. Assemble the Elevation Bracket and Post Clamp. Most installations in the US and Canada will use Elevation Scale A type assembly. Mexico installations will usually use Elevation Scale B assembly. US and Canada Mexico The Post Clamp has two holes drilled. One hole is stamped with an A and the other with a B.
17 Assemble the LNBF Clamp and attach the LNBF clamp to the LNBF arm. LNBF Rotation Angle: _______________ Install the GEOSATpro Mini Bullet LNBF into the LNBF Clamp. Slide the LNBF as far away from the reflector as possible so the tabs on the LNBF plastic housing touch the LNBF clamp. Rotate the LNBF in the circular clamp until the centering line on the top of the LNBF aligns with the LNBF Rotation specified in the aiming coordinates.
18 Optional: Universal Post Mount the Universal Post Mount Foot Plate to a wall stud or roof rafter using two 5/16th x 3” lag bolts. Adding 5/16th x 2” lag bolts on the outer edges will increase stability. To prevent water leakage, use the included silicone sealant or other waterproofing product on all wall or roof penetrations. The Universal Post Mount can be assembled for roof or wall type installations. The post has slots for attaching to the Foot Plate on both ends of the tube.
19 If the post is not exactly plumb, the elevation scale will not be accurate and it will be very difficult to locate the satellites and properly tune the dish for reliable reception. Not Level Level The most critical step to providing a stable mounting platform for the dish is the installation of the Tripod Support Legs.
20 Dish Aiming Elevation Angle Place the assembled dish onto the post. Set the Dish Elevation to the angle provided on the cover of this manual. The pointer for the elevation indicator is a white line that is visible through the elevation scale and is located near the edge of the elevation fastening nut. Semi-tighten the elevation fastening nuts to hold the dish in position. Do not tighten the fasteners for final setting at this time.
21 Compass Reading: Azimuth In North America, the satellites are always located South of your location. To correctly aim the dish you must first accurately determine the exact compass reading angle (azimuth). Metals, electricity and other magnetic disturbances can cause the compass to point incorrectly.
22 Connect Receiver and TV The easiest way to aim the satellite dish is to temporarily place the satellite receiver connected to a small television at the dish antenna mounting location. Caution: DO NOT ATTEMPT TO OPERATE ELECTRONIC DEVICES IN AN UNSAFE LOCATION OR IN VIOLATION of SAFEGUARDS PROVIDED IN THIS MANUAL OR ANY OTHER EQUIPMENT MANUAL PROVIDED WITH THIS AdventistSat SATELLITE SYSTEM. Remove the satellite receiver and remote control from the packaging. Inspect the unit before operation.
23 Locate and Peak Signals Power the receiver into the Operate mode by pressing the Power button on the remote control. Press the Menu button. Press the CH/DOWN arrow to select Installation. Press OK. Enter password 0000 with the remote numeric keypad. Press the CH/DOWN arrow to select Antenna Setup. Select satellite AMC4 KU by pressing the VOL/LEFT or VOL/RIGHT arrow. Press the CH/DOWN arrow to select the 2nd line, frequency. Select 11822 by pressing VOL/LEFT or VOL/RIGHT.
24 This screen shot shows a receiver and LNBF that are properly connected, but the dish is not aimed at the proper satellite. This screen shot shows a receiver and LNBF that are properly connected and the dish is aimed at the proper satellite. While you or an assistant observes the Signal Quality reading meter, slowly make a small left or right movement of the dish. If necessary, sweep the other direction until an indicator bar appears at any signal quality of 20% or better.
25 When the dish is aimed correctly programming will display and the Signal Quality will display a 90% or better quality level. This screen shots show a Quality Reading of a dish that is correctly aimed at AMC4, 11822. Once the correct satellite is located, make small adjustments in elevation and azimuth until maximum signal is indicated on the quality bar. Quality readings should be as high as possible to insure optimum picture and sound on the receiver. The higher the quality, the better the reception.
26 To verify that the dish is accurately aligned for reception of all Adventist channels, press the CH/UP arrow to surf through all of the preprogrammed TV and Radio channels and verify that the Signal Quality is 70% or better on all channels. If the Signal Quality is below 70% on any of the channels, place the receiver on the channel with the lowest quality reading and make very small movements to the dish elevation and/or the dish panning side-to-side (azimuth) and /or LNBF rotation to peak the quality.
27 Completing the Installation Carefully route the coax cable from the dish to the ground block then to the satellite receiver. Secure all cables using appropriate cable clips and nylon zip ties. Avoid using wire staples as they can dimple or penetrate the cable and can cause loss of signal! Form drip loops and cable loops as needed to prevent water from running down the cables and entering cable connection fittings or into wall penetrations.
28 Basic Operation Turn the satellite receiver ON/OFF using the POWER button. Change channels by either entering the channel on the numeric keypad or by pressing CH/UP or CH/DOWN buttons. The volume is adjusted by pressing the VOL/UP or VOL/DOWN buttons. This does not affect the audio level during a recording to the hard drive. Note: Volume is also controlled by the TV. AdventistSat suggests that the satellite receiver volume be set at mid-level and use the TV to adjust the sound level.
FAQ – Frequently Asked Questions 29 Remote doesn’t work but receiver front panel buttons may turn on/off and change channels. Check batteries, remote needs a clear line of sight to the receiver. Reset Master Power switch on rear of the receiver. No lights on receiver. Check power plug make sure that it is plugged into a working electrical outlet. Reset Master Power switch. Receiver displays 50%+ Signal Level, 10% Quality on all channels.
30 Satellite receiver displays “No Signal” only during very hot or cold weather. LNBF is aging or is affected by temperature extremes. Replace the LNBF. Most of the channels have strong Signal Quality, but LLBN signal quality is poor or the receiver displays “No Signal”. LLBN has a weaker signal than the other Adventist channels and may display a low signal quality or no signal. Installations often need to be fine tuned to receive this weaker station.
31 Connection Examples Audio / Video RCA Component Video / Audio RCA S-Video / Audio RCA Cable, DirecTV, Dish or Antenna VCR or DVD Recorder Please consult the owners manual provided with TV, VCR or other device that will be connected to the AdventistSat satellite receiver. The manual will include important connection and operational information. Please contact AdventistSat technical support for assistance in connecting the receiver to a television.
32 Accessories * prices in US Dollar AdventistSat carries a large selection of satellite accessories and replacement items. Please call 866-552-6882 or www.adventistsat. com for additional items or to place an order. Glorystar Satellite System Over 32 Christian Channels $199 + Shipping Satellite Receiver with PVR 45+ Hour Record time.
33 One Year Limited Warranty AdventistSat Systems are guaranteed to be free of defects in materials and workmanship under normal use for a period of 24 months from the date of Sales Invoice by the original purchaser. Annual warranty extension and telephone technical support is available for a $19.95 fee.
34 Quick Guide for Professional Installers This section is an overview of the installation information contained in this booklet designed for the experienced professional installer. AdventistSat equipment is preprogrammed to receive Adventist Television and Radio Services on satellite AMC4. No activation is necessary. Before assembling the satellite dish, lay the reflector on a flat surface. Verify that the reflector has not been warped in shipping.
35 When using a Lacuna, SatHawk, BirDog or SatBuddy digital satellite location and identification meter, connect the LNBF to the meter and use data for standard LNB type, KU, AMC4, Horizontal and Vertical transponders. Peak for AMC4. 4. The satellite receiver features very sensitive Strength and Quality meters to align the dish. Connect the LNBF output to the satellite receiver SAT IN using the 25’ or 75’ coax cable. 5. Connect the satellite receiver TV OUT to the television set Antenna IN.
36 15. Select 11822 by pressing VOL/LEFT or VOL/RIGHT. (This is 3ABN, the strongest transponder on the satellite). 16. Locate the satellite and peak Signal Quality reading by setting the dish elevation and panning the dish side to side. As the dish is directed at any one of the 30+ satellites visible over North America, the signal strength reading will rise and fall. Only when the dish is aimed at the correct satellite will the Signal Quality reading increase above 10%.
37 Cut Here www.adventistsat.