Navigationssoftware NAV 101 und 102 Update Material für NAV 101
Navigationssoftware NAV 101 und NAV 102 Urhebervermerk Änderungen am Produkt und den hier enthaltenen Informationen vorbehalten. Diese Bedienungsanleitung darf weder ganz noch teilweise ohne ausdrückliche schriftliche Genehmigung des Herstellers vervielfältigt oder auf irgendeine Art und Weise elektronisch oder mechanisch – einschließlich Fotokopien und Aufnahmen – weitergegeben werden. © 2008 - Nav N Go Kft.
Inhaltsverzeichnis 1 Warnungen und Sicherheitsinformationen 2 Erste Schritte mit der Audiovox Navigation 2. Schaltfläche und andere Steuerelemente auf dem Bildschirm 2.1. Die Tastaturen verwenden 2.2 Die Karte verwenden 2.2.1 Einzelheiten zu einem Kartenpunkt abrufen 2.2.2 Die Karte verändern 2.2.3 Statusinformationen und versteckte Steuerelemente auf der Karte 2.2.4 Den Cursor (den markierten Punkt auf der Karte) verwenden 2.3 Konzepte in der Audiovox Navigation 2.3.1 Smart Zoom 2.3.2 Positionsanzeiger 2.
.5.5 Menüeinstellungen 4.5.6 TMC-Einstellungen 4.5.
1. Warnungen und Sicherheitsinformationen Die Audiovox Navigation ist ein Navigationssystem, das Ihnen mit einem angeschlossenen GPS-Empfänger dabei hilft, den Weg zu Ihrem Ziel zu finden. Die Audiovox Navigation übermittelt Ihre GPS-Position nicht an Dritte; Sie können daher auch nicht aufgefunden bzw. verfolgt werden. Bitte schauen Sie nur dann auf das Display, wenn es die Verkehrssituation gefahrlos erlaubt.
Inbetriebnahme der Audiovox Navigation Wenn Sie die Audiovox Navigation zum ersten Mal starten, müssen Sie Folgendes tun: 1. Wählen Sie die gewünschte Sprache für die Benutzeroberfläche. Diese Auswahl können Sie später in den Einstellungen (Seite 43) ändern. 2. Wählen Sie die Sprache und die Stimme für die ausgegebenen Sprachanweisungen. Diese Auswahl können Sie später in den Einstellungen (Seite 43) ändern. Danach erscheint das Navigationsmenü und Sie können die Audiovox Navigation verwenden.
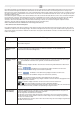
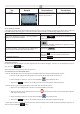
Typ Beispiel Virtuelle Tastatur Beschreibung Verwendung Alphabetische und alphanumerische Jede Taste ist eine Schaltfläche auf Tastaturen, auf denen Sie Buchstaben dem Touchscreen. und Zahlen eingeben können. 2.1. Die Tastaturen verwenden In die Audiovox Navigation müssen Sie Buchstaben und Zahlen nur eingeben, wenn es unbedingt erforderlich ist.
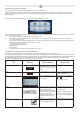
2.2.2 Die Karte verändern Positionsanzeiger auf der Karte: • Aktuelle GPS-Position: • Markierter Punkt (Cursor): Mit den folgenden Steuerelementen können Sie die Kartenansicht besser an Ihre Bedürfnisse anpassen. Die meisten dieser Elemente werden nur angezeigt, wenn Sie einmal in die Karte tippen, und verschwinden nach einigen Sekunden Inaktivität wieder.
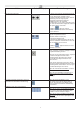
Aktion Schaltfläche(n) Nach links und rechts drehen Beschreibung Sie können den horizontalen Betrachtungswinkel der Karte im 3D-Modus ändern. Wenn die GPS-Position verfügbar ist, dreht die Audiovox Navigation die Karte stets so, dass Ihre Fahrtrichtung nach oben angezeigt wird (Ausrichtung in Fahrtrichtung). Mit diesen Schaltflächen können Sie vom Modus „In Fahrtrichtung“ zu einer anderen Ausrichtung wechseln.
Aktion Schaltfläche(n) Beschreibung Schaltflächen Tippen Sie auf eine der Voreinstellungsschaltflächen, um den Neigungswinkel und den Maßstab auf einen fixen, voreingestellten Wert zu setzen. Smart Zoom ist deaktiviert. Diese Schaltflächen sind im 3D-Modus verfügbar. Tippen Sie auf eine der Schaltflächen und halten Sie sie gedrückt,um ihren Wert auf den aktuellen Neigunswinkel und Maßstab zu setzen oder sie auf den ursprünglichen Wert zurücksetzen.
Der folgende Bereich erscheint neben dem runden Feld, das oben beschrieben wurde. Wenn Sie in diesen Bereich tippen, hängt die ausgeführte Aktion von den aktuell angezeigten Informationen ab. Symbol Information Details Aktion Es gibt keine gültige GPS-Position. Wenn es keine gültige GPS-Position Tippen Sie in diesen Bereich, um gibt, wird dieses Symbol hier ange- die GPS-Datenanzeige zu öffnen, zeigt. wo Sie den Signalstatus und die Verbindungseinstellungen überprüfen können.
Wenn es keine aktive Route gibt, zeigen diese Felder folgende Informationen an: aktuelle Geschwindigkeit, Kompass und aktuelle Uhrzeit. Symbol Typ Weitere Informationen Kompass Zeigt Ihre Fahrtrichtung an; sowohl, wenn die Karte automatisch gedreht wird (3D), als auch bei fixer Nordausrichtung (2D).
2.2.4 Den Cursor (den markierten Punkt auf der Karte) verwenden Platzieren Sie zunächst den Cursor mit einer der folgenden Methoden an der gewünschten Stelle in der Karte: • Verwenden Sie das Suchmenü, um einen Ort auszuwählen. Es wird wieder die Karte aufgerufen, auf der der ausgewählte Punkt (der Cursor) in der Mitte angezeigt wird, und das Cursor-Menü mit den verfügbaren Optionen wird geöffnet.
2.3.2.2 Zur normalen Navigation zurückkehren Wenn die GPS-Position verfügbar ist und Sie die Karte verschoben haben (das Symbol bewegt sich oder wird gar nicht angezeigt) oder Sie die Karte im 3D-Modus gedreht haben, erscheint die Schaltfläche . Tippen Sie darauf, um die Karte zurück zu Ihrer GPS-Position zu verschieben und wieder in Fahrtrichtung auszurichten (automatische Kartendrehung).
Die Audiovox Navigation führt eine automatische Neuberechnung der Route durch, falls Sie vom vorgeschlagenen Reiseplan abkommen. Abhängig von der Art der TMC-Meldung berechnet die Audiovox Navigation die Route auch neu, wenn ein Teil der empfohlenen Route von der TMC-Meldung betroffen ist. Weitere Informationen zu den Routenplanungsoptionen finden Sie auf Seite 42. 2.5.6 Reiseplan Der Reiseplan ist die Liste der nächsten Ereignisse auf Ihrer Route; das heißt, die Navigationsanleitung.
2.3.7 Routendemo Eine Simulation führt Sie durch die Route und folgt dabei den Navigationsanweisungen. Sie können eine Simulation schnell oder in normaler Fahrgeschwindigkeit abspielen. Sie können diese Funktion zum Beispiel verwenden, um herauszufinden, welche Brücke die Audiovox Navigation auf der Route eingeplant hat, und diese dann meiden, falls Sie nicht über diese Brücke fahren möchten.
3.1 Das Ziel einer Route wählen Die Audiovox Navigation bietet Ihnen verschiedene Möglichkeiten, wie Sie Ihr Ziel und die Zwischenziele (Zwischenstopps) festlegen können: • Den markierten Punkt auf der Karte (Cursor) verwenden (Seite 29). • Eine Adresse oder einen Teil davon eingeben, zum Beispiel einen Straßennamen ohne Hausnummer oder die Namen zweier sich kreuzender Straßen (Seite 18). • Eine Adresse über eine Postleitzahl eingeben (Seite 19).
2. Geben Sie den Straßennamen ein: a. Tippen Sie auf . b. Beginnen Sie, den Straßennamen über die Tastatur einzutippen. c. Sie gelangen zur Ergebnisliste: • Nachdem Sie einige Buchstaben eingegeben haben, werden die auf die Zeichenfolge zutreffenden Namen in einer Liste angezeigt. • Tippen Sie auf d. Wählen Sie die Straße aus der Liste. 3. Geben Sie die Hausnummer ein: , um die Ergebnisliste aufzurufen, bevor sie automatisch angezeigt wird. a. Tippen Sie auf . b.
1. Tippen Sie auf die folgenden Schaltflächen: a. Die Audiovox Navigation schlägt Ihnen standardmäßig das Land/den Bundesstaat und den Ort vor, in dem Sie sich gerade befinden. Tippen Sie gegebenenfalls auf die Schaltfläche mit dem Namen des Landes/Bundesstaates und wählen Sie einen anderen Eintrag aus der Liste. b. So können Sie gegebenenfalls den Ort ändern: • Tippen Sie auf die Schaltfläche , um den Ort aus der Liste der kürzlich verwendeten Ziele zu wählen. • So können Sie einen neuen Ort eingeben: 2.
e. Tippen Sie auf die Schaltfläche . • Wenn es nur wenige Querstraßen gibt, werden diese sofort aufgelistet. • Im Fall einer längeren Straße erscheint eine Tastatur. Beginnen Sie, den Namen der Querstraße über die Tastatur einzutippen. Falls die zutreffenden Straßen auf eine Seite passen, wird die Liste während der Eingabe automatisch angezeigt. f. Tippen Sie auf die gewünschte Querstraße in der Liste. g. Die Karte wird mit dem ausgewählten Punkt in der Mitte aufgerufen.
3.1.2.7 Tipps für die schnelle Eingabe von Adressen • Wenn Sie den Namen eines Ortes oder einer Straße eingeben, zeigt die Audiovox Navigation nur diejenigen Buchstaben an, die in den möglichen Suchergebnissen enthalten sind. Alle anderen Buchstaben sind inaktiv. • Tippen Sie bei der Eingabe eines Orts- oder Straßennamens nach einigen Buchstaben auf die Schaltfläche Die Audiovox Navigation listet die Einträge auf, die diese Zeichenfolge enthalten.
3.1.5 Das Ziel aus den letzten Zielen wählen Die Orte, die Sie früher einmal als Ziel eingegeben haben, werden in den letzten Zielen gespeichert. Die Vorgehensweise wird vom Navigationsmenü ausgehend erklärt. 1. Tippen Sie auf die folgenden Schaltflächen: , 2. Blättern Sie gegebenenfalls mit um, um ältere Ziele zu sehen. 3. Tippen Sie auf den gewünschten Eintrag. 4. Die Karte wird mit dem ausgewählten Punkt in der Mitte aufgerufen.
3.5 Eine Simulation der Route ansehen Die Vorgehensweise wird von der Kartenanzeige ausgehend erklärt. 1. Tippen Sie auf die folgenden Schaltflächen: 2. Das Routenmenü wird geöffnet. 3. Tippen Sie auf abzuspielen. , . , um die Simulation in Normalgeschwindigkeit und mit der gleichzeitigen Ausgabe von Sprachanweisungen 4. Sie können die Simulation jederzeit abbrechen, indem Sie auf tippen. 3.
3.9 Eine gespeicherte Route laden Die Vorgehensweise wird von der Kartenanzeige ausgehend erklärt. 1. Tippen Sie auf die folgenden Schaltflächen: , , . 2. Tippen Sie auf die Route, die Sie für die Navigation auswählen möchten. 3. Im sehr wahrscheinlichen Fall, dass der Ausgangspunkt der gespeicherten Route nicht Ihre aktuelle GPS-Position ist, müssen Sie bestätigen, ob Sie die Navigation von der aktuellen GPS-Position beenden und den Ausgangspunkt der geladenen Route verwenden möchten.
Symbol Name Aktion Abzweigungsvorschau, also das nächste Ereignis auf Ihrer Route Zeigt die Routeninformationen an Übernächstes Ereignis auf der Route Öffnet den Reiseplan Fahrtdaten Zeigt die Fahrtinformationen an Qualität der GPS-Position Öffnet das Menü „Schnellzugriff“ Obere Zeile Nächste Straße n.V. Untere Zeile Aktuelle Straße und Hausnummern links und rechts n.V.
Symbol Name Vergrößern und verkleinern Aktion Ändert den Kartenmaßstab Zur GPS-Position zurückkehren (erscheint, Tippen Sie auf diese Schaltfläche, um die Karte wenn die GPS-Position verfügbar ist und Sie die zurück zu Ihrer aktuellen GPS-Position zu beweKarte verschoben haben) gen. Wenn die Karte im 3D-Modus gedreht wurde, wird auch die automatische Kartendrehung wieder aktiviert.
4.1.1 Symbole auf der Karte Auf der Karte gibt es verschiedene Statussymbole. Die meisten davon sind gleichzeitig eine Schaltfläche. Sie zeigen folgende Informationen an: • • • Qualität der GPS-Position Audiostatus (stumm oder aktiviert) TMC-Empfangs- und Verarbeitungsstatus 4.1.1.1 Anzeige für die Qualität der GPS-Position und den Fahrzeugtyp In diesem Bereich gibt es mehrere Statusanzeigen und er dient auch als Schaltfläche, über die Sie das Menü „Schnellzugriff“ öffnen können.
4.1.1.3 Die nächsten zwei Ereignisse auf der Route (Felder für die Abzweigungsvorschau) Zwei Felder in der Kartenanzeige dienen dazu, die nächsten beiden Fahrmanöver (Ereignisse auf der Route), die im Reiseplan aufgelistet sind, anzuzeigen. Es wird sowohl die Art des Ereignisses (Wenden, Kreisverkehr, Abfahren von der Autobahn usw.) als auch seine Entfernung von der aktuellen GPS-Position angezeigt. Die meisten dieser Symbole sind leicht verständlich und Ihnen schon als Verkehrszeichen bekannt.
4.1.2 Objekte auf der Karte 4.1.2.1 Straßen Die von der Audiovox Navigation angezeigten Straßen sehen ähnlich wie gedruckte Straßenkarten aus. Aus der Farbe und der Breite können Sie schließen, wie wichtig die Straße ist: Dadurch können Sie ganz leicht eine Autobahn von einer kleinen Straße unterscheiden. Tipp! Falls Sie während der Navigation keine Straßennamen sehen wollen, können Sie sie deaktivieren (Seite 21). 4.1.2.
Symbol Name Beschreibung Zwischenziel Ein Zwischenziel ist ein Zwischenstopp auf der Route. Sie können so viele Zwischenziele einfügen, wie Sie möchten. Ziel (Endpunkt) Der letzte Punkt der Route; das endgültige Ziel. Routenfarbe Die Route ist dank ihrer Farbe immer gut auf der Karte sichtbar, sowohl im Farbprofil für den Tag- als auch den Nachtmodus. Der aktive Abschnitt der Route ist immer in einem helleren Ton gehalten als die inaktiven (späteren) Abschnitte.
Schaltfläche Beschreibung Wenn das Cursor-Menü offen ist, können Sie die Karte trotzdem verschieben, vergrößern und verkleinern. Sie können auf eine beliebige Stelle in der Karte tippen, um den Cursor an diesem neuen Ort zu platzieren, aber wenn Sie diese Schaltfläche verwenden, kehrt der Cursor an die Stelle zurück, von der aus Sie das Cursor-Menü ursprünglich geöffnet haben. Wird an der Cursorposition angezeigt, wenn es dieselbe Stelle ist, an der das Cursor-Menü geöffnet wurde.
Schaltfläche Beschreibung Orte auf der Karte können mit einem Pin markiert werden. Im Gegensatz zu einem POI hat ein Pin keinen Namen und es sind auch keine anderen Daten dazu gespeichert. Sie können Pins auf der Karte nur anhand ihrer Farbe voneinander unterscheiden. Wenn sich der Cursor auf oder nahe bei einem Pin befindet, ersetzt diese Schaltfläche die vorige Schaltfläche und löscht den Pin, in dessen Nähe sich der Cursor befindet.
Name Beschreibung Funktion Routenlinie Im oberen Bildschirmbereich wird Ihre geplante Tippen Sie in dieses Feld, um in allen Datenfeldern Route als horizontale Linie angezeigt. Ganz links Informationen zu den Zwischenzielen anzuzeigen. befindet sich der Ausgangspunkt der Route und ganz rechts das endgültige Ziel. Auf der Linie sehen Sie die Flaggen für Ihre Zwischenziele, die proportional zu ihrer Entfernung angeordnet sind.
Name oder Beschreibung Funktion Gibt an, ob die Routendatenfelder Informationen über Ihr endgültiges Ziel (karierte Flagge) oder das nächste Zwischenziel (gelbe Flagge) enthalten. Feld neben der Flagge Zeigt den Namen oder die Nummer der aktuellen Straße an. Abzweigungsvorschau Zeigt die Art und die Entfernung des nächsten Ereignisses auf der Route an. Tachometer Zeigt die aktuelle Geschwindigkeit sowohl graphisch als auch numerisch an.
Neben den meisten Feldern auf dieser Seite ist ein -Symbol zufinden. Dieses Symbol gibt an, ob das dazugehörige Feld auf der Karte unter den Fahrtdaten angezeigt wird. Darüber hinaus zeigt es die Position der Daten wie folgt an: Symbol Beschreibung Dieser Wert wird nicht auf der Karte angezeigt. Dieser Wert erscheint in der Kartenanzeige unter den Fahrtdaten. Es handelt sich dabei um den oberen Wert. Dieser Wert erscheint in der Kartenanzeige unter den Fahrtdaten.
4.1.9 GPS-Datenanzeige Name Funktion (antippen und halten) Hauptfunktion (einfaches Antippen) Öffnet das Navigationsmenü. Wenn Sie nur die Lautstärke ändern, müssen Sie diese Schaltfläche benutzen, um zur Kartenanzeige zurückzukehren. Schaltet alle Töne der Audiovox Navigation auf stumm. Öffnet die Audioeinstellungen. Durch langen “Druck” auf das Symbol können Einstellungen vorgenommen werden. Wechselt manuell zwischen den Farbprofilen für Tag und Öffnet das Einstellungsmenü für die Farbprofile.
Symbol Farbe Name Beschreibung Grün, blinkend Anzeige für die Qualität der GPS-Verbindung Die Audiovox Navigation ist mit dem GPS-Empfänger verbunden. Gelb, blinkend Anzeige für die Qualität der GPS-Verbindung Die Audiovox Navigation hat keine Verbindung zum GPS-Empfänger, ist aber derzeit mit dem Verbindungsaufbau beschäftigt.
4.3 Routenmenü Hier können Sie Ihre Routen speichern, laden und bearbeiten. Tippen Sie auf die folgenden Schaltflächen: Schaltfläche , Beschreibung Referenz Seite 31 Öffnet eine Seite mit nützlichen Routendaten. Sie können die Navigationsanweisungen durchsehen, denen die Audiovox Navigation während der Fahrt folgt. Sie können Fahrmanöver oder Straßen ausschließen, um die Route an Ihre Bedürfnisse anzupassen.
4.4.2 Letzte Ziele verwalten Sie können die Liste der zuletzt verwendeten Orte verwalten. Tippen Sie auf die folgenden Schaltflächen: Schaltfläche , , Beschreibung Löscht den markierten Eintrag aus den letzten Zielen. Löscht alle letzten Ziele. Wechselt zur nächsten bzw. vorigen Seite, um zusätzliche Listeneinträge anzuzeigen. 4.4.3 POIs verwalten Sie können Ihre POIs verwalten und die POI-Anzeige sowohl für Ihre eigenen POIs als auch für die im Produkt bereits integrierten festlegen.
Wenn eine POI-Gruppe zum Bearbeiten geöffnet ist: Schaltfläche Beschreibung Die Elemente in der POI-Gruppe werden nicht auf der Karte angezeigt. Die Entfernungsschaltflächen legen den Maßstab fest, ab dem die Elemente in der POI-Gruppe auf der Karte angezeigt werden. Die Anzeigeeinstellungen werden auch für die Untergruppen der bearbeiteten POIGruppe übernommen. Schaltfläche mit dem Symbol der POI-Gruppe Tippen Sie auf diese Schaltfläche, um ein neues Symbol für die POI-Gruppe zu wählen.
4.5 Einstellungsmenü Sie können die Programmeinstellungen konfigurieren und das Verhalten von der Audiovox Navigation ändern. Tippen Sie auf die folgenden Schaltflächen: , . Im Einstellungsmenü gibt es zwei Seiten mit Untermenüs. Tippen Sie auf Schaltfläche um auf die anderen Optionen zuzugreifen. Beschreibung Sie können das Aussehen und den Inhalt der Kartenanzeige auf Ihre Zwecke abstimmen.
4.5.1 Die Kartenanzeige konfigurieren Sie können das Aussehen und den Inhalt der Kartenanzeige auf Ihre Zwecke abstimmen. Tippen Sie auf die folgenden Schaltflächen: , , Schaltfläche 3D-Einstellungen Beschreibung In den 3D-Einstellungen können Sie festlegen, welche der vorhandenen 3D-Objekte auf der Karte angezeigt werden sollen, und Sie können die Detailliertheit der 3D-Anzeige anpassen.
4.5.3 Routenplanungsoptionen Diese Einstellungen legen fest, wie Routen berechnet werden. Tippen Sie auf die folgenden Schaltflächen: , , Schaltfläche Bei der Routenplanung verwendete Straßenarten Routenberechnungsmethode Beschreibung Um die Route auf Ihre persönlichen Bedürfnisse abzustimmen, können Sie auch einstellen, welche Straßenarten bei der Routenplanung wenn möglich berücksichtigt oder ignoriert werden sollen. Wenn Sie eine Straßenart ausschließen, ist das die von Ihnen bevorzugte Option.
Verfügbare Routenberechnungsmethoden: Option Beschreibung Schnell Ergibt die schnellstmögliche Route, wenn Sie auf allen Straßen (fast) die erlaubte Höchstgeschwindigkeit fahren können. Normalerweise für schnelle und normale Fahrzeuge die beste Option. Kurz Ergibt eine Route, die von allen möglichen Fahrstrecken zwischen den einzelnen Wegpunkten die geringste Länge aufweist. Üblicherweise für Fußgänger, Fahrradfahrer oder langsame Fahrzeuge von Vorteil.
4.5.5 Menüeinstellungen Sie können das Aussehen und die Eigenschaften der Menüseiten ändern. Tippen Sie auf die folgenden Schaltflächen: , , Schaltfläche Hintergrund Beschreibung Sie können das Bild festlegen, das als Menü-Hintergrund verwendet werden soll. 4.5.6 TMC-Einstellungen Sie können die Verbindung zum TMC-Empfänger einrichten. Wenn der TMC-Empfänger aktiv ist, können Sie wählen, von welchem Radiosender Daten empfangen werden sollen. Tippen Sie auf die folgenden Schaltflächen: , , .
4.5.7 Warneinstellungen Sie können einige nützliche Warnungen aktivieren und mit Hilfe des Sicherheitsmodus den Touchscreen sperren, während sich das Fahrzeug bewegt. Tippen Sie auf die folgenden Schaltflächen: Schaltfläche , , Beschreibung Die Karten können Informationen über die auf den jeweiligen Straßenabschnitten erlaubten Höchstgeschwindigkeiten entWarnen falls zu schnell halten. Die Audiovox Navigation kann Sie warnen, falls Sie die aktuelle Geschwindigkeitsbegrenzung überschreiten.
5 Glossar 2D-/3D-GPS-Empfang Der GPS-Empfänger nutzt Satellitensignale, um seinen (Ihren) Standort zu bestimmen. Um eine dreidimensionale Position zu ermitteln (inklusive Höhenangabe), sind mindestens vier Signale erforderlich. Da die Satelliten ständig in Bewegung sind und die Signale von anderen Objekten behindert werden können, empfängt Ihr GPS-Gerät eventuell nicht vier Signale.
4.1 Der Gegenstand dieses Vertrages ist das als Navigationshilfe dienende Softwareprodukt des Lizenzgebers (nachfolgend das Softwareprodukt). 4.2 Das Softwareprodukt beinhaltet das zu verwendende Computerprogramm, alle dazugehörigen Unterlagen sowie die dazugehörige Kartendatenbank. 4.
Navigation software NAV 101 and NAV 102 Update for NAV 101 1
Navigation software NAV 101 and NAV 102 Copyright note The product and the information contained herein is subject to change without prior notification. This manual may not, in whole or in part, be reproduced or transmitted in any form either electronically or mechanically, including photocopying and recording, without the express written consent of Nav N Go Kft.. © 2008 - Nav N Go Kft. Whereis® map data is © 2006 Telstra Corporation Limited and its licensors Data Source © 2006 Tele Atlas N.V.
Table of contents 1 Warnings and Safety information 2 Getting started with AUDIOVOX Navigation Software 2.1 Buttons and other controls on the screen 2.1.1 Using keyboards 2.2 Using the map 2.2.1 Checking the details of a map location 2.2.2 Manipulating the map 2.2.3 Status information and hidden controls on the map 2.2.4 Using the Cursor (the selected map location) 2.3 AUDIOVOX Navigation Software concepts 2.3.1 Smart Zoom 2.3.2 Position markers 2.3.2.1 Current GPS position and Lock-on-Road 2.3.2.
4.5.4 Regional settings 4.5.5 Menu settings 4.5.6 TMC settings 4.5.
1 Warnings and Safety information Audiovox navigation is a navigation system that helps you find your way to your destination with a connected GPS receiver. Audiovox navigation does not transmit your GPS position; others cannot track you. It is important that you look at the display only when it is safe to do so. If you are the driver of the vehicle, we recommend that you operate Audiovox navigation before you start your journey.
2.1 Start using Audiovox navigation When Audiovox navigation is started the first time, you need to do the following: 1. Select the written language of the application. Later you can change it in Settings (page 42). 2. Select the language and speaker used for voice guidance messages. Later you can change it in Settings (page 42). 3. After this, the Navigation menu appears and you can start using Audiovox navigation.
2.3.1 Using keyboards Type Example Virtual keyboard Description Alphabetic and alphanumeric keyboards to enter text and numbers. How to use Each key is a touch screen button. You only need to enter letters or numbers in Audiovox navigation when you cannot avoid it. You can type with your fingertips on the full-screen keyboards and you can switch between various keyboard layouts, for example ABC, QWERTY, or numerical.
2.4.2 Manipulating the map Position markers on the map: • Current GPS position: • Selected location (Cursor): The following controls help you modify the map view to best suit your actual needs. Most of these controls appear only if you tap the map once, and disappear after a few seconds of inactivity. Action Moving the map with drag&drop Button(s) No buttons Description You can move the map into any direction: tap and hold the map, and move your finger to the direction in which you want to move the map.
Action Button(s) Rotating left and right Description Changes the horizontal view angle of the map in 3D mode. When GPS position is available, Audiovox navigation always rotates the map so its top faces your direction of travel (Track-Up orientation). You can turn away from Track-Up with these buttons. If GPS position is available and you have rotated the map the . button appears. Tap this button to reenable the automatic map rotation.
Action Button(s ) Description Tilt and zoom preset buttons (available in Advanced mode only) Tap one of the preset buttons to set the tilt and zoom levels to fix, predefined values. Smart Zoom is disabled. These buttons are available in 3D mode. Tap&hold any of the buttons to set its value to the current tilt and zoom levels, or to reset it to its original value. Kartenmaßstab Icon Audiovox navigation Software shows the scale of the map in 2D mode.
The following area appears next to the above described rounded area. When tapping this area, the result depends on the information currently shown. Icon Information Details Action There is no valid GPS position If there is no valid GPS position, this Tap this area to open the GPS Data symbol appears here. screen to check the signal status or the connection settings. Traffic restriction.
The following information can be seen in the three data fields shown on the map screen. Tap this area to open the Trip Information screen where you can select which values to be shown in these three fields. When there is no active route, these fields show the following information: current speed, compass and the current time of day. Icon Type More information Compass Shows the direction of your heading both when the map is automatically rotated (3D) and when the map is always facing North (2D).
2.2.4 Using the Cursor (the selected map location) First, place the Cursor at the desired map location with one of the following options: • Use the Find menu to select a location. The map returns with the selected point (the Cursor) in the middle, and the Cursor menu appears with the available options. • Tap the screen and tap again to place the Cursor at the desired location. Now tap to open the Cursor menu.
2.3.2.2 Returning to normal navigation When GPS position is available, and you have moved the map (the mode, the tion). icon is moving or is not even visible), or you have rotated the map in 3D button appears.
AUDIOVOX Navigation Software automatically recalculates the route if you deviate from the proposed itinerary. If your hardware supports TMC: Depending on the type of the TMC event, AUDIOVOX Navigation Software also recalculates the route if a TMC event concerns a part of the recommended route. For further information about Route Planning options, see page 41. 2.3.6 Itinerary The Itinerary is the list of the route events, that is, the driving instructions.
2.3.7 Route demonstration A simulation drives you through the route, following the driving instructions (page 22). You can use it, for example, to see which bridge AUDIOVOX Navigation Software planned for the route; if you do not want to take that bridge, you can avoid it.Route demonstration can be started from the Route menu by tapping the button. 2.3.8 POI (Points of Interest) A point of interest (POI) is a location that someone might find useful or interesting.
Tip! If you are going to use a route later, save it before you start navigating. Tap the following buttons: , , . 3.1.1 Selecting the Cursor as the destination 1. Locate your destination on the map: move and scale the map as needed (page 7) 2. Tap the location that you want to select as your destination. The Cursor ( 3. Tap ) appears. to open the Cursor menu. 4. The map appears with the selected point in the middle. Tap you can start navigating. from the Cursor menu.
3. Tap to finish entering the address 6.The map appears with the selected point in the middle. 1. Tap . from the Cursor menu. The route is then automatically calculated, and you can start navigating. 3.1.2.3 Entering an address if house numbering is restarted There are long roads where the house numbering is restarted at some point. This way the same house number can appear twice or even more times on the same road.
4. Enter the street name: 1. Tap . 2. Start entering the street name on the keyboard 3. Get to the list of results: • After entering a couple of characters, the names that match the string appear in a list • Tap to open the list of results before it appears automatically. 4. Instead of picking one of the streets, tap . 5.Enter the house number: 1. Tap . 2. Enter the house number on the keyboard. 3.Tap to finish entering the address. 6. A list appears with the matching addresses. Tap the desired one.
• To enter a new settlement: a. Tap the button with the name of the settlement, or if you have changed the country/state, tap b. Start entering the settlement name on the keyboard. c. Get to the list of search results: • After entering a couple of characters, the names that match the string appear in a list. . • Tap , to open the list of results before it appears automatically. d. Pick the settlement from the list. 4. Tap the button. 5. The map appears with the selected point in the middle.
3.1.4 Selecting the destination from the POIs You can select your destination from the POIs included with Audiovox Navigation or from the ones you have previously created. The procedure is explained starting from the Navigation menu. 1. Tap the following buttons: , 2. Select the area around which the POI should be searched: • The POI will be searched around a given address • The map appears with the Cursor in the middle.
3.2 Creating a multi-point route (inserting a via point) Multi-point routes are created from simple routes, so a route must be active first. One of the ways of expanding the route is to keep the destination, and to add via points (intermediate destinations). 1. Select a new location as you did in the previous sections. This will be the additional destination in the route. 2. The map appears with the selected point in the middle, and the Cursor menu opens automatically. 3.
3.5 Watching the simulation of the route The procedure is explained starting from the Map screen. 1. Tap the following buttons: 2. The Route menu appears: 3 Tap , . , to run the simulation at normal speed and with voice guidance instructions announced. 4. The simulation can be aborted any time by tapping . 3.6 Pausing the active route You do not need to pause the active route: when you start driving again, Audiovox Navigation Software restarts the voice instructions from your position. 3.
4 Reference Guide On the following pages you will find the description of the different menu screens of Audiovox Navigation Software. The Navigation menu: Audiovox Navigation Software starts with the Navigation menu. From there you can access the following screens: Screen Button Description Map The Map screen.
Icon Name Action Turn Preview, that is, the next route event Opens the Route Information screen Second upcoming route event Opens the Itinerary Trip data Opens the Trip Information screen GPS position quality Opens the Quick menu Top row Next street n/a. Bottom row Current street and house numbers on left and righ n/a.
Icon Name Action Zoom in, zoom out Scales the map Return to GPS position (appears when GPS position is available and you have moved the map) Tap this button to move the map back to the current GPS position. If the map has been rotated in 3D mode, automatic map rotation is also reenabled. Enable Smart Zoom (replaces the previous button if there is no GPS position or the map has not been moved) Tap this button once to enable Smart Zoom. Tap&hold the button to set the zoom limits of Smart Zoom.
4.1.1.1 GPS position quality indicator This area is a status indicator, and also acts as a button that opens the Quick menu. GPS reception quality shows the current accuracy of the position information. Icon Description Audiovox Navigation Software has no connection to the GPS receiver: GPS navigation is not possible. Devices with a built-in GPS receiver are permanently connected. On such devices, the icon does not appear in normal circumstances.
4.1.1.3 Next two route events (Turn Preview fields) There are two fields reserved on the Map screen to display the next two manoeuvres (route events that are listed in the Itinerary). Both the type of the event (turn, roundabout, exiting motorway, etc.) and its distance from the current GPS position is displayed. Most of these icons are very intuitive and you also know them as road signs. The following table lists some of the frequently shown route events.
4.1.2.2 3D objects types To enable or disable 3D visualisation on the map, tap the follwing buttons: , Typ , , Description 3D landmarks Landmarks are 3D artistic or block representations of prominent or wellknown objects. 3D landmarks are only available in selected cities and countries. Elevation model Hills and mountains are shown in the background of the 3D map view, and illustrated by colour on the 2D map.
4.1.3 Cursor menu As soon as you select one point in the Find menu, the map appears with the Cursor menu, a menu with possible actions for the selected point. Icon Name Description Via point A via point is an intermediate destination. You can place as many via points as you want. Destination (end point) The last point of the route, the final destination. Route colour The route always stands out with its colour on the map, both in daytime and in night colour mode.
Icon Description With the Cursor menu open, you can still move or scale the map, and tap the map anywhere to place the Cursor to a new location, but when you use this button, the Cursor jumps back to the place where it was at the time when you opened the Cursor menu. Displayed at the Cursor if it is at the same location with which the Cursor menu was opened. Displayed at the Cursor if it has been relocated since the Cursor menu was opened.
4.1.5 Position menu When you follow the recommended route on the map (the Cursor is the current GPS position), the Position menu replaces the Cursor menu. It does not contain buttons that modify the current route, as the GPS position is not useful as a route point. To open the Position menu, tap 4.1.6 Route Information screen The Route Information screen has all the data and some of the functions you need while you navigate.
4.1.7 Trip Information screen The Trip Information screen has both route and travel data you might need during your journey. It can be opened directly from the Map screen by tapping the Trip Data field ( ) The fields on this screen are continuously updated while you keep the screen open. When you open the screen, all route data fields contain information about reaching your finaldestination. Tap and the fields concerning your route display data for the next via point.
You have the following data and functions on this screen: Most of the fields on this screen have a symbol next to them. This symbol shows whether the field it is attached to is shown on the map as a Symbol Description This value is not shown on the map screen. This value appears on the map screen in the Trip Data area. This is the value at the top. This value appears on the map screen in the Trip Data area. This is the value in the middle. This value appears on the map screen in the Trip Data area.
Name Function (tap and hold) Main function (single tap) Opens the Navigation menu. If you only adjust the volume, you need to use this button to return to the Map screen.. Mutes all sounds of Audiovox Navigation Software. Push and hold to open Sound settings. Switches between the daytime and night colour schemes manually. This will not disable the automatic switching between the two schemes: the other colour scheme returns at the next scheduled time.
Symbol Colour Name Description Green, blinking GPS connection quality indicator Audiovox Navigation Software is connected to the GPS receiver. Yellow, blinking GPS connection quality indicator Audiovox Navigation Software has no connection to the GPS receiver but it is still trying to establish a c onnection. Red, blinking GPS connection quality indicator Audiovox Navigation Software has no connection to the GPS receiver and is not trying to establish a connection.
4.2 Find menu Select the destination of your route. Tap the following buttons: Button , Description Reference If you know at least a part of the address, this is the quickest way to find the location. page 16 You can select your destination from the thousands of POIs included with Audiovox Navigation Software or from the ones you have previously created. page 20 The destinations that you have already entered in Audiovox Navigation Software are available in the History list.
4.4 Manage menu You can manage the content that AUDIOVOX Navigation Software stores. Tap the following buttons: Button Description Reference Renaming or deleting saved routes page 37 Deleting History items page 37 page 39 Renaming or deleting Favourites Creating, updating or deleting POIs Creating, updating or deleting POI groups Modifying POI visibility settings page 37 4.4.1 Manage Saved Routes You can manage the previously saved routes.
Button / Icon Button with the name of the POI group Button with the name and address of a POI item Description Opens the list of the subgroups of this POI group. The new list behaves the same as this one. Opens the selected POI for editing. Only the POIs you have created appear in this list. Opens the selected POI group for editing. Tap to filter the list to contain only the POIs that you saved. Tap to see all POIs in the list. Creates a new POI group at the given group level.
4.4.4 Manage Favourites You can manage the list of your Favourites. Tap the following buttons: , , Button Description Deletes the selected item in the list of Favourites. Clears the list of Favourites. Moves between pages for additional list items. 4.4.5 User Data Management You can manage the data you have saved (Pins, POIs, Favourites, and History) and the settings you have made in the program.
Button Description Referenz You can fine-tune the appearance and content of the Map screen. page 40 You can control how AUDIOVOX Navigation Software behaves during navigation. page 41 These settings determine how routes will be calculated. page 41 These settings allow you to customise the application for your local language, measurement units, time and date settings and formats, as well as to choose the voice guidance profile you prefer.
4.5.2 Navigation settings You can control how AUDIOVOX Navigation Software behaves during navigation. Tap the following buttons Button , , Description Keep Position on Road This feature allows car drivers to always correct GPS position errors by matching the vehicle position to the road network. By turning off this feature you also turn off the GPS position error filtering. The position shown on the map will be subject to all position errors and position fluctuations.
Road Types Used for Route Planning: Type Description Motorways You might need to avoid motorways when you are driving a slow car or you are towing another vehicle. Unpaved roads Audiovox Navigation Software excludes unpaved roads by default: unpaved roads can be in a bad condition and usually you cannot reach the speed limit on them. Charge roads Charge roads are pay roads where you can purchase a pass or vignette to use the road for a longer period of time.
Time and Time Zone Settings: Button Description Auto Time Correction to GPS Use this feature to synchronise the clock of your device to the highly accurate time provided by the GPS receiver. Use Auto Time Zone Use this feature to synchronise the time zone of the clock of your device to the time zone based on your current GPS position. This is useful if you travel abroad. Set Time Zone Set time zone manually if you do not want to synchronise the time zone automatically.
4.5.7 Warning settings You can enable speed warning. Tap the following buttons: , Button Description aps may contain information about the speed limits of the road segments. Audiovox Navigation Software is able to warn you Warn When Speeding if you exceed the current limit. This information may not be available for your region (ask your local dealer), or may not be fully correct for all roads in the map. This setting lets you decide whether you wish to receive the warnings.
6 End User Licence Agreement 1 The contracting parties 1.1 Contracting parties to this Agreement are, on the one hand: Nav N Go Kft. (23 Bérc utca, H-1016 Budapest, Hungary; Hungarian reg.no.: 01-09-891838) as Licensor and the legal user (as defined in Section 2) of the object of this Agreement according to Section 4, hereinafter referred to as User on the other hand (hereinafter jointly referred to as Parties). 2 Conclusion of the Agreement 2.
of transportation, observing the traffic regulations and rules (e.g. use of obligatory and/or reasonable and suitable security measures, proper and generally expected care and attention in the given situation, and special care and attention required due to utilising the Software Product) is the exclusive responsibility of the User; the Licensor shall not assume any responsibility for any damages occurred in relation to utilising the Software Product during transportation. 8.
D Wir gratulieren Ihnen! Durch Ihre kluge Wahl sind Sie Besitzer eines Audiovox Mobile Video-Produktes geworden. Audiovox Mobile Video-Produkte erfreuen sich aufgrund der hohen Qualität eines ausgezeichneten Rufes weltweit. Dieser hohe Qualitätsstandard ermöglicht es für Audiovox Mobile Video-Produkte 2 Jahre Garantie zu gewähren. Die Produkte werden während des gesamten Fertigungsvorganges laufend kontrolliert und geprüft. Im Servicefall beachten Sie bitte folgendes: 1.
G ARANTIEKARTE WARRANTY C ARD Typ/ Type Serien-Nr./Serial-No.
Audiovox Audio Produkte GmbH Lise-Meitner-Str. 9 · 50259 Pulheim Tel.: +49 2234/807-0 · Fax: + 49 2234/807-399 www.audiovox-germany.