
User's Manual
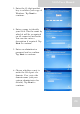
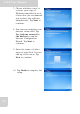
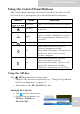
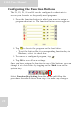
Table Of Contents
- Table of Contents
- Preface
- Safety Instructions
- Rugged and Ready to Go
- Getting Started
- Installing the Rubber Bumpers
- Removing the Rubber Bumpers
- Using the Power Switch
- Inserting a Memory Card
- Removing a Memory Card
- Installing a 3G SIM Card
- Removing 3G SIM Card (optional)
- Installing a WWAN Module (optional)
- Installing an MSR (optional)
- Installing a 1D Barcode Scanner (optional)
- Installing an RFID (optional)
- Upgrading Components
- Making Connections
- Turning On
- Wireless Connections
- Using the Modules
- Using the Fingerprint Software
- Advanced Settings
- Troubleshooting
- Appendix

S10A User Manual
24
3. Enter the 25-digit product
key to validate your copy of
Windows. Tap Next to
continue.
4. Enter a name to identify
your S10A. This the name by
which it will be recognized
on all connected networks.
You can also enter a
description if required. Tap
Next to continue.
5. Enter an administrator
password and re-confirm.
Tap Next to continue.
6. Choose whether or not to
make the S10A part of a
domain. If so, enter the
domain name (ask your
system administrator for
details). Tap Next to
continue.