
User's Manual
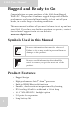
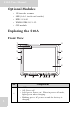
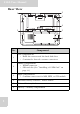
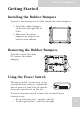
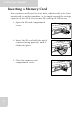
Table Of Contents
- Table of Contents
- Preface
- Safety Instructions
- Rugged and Ready to Go
- Getting Started
- Installing the Rubber Bumpers
- Removing the Rubber Bumpers
- Using the Power Switch
- Inserting a Memory Card
- Removing a Memory Card
- Installing a 3G SIM Card
- Removing 3G SIM Card (optional)
- Installing a WWAN Module (optional)
- Installing an MSR (optional)
- Installing a 1D Barcode Scanner (optional)
- Installing an RFID (optional)
- Upgrading Components
- Making Connections
- Turning On
- Wireless Connections
- Using the Modules
- Using the Fingerprint Software
- Advanced Settings
- Troubleshooting
- Appendix

S10A User Manual
8
Getting Started
Installing the Rubber Bumpers
To protect the housing case of S10A, install the rubber bumpers.
1. Install the rubber bumpers
on the left and right side of
S10A.
2. Make sure the rubber
bumpers are aligned and
locked on the indents.
Removing the Rubber Bumpers
From the rear of the tablet
PC, remove the rubber
bumpers.
Using the Power Switch
The power switch, located next to the
external battery contacts, controls the
flow of power of your S10A. By default,
the power switch is set on the left.
To reveal the power switch, remove the external battery
contacts cover.
• To cut off power flow - switch to the left
• To allow power flow - switch to the right
S1 S2
F1 F2 F3
MODE
ENTER
Lock Lock
SW1