
User manual


9 PCM-4153 User Manual
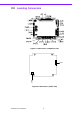
Chapter 2 Installation
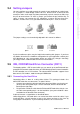
2.4 Setting Jumpers
You may configure your card to match the needs of your application by setting jump-
ers. A jumper is a metal bridge used to close an electric circuit. It consists of two
metal pins and a small metal clip (often protected by a plastic cover) that slides over
the pins to connect them. To “close” a jumper, you connect the pins with the clip. To
“open” a jumper, you remove the clip. Sometimes a jumper will have three pins,
labeled 1, 2 and 3. In this case you would connect either pins 1 and 2, or 2 and 3.
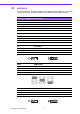
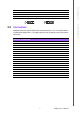
The jumper settings are schematically depicted in this manual as follows:.
A pair of needle-nose pliers may be helpful when working with jumpers. If you have
any doubts about the best hardware configuration for your application, contact your
local distributor or sales representative before you make any changes. Generally,
you simply need a standard cable to make most connections.
2.5 IDE, CDROM Hard Drive Connector (CN11)
The board provides 1 IDE channel which you can attach up to two Enhanced Inte-
grated Drive Electronics hard disk drives or CDROM to the board’s internal controller.
Its IDE controller uses a PCI interface. This advanced IDE controller supports faster
data transfer, PIO mode 3, mode 4 and up to UDMA33/66.
2.5.1 Connecting the Hard Drive
Connecting drives is done in a daisy-chain fashion. This package includes One
44PIN IDE cable that can connect to 1.8" and 2.5" drives.
1. Connect one end of the cable to Hard Drive connector. Make sure that the red
(or blue) wire corresponds to pin 1 on the connector, which is labeled on the
board (on the right side).
2. Plug the other end of the cable into the Enhanced IDE hard drive, with pin 1 on
the cable corresponding to pin 1 on the hard drive. (See your hard drive’s docu-
mentation for the location of the connector.)
If desired, connect a second drive as described above.
Unlike floppy drives, IDE hard drives can connect to either end of the cable. If you
install two drives, you will need to set one as the master and one as the slave by
using jumpers on the drives. If you install only one drive, set it as the master.
open closed closed 2-3
open
closed closed 2-3