FPM-2150G Series Flat Panel Monitor with 15" Color TFT/LCD Display User's Manual
Copyright Notice This document is copyrighted by Advantech Co., Ltd. All rights are reserved. Advantech Co., Ltd. reserves the right to make improvements to the products described in this manual at any time. Specifications are thus subject to change without notice. No part of this manual may be reproduced, copied, translated, or transmitted in any form or by any means without the prior written permission of Advantech Co., Ltd. Information provided in this manual is intended to be accurate and reliable.
FCC Class B This equipment has been tested and found to comply with the limits for a Class B digital device, pursuant to Part 15 of the FCC Rules. These limits are designed to provide reasonable protection against harmful interference when the equipment is operated in a residential environment. This equipment generates, uses and can radiate radio frequency energy. If not installed and used in accordance with this user's manual, it may cause harmful interference to radio communications.
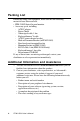
Packing List Before installing your equipment, make sure that the following materials have been received: • FPM-2150G Series flat panel monitor • Accessory pack, including: - AC/DC adapter - Power Chord - Video signal cable, 1.8m - Keyboard/mouse Y cable - AC/DC power adapter bracket - Hook wall-mounted bracket (in FPM-2150G) - Four fixed panel-mounted bracket - Mounting bracket (in FPM-2150G) - RS-232 cable, 1.8m (FPM-2150G-R only) - Keyboard/mouse 1.
Safety Instructions 1. Read these safety instructions carefully. 2. Keep this User's Manual for later reference. 3. Disconnect this equipment from any AC outlet before cleaning. Use a damp cloth. Do not use liquid or spray detergents for cleaning. 4. For plug-in equipment, the power outlet socket must be located near the equipment and must be easily accessible. 5. Keep this equipment away from humidity. 6. Put this equipment on a reliable surface during installation.
Wichtige Sicherheishinweise 1. Bitte lesen sie Sich diese Hinweise sorgfältig durch. 2. Heben Sie diese Anleitung für den späteren Gebrauch auf. 3. Vor jedem Reinigen ist das Gerät vom Stromnetz zu trennen. Verwenden Sie Keine Flüssig-oder Aerosolreiniger. Am besten dient ein angefeuchtetes Tuch zur Reinigung. 4. Die NetzanschluBsteckdose soll nahe dem Gerät angebracht und leicht zugänglich sein. 5. Das Gerät ist vor Feuchtigkeit zu schützen. 6.
Contents Copyright Notice ................................................................................... ii Packing List ......................................................................................... iv Additional Information and Assistance ............................................... iv Safety Instructions ................................................................................ v Wichtige Sicherheishinweise .............................................................
Figures Figure 1-1: Dimensions ................................................................................. 6 Figure 2-1: Wall Mounting .............................................................................. 8 Figure 2-2: Panel Mounting ........................................................................... 9 Figure 2-3: Rack mounting ............................................................................ 9 Figure 2-4: Desktop Stand for the VOP-1150 series ..............................
Tables Table A.1 Supported Input Formats ............................................................
CHAPTER Introduction This chapter includes: • Introduction • Specifications • LCD Specification • Power Consumption • Connectors • Dimensions 1
1.1 Introduction Advantech's FPM-2150G Series is a 15" color TFT LCD flat panel monitor built specifically for industrial applications. With the optional touchscreen, the FPM-2150G Series is an excellent and user-friendly system control interface. In addition to its usual application as an LCD panel monitor, the FPM-2150G comes standard with direct VGA control signal input making it compatible with Industrial PCs and Workstations.
• CE, FCC, BSMI, CCIB compliant Touchscreen (Optional) • Type: 8 wire, analog resistive • Resolution: continuous • Light transmission: 75% (surface meets ASTM-D-3363-92A Standard, tabler abrasion test) • Controller: RS-232 interface • Power Consumption: +5 V @ 200 mA • OS support: Windows 95/98, Windows NT/2000/XP, MS-DOS • Life span: 100 million touches 1.3 LCD Specification • • • • • • • • • • Display type: XGA TFT- LCD Display size: 15" Max. colors: 262 K Max.
1.5 Connectors The following connectors are situated on the buttom of the FPM-2150G Series: VGA Port (DB-15) This DB-15 connector can be connected to the system via the external 15-pin DB-15 connector locatd on the left side of the system unit. Keyboard & mouse Connector (PS/2) There are two PS/2 connectors which can ne connected to keyboard or mouse. Touchscreen Connector (DB-9) (optional) This connector will be present only if a touchscreen is installed.
1.5.1 PS/2 connectors The FPM-2150G provides two PS/2 connectors in the buttom side. Please follow the steps to connect the keyboard /mouse cable. 1. Connect 1.8m keyboard/mouse cable to one of the PS/2 port. 2. Connect other side of Keyboard/mouse 1.8m cable to PC 3. Connect Y cable to another PS/2 port in FPM-2150G Note: You MUST select one PS/2 port to connect 1.8m cable to PC. Keyboard/mouse 1.
Unit: mm 1.6 Dimensions Cut out dimension : 373.5x297.5 mm (14.7" x 11.71") VOP-1150TV (15") 372.60 [14.67] 270.59 [10.65] 382.95 [15.08] 307.00 [12.09] 29.00 [1.14] 48.13 [1.89] 15.00 [0.59] 215.10 [8.47] 296.60 [11.68] 75.00 [2.95] 100.00 [3.94] 75.00 [2.95] 100.00 [3.
CHAPTER 2 System Setup • Mounting the Monitor - Wall/Panel mounting - Desktop Stand/Swing-ARM Mounting
2.1 Mounting the Monitor The FPM-2150G Series can be placed as you require. The versatility of the FPM-2150G mounts enable it to be mounted on your desk or anywhere else. 2.1.1 Wall Mounting Please follow the steps to install FPM-2150G in the wall. 1. Screw the wall-mount bracket in the wall. 2. Put the FPM-2150G in the bracket. 3.
2.1.2 Panel Mounting If you need to install the FPM-2150G series on a panel mount, please release the mounting brackets by detaching screws on rear side and fix them on up and bottom side by screws. Figure 2-2: Panel Mounting 2.1.3 Rack Mounting FPM-2150G series can be directly mounted in a standard 19" rack.
2.2 Desktop, Swing-ARM for FPM-2150G The FPM-2150G Series can be mounted in other ways. You can place the desktop stand for desktop use or attach it on a swing-arm bracket. 2.2.1 Desktop Stand The desktop stand bracket is attached to the rear of the FPM-2150G. Simply detach the small bracket at the rear side of the monitor by screwing the two screws. The bracket now becomes the desktop stand bracket.
2.2.2 Swing-ARM 75 100 Detach the mounting brackets on the rear side, then attach the FPM-2150G series onto the Swing-ARM mount.
2.2.3 Power adapter The power adapter bracket is attached to the rear of the FPM-2150G. Simply detach the small bracket at the rear side of the monitor by screwing the four screws.
Note: If you find that the brightness of LCD is dark, please follow the steps to adjust it. 1. Find the OSD in the rear side of FPM-2150G 2. Press two buttons, " " & " " , at the same time. 3. The LCD will reset and get brighter.
APPENDIX A Display Timing Mode and OSD
A.1 Supported Input Timing Modes The nineteen kinds of timings below are already programmed in this module. The input synchronous signals are automatically recognized. Table A.1: Supported Input Formats Vertical Frequencies Resolution 56 Hz 60 Hz Yes Yes Yes Yes Yes Yes Yes 640 x 480 800 x 600 1024 x 768 Yes 70 Hz Yes 72 Hz 75 Hz Yes Note 1: Even if the preset timing is entered, a little adjust-ment of the functions such as Horizontal period, CLK-delay and display position, are required.
A.2 Keypad Interface The keypad interface provides driver for a dual color LED for status indication. AUTO Press this button to execute auto adjustment process. SEL Presses to show the OSD screen or select an item for changing its setting. To move between items or increase item setting. EXIT To close the selected item or the whole OSD screen. ON/OFF Turn the display backlight ON and OFF. PS, The green light means that the COMMON board detects the input signal and ends output signal to LCD panel .
A.3 OSD Function Each selected value is stored into LCD memory after SEL signal input or time out. The stored values are not affected if the power is turned off. But the selected value is not available in case a selected mode is changed before time out or power is turned off before time out.