FPM-3151G Series 15" XGA Industrial Monitor with Resistive Touchscreen, DirectVGA, DVI and Wide Operating Temperature User Manual
Copyright Notice This document is copyrighted by Advantech Co., Ltd. All rights are reserved. Advantech Co., Ltd. reserves the right to make improvements to the products described in this manual at any time. Specifications are thus subject to change without notice. No part of this manual may be reproduced, copied, translated, or transmitted in any form or by any means without the prior written permission of Advantech Co., Ltd. Information provided in this manual is intended to be accurate and reliable.
Product Warranty (2 years) Advantech warrants to you, the original purchaser, that each of its products will be free from defects in materials and workmanship for two years from the date of purchase. This warranty does not apply to any products which have been repaired or altered by persons other than repair personnel authorized by Advantech, or which have been subject to misuse, abuse, accident or improper installation.
FCC Class A Note: This equipment has been tested and found to comply with the limits for a Class A digital device, pursuant to part 15 of the FCC Rules. These limits are designed to provide reasonable protection against harmful interference when the equipment is operated in a commercial environment. This equipment generates, uses, and can radiate radio frequency energy and, if not installed and used in accordance with the instruction manual, may cause harmful interference to radio communications.
. Keep this equipment away from humidity. 6. Put this equipment on a reliable surface during installation. Dropping it or letting it fall may cause damage. 7. The openings on the enclosure are for air convection. Protect the equipment from overheating. DO NOT COVER THE OPENINGS. 8. Make sure the voltage of the power source is correct before connecting the equipment to the power outlet. 9. Position the power cord so that people cannot step on it. Do not place anything over the power cord. 10.
FPM-3151G User Manual vi
Contents Chapter 1 Introduction ..................................................... 2 1.1 1.2 1.3 1.4 1.5 1.6 1.7 Chapter Introduction ....................................................................... 2 Specifications .................................................................... 2 LCD Specifications ........................................................... 3 Power Consumption .......................................................... 3 Environment ........................................
C.2.9 C.2.10 C.2.11 C.2.12 C.2.13 FPM-3151G User Manual Auto Configuration Menu ............................................ 30 Mode Information Menu .............................................. 31 Memory Recall Menu .................................................. 32 Exit Menu .................................................................... 33 Hot Keys ......................................................................
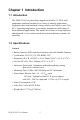
CHAPTER 1 2 Introduction This chapter includes: • Introduction • Specifications • LCD Specification • Power Consumption • Connectors • Dimensions
Chapter 1 Introduction 1.1 Introduction The FPM-3151G is a particularly rugged and reliable 15” XGA wide temperature industrial monitor for a variety of industry applications. Equipped with a hard anodized coating, stainless steel chassis, and -20 to 60° C operating temperature, it can satisfy demands in a wide range of harsh industrial applications. This model also features a strong capacitor, and enhanced 5-wire resistive touch and system isolation to enhance the reliability. 1.
Touchscreen (Optional) • Sensor: AMT • Driver: Penmount 6000 • Type: 5-wire resistive with enhanced ITO film • Interface: USB & RS-232 (Combo) • Life Span: 36 million with a silicone rubber of R8 finger, writing rate is by 250g at 2 times/s • Light Transmission: > 80% • Driver Support: Windows 7 / XP / Vista / XPE / CE, Linux • Power Consumption: +5 V @ 100 mA • Touch Resolution: Linearity 1.3 LCD Specifications • Display Type: XGA TFT LCD • Backlight Type: LED • Display Size: 15” • Max.
1.5 Environment • Operation Temperature: -20 ~ 60°C (-4 ~ 140°F) • Storage Temperature: -30 ~ 80°C (-22 ~ 176°F) • Relative humidity: 10 ~ 95% non-condensing • Waterproof: Front panel NEMA4/IP65 compliant • Shock: 11ms, 10G (Non Operating, Half Sine Wave) • Vibration: 5 ~ 500 Hz, 1 Grms (Operating, Random) 1.
1.7 Dimensions M3 M3 M3 M3 422.00 [16.61] 310.00 [12.20] 36.00 [1.42] 60.00 [2.36] M3 M3 M3 M3 10.00 [0.39] 390.00 [15.35] 75.00 [2.95] 100.00 [3.94] Chapter 1 5 70.00 [2.76] M4 Depth=8mm M4 Depth=8mm M4 Depth=8mm M4 Depth=8mm M4 Depth=8mm M4 Depth=8mm M4 Depth=8mm M4 Depth=8mm 290.00 [11.42] 75.00 [2.95] 100.00 [3.94] Figure 1.
FPM-3151G User Manual 6
CHAPTER 2 Mounting • Wallmounting • Panel Mounting • Rack Mounting • Desktop Mounting • Swing Arm Mounting 2
Chapter 2 Mounting 2.1 Mounting the Monitor The FPM-3151G Series can be mounted in many different ways. The versatility of the FPM-3151G mounts enable it to be mounted on your desk or anywhere else. 2.1.1 Wallmounting (Optional) FPM-3151G can be mounted directly on a wall with panel mounting brackets. Customers must order the stand kit for FPM-3151G (Part Number: FPM-2150G-SMKE). Please refer to figure 2-1 and follow the following steps to mount FPM-3151G on a wall: 1.
2.1.2 Panel Mounting FPM-3151G can be mounted directly on a panel with additional mounting brackets. Please refer to figure 2-2 and follow the following steps: 1. Fix 10pcs panel bracket around the industrial monitor 2. Fix into the panel by screw the bracket Figure 2.
2.1.3 Rack Mounting (Optional) If you need to install the FPM-3151G on a rack, you must order the rack mount kit for FPM-3151G (Part Number is FPM-3151G-RMKE). Attach the rack mounting brackets on FPM-3151G with the screws, then affix the monitor in the rack. Figure 2.
2.2 Desktop, Swing-ARM for FPM-3151G The FPM-3151G Series can be mounted in other ways, such as desktop and swing-arm. 2.2.1 Desktop Stand (Optional) FPM-3151G can be mounted as stand in the desk directly by a additional mounting brackets. Customers must order the stand kit for FPM-3151G (Part Number: FPM-2150G-SMKE). Please refer to figure 2-4 and follow these steps: Figure 2.
2.2.2 Swing Arm (VESA Compliant) FPM-3151G has been designed with support for the VESA Arm standard. Refer to figure 2.5. Supports both 75mm and 100mm VESA dimension. Figure 2.
APPENDIX A SXGA2 Touchscreen
Appendix A Touchscreen A.1 Introduction The FPM-3151G Series optional touchscreen uses advanced 5-wire resistive technology. It provides more accurate sensing capacity than other technologies. The touchscreen is specially designed for tough industrial environments, and has been approved to FCC Class B standards. Note: If RS-232 or USB touchscreen are used at the same time, only the USB touchscreen will be available. A.2 Touchscreen Specifications 1. Input Method and Activation Force 16mm dia.
4. Linearity 4.1 Linear Test Specifications Direction X: <1.5 % Direction Y: <1.5 % 4.2 Linearity Test Apply voltage (DC5V) to upper (or lower ) electrodes, output voltage Vx or Vy on the other electrodes is measured at every regular intervals. Linearity is the value of max.
A.3 Installing Driver for Windows OS The touchscreen has drivers for Windows 2000/XP/Vista. You should read the instructions in CD-ROM Disk Touchscreen section carefully before you attempt installation. The FPM-3151G-R3AE needs to install the Penmount 6000 driver. Please find the Penmount 6000 folder and install the driver into your system. Note 1: The driver manual are examples only. You must follow the flow chart instructions and pay attention to the instructions which then appear on your screen.
B APPENDIX 2 Setting Serial Data for Expansion
Appendix B Setting Serial Data for Expansion B.1 Setting Serial Data for Expansion The twelve kinds of timings below are already programmed in this module. The input synchronous signals are automatically recognized.
C APPENDIX 2 OSD Operation Keypad
Appendix C OSD Operation Keypad C.1 OSD Board Overview The OSD keypad, including six keys and a two color indicator, is designed as the OSD operation interface. Note: This sheet is only for reference, different models will has different styles, but the functionality is the same. C.1.1 OSD Button Description Buttons Descriptions Power Auto/Exit Turn the monitor power ON or OFF. Automatically adjust the clock, phase, H-position and V-position. Exit menu. Activate the volume control.
C.2 OSD Key Functions Each selected value is stored into LCD memory after SEL signal input or time out. The stored values are not affected if the power is turned off. But the selected value is not available in case a selected mode is changed before time out or power is turned off before time out. TIME OUT 5-6 seconds ( Can be set in OSD Manager) The default definition of input keys is shown as following: C.2.
C.2.2 Input Source Select • Generate Main Menu Select by Left and Right Button, press Menu Button for selection confirmation • Main Menu -- DISPLAY IN SCREEN • Sub-Menu – DISPLAY IN SCREEN • Available Key Functions Power Off the LCD Monitor Increase the gauge value of the selected option. Return to last menu Selected to confirm Decrease the gauge value of the selected option.
4. Auto Select Input • ON start from default setting and scan the inputs by following sequence from ANALOG INPUT, DIGITAL INPUT, S-VIDEO INPUT, and CVBS INPUT. • OFF start from default setting C.2.
• Available Key Functions Power Off the LCD Monitor Increase the gauge value of the selected option. Return to last menu Selected to confirm Decrease the gauge value of the selected option. N/A RECALL VALUE – User Define • Rec1 Pressed to record 1st setting as recall value followed by current screen setting • Rec2 Pressed to record 2nd setting as recall value followed by current screen setting • Recall Switch the setting change by Rec1 and Rec2 while pressed C.2.
• Available Key Functions Power Off the LCD Monitor Increase the gauge value of the selected option. Return to last menu Selected to confirm Decrease the gauge value of the selected option.
C.2.5 Color Temperature Menu • Generate Main Menu Select by Left and Right Button, press Menu Button for selection confirmation • Main Menu -- DISPLAY IN SCREEN • Sub-Menu – DISPLAY IN SCREEN • Available Key Functions Power Off the LCD Monitor Increase the gauge value of the selected option. Return to last menu Selected to confirm Decrease the gauge value of the selected option.
C.2.
• Available Key Functions Power Off the LCD Monitor Increase the gauge value of the selected option. Return to last menu Selected to confirm Decrease the gauge value of the selected option. N/A Customization setting for RGB colors C.2.
• Available Key Functions Power Off the LCD Monitor Increase the gauge value of the selected option. Return to last menu Selected to confirm Decrease the gauge value of the selected option. N/A C.2.
• Available Key Functions Power Off the LCD Monitor Increase the gauge value of the selected option. Return to last menu Selected to confirm Decrease the gauge value of the selected option. N/A C.2.
• Available Key Functions Power Off the LCD Monitor Increase the gauge value of the selected option. Return to last menu Selected to confirm Decrease the gauge value of the selected option. N/A Auto configuration can be set in menu and also can press the without any menu indication. C.2.
• Available Key Functions Power Off the LCD Monitor Increase the gauge value of the selected option. Return to last menu Selected to confirm Decrease the gauge value of the selected option. N/A C.2.
• Available Key Functions Power Off the LCD Monitor Increase the gauge value of the selected option. Return to last menu Selected to confirm Decrease the gauge value of the selected option. N/A C.2.
• Available Key Functions Power Off the LCD Monitor Increase the gauge value of the selected option. Return to last menu Selected to confirm Decrease the gauge value of the selected option. N/A C.2.
• Entry OSD UNLOCK MODE • Press HOT KEY, the screen will show this action first • Don’t remove the HOT KEY until the screen indicated this task is finished.
FPM-3151G User Manual 36