
User's Manual


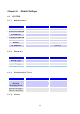
Table Of Contents
- _
- Chapter 1. Introduction
- 1.1 Introducing the EKI-6311g
- 1.2 Product Features
- 1.3 Package Contents
- 1.4 System Requirements
- 1.5 Inline Power Injector (PoE)
- Chapter 2. Installation and Basic Configuration
- 2.1 Before You Start
- 2.2 Locate the EKI-6311g and Inline Power Injector Ports
- 2.3 Preparing Installation
- 2.4 Basic Configuration
- 2.4.1 Logging into the Web Interface
- 2.4.2 Basic Configuration Steps
- 2.4.3 Set Operating Mode, IP Address, Subnet Mask, Default Route IP, DNS Server IP of EKI-6311G
- 2.4.4 Set Wireless SSID for Wireless Interface
- 2.4.5 Set Wireless Encryption for Wireless Interface
- 2.4.6 Change Supervisor Account & Password
- 2.4.7 pgrade the Firmware
- Chapter 3. Network Topologies
- Chapter 4. All function on Device
- Chapter 5. Specifications
- Chapter 6. Default Settings
- Chapter 7. Regulatory Compliance Information

4.5 SNMP
You can set the SNMP Com m unity and SNMP Trap sett ing here
4 .5 .1 Agent Se t t ings
SNMP Agent provides a sim ple protection. Access to t he SNMP device is
cont rolled through com m unity nam es. The com m unit y nam e can be
thought of as a password. I f you don't have t he correct com m unity nam e,
you can't retrieve any dat a ( get ) or m ake any change (set) . Mult iple
SNMP m anagers m ay be organized in a specified com m unit y. You can
change your SNMP com m unity set t ings on this screen. Check the
“ Enable” check box to t urn on SNMP daem on. Click APPLY t o com plet e
your change.
Re a d Only Com m unit y: Specify the nam e of com m unit y for read only
access.
Re a d W rit e Com m unit y: Specify the nam e of com m unit y for read and
writ e access.
Figure 4 - 1 4
4.6 EXIT
36