User Manual POC-S196 19” Slim Point-of-Care Terminal
Instructions for the User The document combines text and illustrations, providing a comprehensive overview of the system. The information is presented as sequential steps of action, allowing the user to learn directly how to use the device. The text provides explanations and instructs the user step-by-step in the practical use of the product, with short, clear instructions in easy-to-follow sequence.
Safety Instructions Strictly follow these instructions for use and please read them carefully. Keep this User's Manual for later reference. Any use of the product requires full understanding and strict observation of all portions of these instructions. Observe all WARNINGS and CAUTIONS as rendered throughout this manual and on labels on the equipment. Repair of the device may only be carried out by trained service personnel.
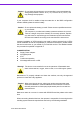
Caution! Do not leave this equipment in an uncontrolled environment where the storage temperature is below -20°C (-4°F) or above 60°C (140°F). This may damage the equipment. If your computer clock is unable to keep accurate time or the BIOS configuration resets to default, please check the battery. Caution! Do not replace the battery yourself. Please contact a qualified technician or your retailer. The computer is provided with a battery-powered real-time clock circuit.
EN 60601-1 (IEC 60601-1) Medical electrical equipment Part 1: General requirements for safety EN 60601-1-1 (IEC 60601-1-1) Medical electrical equipment Part 1-1: General requirements for safety Collateral standard: Safety requirements for Medical electrical systems EN 60601-1-2 (IEC 60601-1-2) Medical electrical equipment Part 1-2: General requirements for safety Collateral standard: Electromagnetic compatibility; Requirements and tests Accessory equipment connected to the analog and digital interfaces mus
! ! ! Increase the separation between the equipment and the receiver. Connect the equipment to a power outlet on a circuit different from that to which the receiver is connected. Consult the dealer or an experienced radio/TV technician for help. Warning! Any changes or modifications made to the equipment which are not expressly approved by the relevant standards authority could void your authority to operate the equipment.
Distributed in Europe by: Advantech Europe GmbH Kolberger Straße 7 D-40599 Düsseldorf, Germany Tel: 49-211-97477350 Fax: 49-211-97477300 Visit the Advantech websites at www.advantech.com or www.advantech.com.tw if you need more information.
POC-S196 User Manual viii
Contents Chapter 1 General Information ............................1 1.1 1.2 Introduction ............................................................................................... 2 Specifications ............................................................................................ 2 Table 1.1: Touchscreen Specification ......................................... 4 LCD Specifications.................................................................................... 5 Dimensions .............
6.2 Chapter 6.3 Installation of Touch Panel Driver ........................................................... 30 6.2.1 Installation for Windows XP ........................................................ 30 Further Information ................................................................................. 34 7 Utilities and Hot Fixes ...................... 35 7.1 7.2 Introduction .............................................................................................
Chapter 1 1 General Information Sections include: ! Introduction ! Specifications ! LCD Specifications ! Dimensions
1.1 Introduction The POC-S196 is a multimedia Intel® CoreTM Duo Mobility processor-based computer that is designed to serve as a Point-of-Care terminal (POC.) It is a PC-based system with 19" color TFT LCD display, Single DVI-I Port, Dual on-board 10/100/ 1000 Ethernet port, Single COM port, Quad USB 2.0 port and a 24-bit stereo audio controller. With a built-in 2.5” HDD drive, the POC-S196 is as slim and user-friendly as a notebook computer, and generates low audible noise.
POC-S196 User Manual General Information 3 Chapter 1 Display interface ! SDVO interface: Chrontel 7307C Single channel DVI transmitter to support External Single display ! Display resolution: Supports 24 bits digital output (DVI-I port) resolutions up to 1600 x 1200 at 60 Hz ! Graphic chipset: Intel® Graphics Media Accelerator 950 engine ! Shared memory: Dynamic Video Memory Technology (DVMT) 3.0 to dynamically allocate up to 224 MB of system memory for graphics usage.
Touchscreen (optional) Table 1.1: Touchscreen Specification Type Analog Resistive Resolution Continuous Light Transmission 75% Controller RS-232 interface (uses COM3) Power Consumption +5V@200 Ma Software Driver Supports Windows 2000,Windows XP Durability (touches in a lifetime) 30 million Note! The Point-of-Care Terminal with the optionally installed touchscreen will share COM3. Once the touchscreen is installed, COM3 cannot be used for other purposes.
Display type: 19" TFT LCD. Resolution: 1280 x 1024 Colors: 16.7 M (8 bits/color) Dot size (mm): 0.294 x 0.294 Viewing angle: 178° x 178° ! ! ! ! Luminance: 300 cd/m2 Contrast ratio: 1300 : 1 LCD MTBF: 50,000 hours Backlight lifetime: 50,000 hours General Information ! ! ! ! ! Chapter 1 1.3 LCD Specifications 1.4 Dimensions 471.5 100 75 149.9 75 100 416.2 110.9 Figure 1.
POC-S196 User Manual 6
Chapter 2 2 System Setup Sections include: ! A Quick Tour of the POC-S196 ! Installation Procedures ! Running the BIOS Setup Program ! Installing System Software ! Installing the Drivers
2.1 A Quick Tour of the POC-S196 Before you start to set up the POC-S196, take a moment to become familiar with the locations and purposes of the controls, drives, connections and ports, which are illustrated in the figures below. When you place the POC-S196 upright on the desktop, its front panel appears as shown in Figure 2.1. Read Light Control Brightness Increase/Decrease Function Volume Up/Down Touchscreen Status Control Touchscreen Light Indicator Power Switch Figure 2.
Chapter 2 Turn the Point-of-Care Terminal around to look at its rear cover. The sunken I/O section is at the bottom of the panel PC, as shown in Figure 2.2. (The I/O section includes various I/O ports, including serial ports, DVI port, Ethernet port, USB ports, DC power adapter jack, and so on.) System Setup Figure 2.
2.2 Installation Procedures 2.2.1 Connecting the Power Cord The POC-S196 can only be powered by a DC power adapter (SINPRO Model No MPU100-107). Always handle the power cords by holding the plug ends only. Follow these procedures in order: 1. Connect the male end of the power adapter to the DC jack of the panel PC. (See Figure 2.3.) 2. Connect the female end of the power cord to the DC power adapter. 3. Connect the 3-pin male plug of the power cord to an electrical outlet. Figure 2.
2.4 Installing System Software Recent releases of operating systems from major vendors include setup programs which load automatically and guide the user through hard disk preparation and operating system installation. The guidelines below will help in determining the steps necessary to install the operating system on the panel PC hard drive. Note! Some distributors and system integrators may have already preinstalled system software prior to shipment of the panel PC.
2.5 Installing the Drivers After installing the system software, you will be able to set up chipset, graphics, ethernet, audio and touchscreen functions from an external CD-ROM drive. All drivers except that for the CD-ROM drive are stored on a CD-ROM disc titled "Drivers and Utilities." The standard procedures for installing the chipset, graphics, audio and ethernet drivers are described in Chapters 3, 4, 5, and 6 respectively.
Chapter 3 3 Chipset and Graphics Setup Sections include: ! Introduction ! Installation of Chipset Driver
3.1 Introduction The POC-S196 has an onboard display interface. The specifications and features are described below: 3.1.1 Chipset The POC-S196 uses a Mobile Intel® 945GME Express chipset for its graphic controller. It supports an SDVO device, and CRT monitors. The Mobile Intel® 945GM Express Chipsets are designed for use with Intel’s next generation mobile platforms: Intel® Centrino® Duo processor technology. The Mobile Intel 945 Express Chipset Family come with a Generation 3.
Complete the following steps to install the Chipset driver. Follow the procedures in the flow chart that apply to the operating system that you are using with your POCS196. The following Windows illustrations are examples only. You must follow the flow chart instructions and pay attention to the instructions which appear on your screen. Note! The CD-ROM drive is designated as “D” throughout this chapter. Note! means pressing the “Enter” key on the keyboard.
3.2.1 Installation for Windows XP Step1.1. Double Click “Setup.exe” in the D:\Driver\Chipset\ folder. The Install dialog will appear. Step 1.2. Click “Next” to continue. Step 1.3. Read the ‘License Agreement’ and click “Yes” to proceed.
17 POC-S196 User Manual Chipset and Graphics Setup Step 1.5. When the ‘Installation is Complete’ message appears, click 'Finish' to restart your computer. Chapter 3 Step 1.4. Read the ‘Readme’ file information and click “Next” to proceed.
Step 2.1. Double Click “Setup.exe” in the D:\Driver\GRAPHICS folder. The Install dialog will appear. Step 2.2. Click “Next” to continue. Step 2.3. Read the ‘License Agreement’ and click “Yes” to proceed.
Step 2.6. When the ‘Setup Is Complete’ message appears click “Finish” to restart your computer. 19 POC-S196 User Manual Chipset and Graphics Setup Step 2.5. When the ‘Click Next to continue’ message appears click “Next” to proceed. Chapter 3 Step 2.4. Read the ‘Readme’ file information and click “Next” to proceed.
POC-S196 User Manual 20
Chapter 4 4 Audio Interface Sections include: ! Introduction ! Installation of Audio Driver ! Further Information
4.1 Introduction The POC-S196's onboard audio interface provides high-quality stereo sound by using the ALC888 audio controller from Realtek. The ALC888 series are high performance 7.1+2 channel High Definition Audio Codecs providing ten DAC channels that simultaneously support 7.1 sound playback, plus 2 channels of independent stereo sound output (multiple streaming) through the front panel stereo outputs.
Step 1.1. Double Click “Setup.exe” in the D:\Driver\AUDIO folder. The Install dialog will appear. Step 1.2. Click “Next” to continue. The install program will install the driver and utilities. It will take some time to process. Chapter 4 4.2.
Step 1.3. When the ‘InstallShield Wizard Complete’ message appears click “Finish” to restart your computer. 4.3 Further Information For further information about the audio interface installation on your POC-S196, including driver updates, troubleshooting guides and FAQ lists please visit the following web resources: Realtek website: www.realtek.com.tw Advantech websites: www.advantech.com www.advantech.com.
Chapter 5 5 PCI Express Ethernet Interface Sections include: ! Introduction ! Installation of Ethernet Driver ! Further Information
5.1 Introduction The POC-S196 is equipped with a high performance PCIe Ethernet chipset, the Realtek RTL8111B which is fully compliant with IEEE 802.3 10/100/1000 Mbps standards. The Ethernet port provides a standard RJ-45 jack. 5.2 Installation of the Ethernet Driver 5.2.1 Installation for Windows XP Step 1.1. Double Click “Setup.exe” in the D:\Driver\ETHERNET folder. The Install dialog will appear. Step 1.2. Click “Next” to continue.
27 POC-S196 User Manual PCI Express Ethernet Interface Step 1.4. When the ‘InstallShield Wizard Complete’ message appears click “Finish” to finish the install program. Chapter 5 Step 1.3. Click “Install” to continue. The install program will install the driver. It will take some time to process.
5.3 Further Information For further information about the installation on your POC-S196, including driver updates, troubleshooting guides and FAQ lists please visit the following web resources: Realtek website: www.realtek.com.tw Advantech websites: www.advantech.com www.advantech.com.
Chapter 6 6 Touch Panel Interface Sections include: ! Introduction ! Installation of Touch Panel Driver ! Further Information
6.1 Introduction The POC-S196 is supported with a system-integrated touch panel. The touch panel controller is controlled by the COM3 interface. 6.2 Installation of Touch Panel Driver 6.2.1 Installation for Windows XP Step 1.1. Double click “Setup.exe” in the D:\Driver\TOUCHSCREEN folder. The Install dialog will appear. Step 1.2. Click “Next” to continue.
Chapter 6 Step 1.3. Click “Next” to continue. Since the POC-S196’s touch controller is controlled by COM3, please do not select the ‘Install PS/2 interface driver’. Touch Panel Interface Step 1.4. Click “Next” to continue. Please select “None” for ‘Do 4 point calibration’, the driver install program will do this four point calibration when the install is complete.
Step 1.5. Click “Next” to continue. Please select “Support Multi-Monitor System”. Step 1.6. Click “Next” to continue. If you want to change the driver destination folder, you can click the “Browse” button to change the folder.
Chapter 6 Step 1.7. Click “Next” to continue. Touch Panel Interface Step 1.8. Click “Yes” to continue. The install program will search the touchscreen controller to find it on COM3.
Step 1.9. Click “Yes” to continue. Please do the four point calibration to calibrate the touch screen. Step 1.10. Touch the “X” once at each of the four corners when it appears on the panel. Touch each “X” icon until the icon stops blinking. 6.3 Further Information For further information about the installation on your POC-S196, including driver updates, troubleshooting guides and FAQ lists please visit the following web resources: Advantech websites: www.advantech.com www.advantech.com.
Chapter 7 7 Utilities and Hot Fixes Sections include: ! Introduction ! Wakeup by External USB Device at S3 Resume (Wakeup) ! Window Audio Volume Application
7.1 Introduction The POC-S196 system needs specific utilities or hot fixes to support special functions. 7.2 Wakeup by External USB Device at S3 Resume (Wakeup) The POC-S196 supports three different sleep (suspend) modes; they are: 1. S1: Power On Suspend: The system will stop the clock, turn off the LCD backlight, but keep all power on. Users can press any key (by mouse or keyboard) to wakeup the system. 2.
Chapter 8 8 Operation Information Sections include: ! Plug in the Power Adapter ! Thermal Information ! Disconnect the Power ! General Safety Guide
8.1 Plug in the Power Adapter Always leave space around the power adapter. Do not use this equipment in a location where airflow around the power adapter or computer is confined. Always disconnect the power adapter before opening the computer to perform procedures such as installing memory or removing the hard disk. Warning! Use only the power adapter that came with the POC-S196 system. Adapters for other electronic devices may look similar, but they may damage your computer. 8.
39 POC-S196 User Manual Operation Information For your own safety and that of the equipment, always take the following precautions.
POC-S196 User Manual 40
Appendix A Description of Connectors A
A.1 Description of Connectors 19 18 17 1 16 15 14 2 3 4 13 21 20 22 12 5 6 7 8 9 10 11 Figure A.
28 29 26 35 23 25 32 30 31 24 33 34 Figure A.
Table A.1: Description of Connector No. Description No. Description 1 CPU FAN (Reserved) 18 2 DDR 2 S.O.
Appendix B B Windows Display Hot Key Function
B.1 Windows Display Hot Key Function If a user wants to switch the display content to a different display device, such as: 1. Internal LCD Panel (Notebook) 2. External CRT Monitor (Monitor) 3. External DVI Monitor (Digital Display) the user can press the hot key defined below to switch the display device:.
Appendix B Windows Display Hot Key Function POC-S196 User Manual 47
www.advantech.com Please verify specifications before quoting. This guide is intended for reference purposes only. All product specifications are subject to change without notice. No part of this publication may be reproduced in any form or by any means, electronic, photocopying, recording or otherwise, without prior written permission of the publisher. All brand and product names are trademarks or registered trademarks of their respective companies. © Advantech Co., Ltd.