
User's Manual


AWCBX400 UHF Call Box
Owners Manual
Version 12.3.7
Copyright © 2012, Advanced Wireless Communications, All Rights Reserved
AWCBX400 Owner Manual Part Number: 4208-5521-5631
- 6 -
Basic setup programming
The AWCBX400 comes from the factory without any voice prompts. You will need to program each prompt into the Call
Box using the back panel switches and microphone. You can record audio and “upload” the audio via the external
programming jack if you wish. With the external jack you can use voice prompts created by computer.
First, insure that you have new batteries of the proper type inserted into the battery pack in location (A) on figure 2.
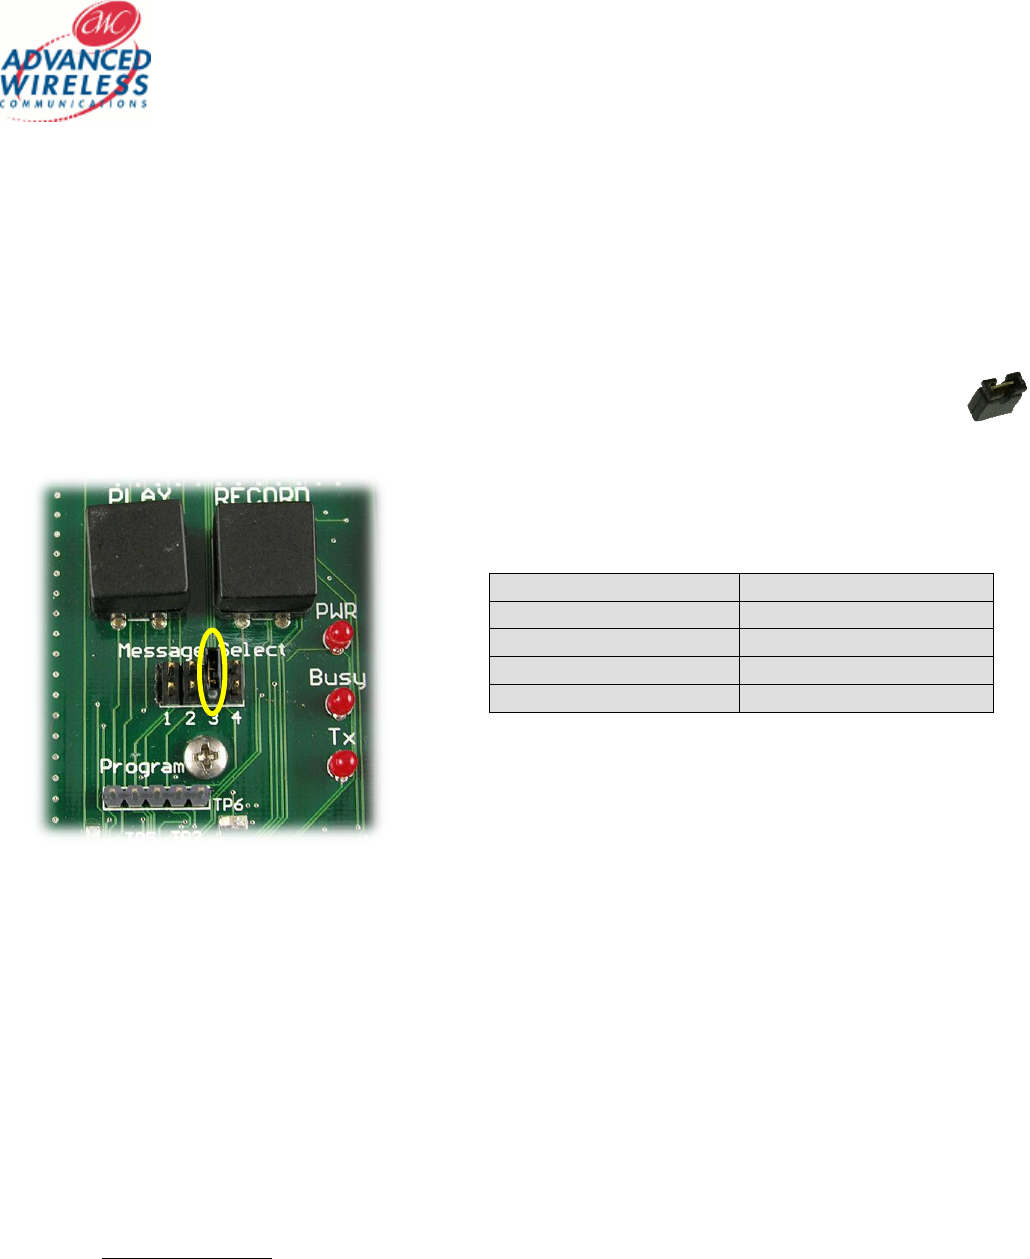
Next, locate the desired Message Selection jumpers from Table 2 below. Using the single jumper,
connect the jumper vertically over the pins for the message selected as shown in Figure 3.
Voice Programming Jumpers (F)
Jumper Position
Message
1
Relay Alarm Message
2
Relay Cancel Message
3
Call Button Message
4
Call Button Cancel
Table 2
With the jumper selected, press and hold the RECORD button, the red BUSY LED will light indicating recording is enabled.
Speak into the built-in microphone (“B” in Figure 2); release the RECORD button when finished. If you speak too long
you will hear two beeps and the red BUSY LED will go out. You are allowed approximately 60 seconds recording time
total for all 4 recordings. If you are not using the external activation device, you have 60 seconds between 2 recordings.
Example: Message 1 – 23 seconds
Message 2 – 37 seconds <Memory Full>
Message 3 – Not Used
Message 4 – Not Used
When finished recording, press the PLAY button once to verify the selected recording. When finished with all
recordings, remove the jumper or store it on just 1 pin of the row of pins in the message selection jumper block. This will
prevent changes in voice message caused from an accidental touch of the record button.
Figure 3