
User Manual

Epoch-HP RF Repeater
User Manual V1.1
Advanced RF Technologies, Inc. Proprietary Document Page 14 of 36
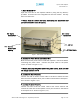
5. Connect the USB Cable
Using the USB cable (included in the box), connect one end of the cable to
the Epoch-HP’s USB port located on the bottom of the repeater (# 4 -
Figure 3) and the other end to the laptop’s USB port.
6. Connect the Back-Up Battery (Optional)
If a back-up battery is needed, please connect it to the power supply
located inside the repeater. You can pass the back-up battery power
cable through the opening as shown in Figure 3 (# 5).
7. Turn On the Power for Epoch-HP
Make sure that the donor and server antennas and the power cable are
securely connected to the correct ports. Turn the power switch on,
located inside the repeater.
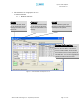
8. Launch the Epoch-H V1.X Program
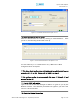
Open the Epoch-H V1.X program. You will see the Status Window.
** Please make sure that both communication status LEDs, the TX and the
RX on the bottom of the window, are blinking periodically. A green
blinking TX LED indicates that the data is being transmitted from the PC
to the Epoch-HP. A green blinking RX LED indicates that the data is
being retrieved from the Epoch-HP to the PC.
** For more detailed information on the Epoch-H V1.X, please refer to
Section 3 on page 15.
** If either the TX or the RX status LED is not blinking, check if the USB
driver has been installed. For more information, refer to Section 5,
“Troubleshooting” on page 29.
** Before proceeding to the next step, please close the cabinet door (do
not lock) at this time in order to avoid inadvertent RF feedback going
inside the repeater.”
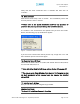
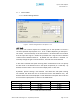
9. Go to the Install Window
Now with the blinking TX and RX status LEDs on the Status Window, go to
the Install Window. You will see the following: