
User guide


WEB Connect for Pocket PC page 2
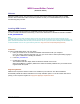
Launching WEB Connect
After installation, WEB Connect will be installed in the Programs Directory. To launch WEB Connect for the first
time,
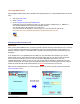
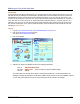
1. Click on the Start Menu.
2. Select Programs.
3. In the Programs Directory, select WEBConnect
Depending on how your Pocket PC is setup, you may not see the complete title (i.e., WEBConn…).
This will launch WEB Connect and start the activation process.
You may also want to all a shortcut to your Menu bar.
See your Pocket PC documentation on how to do this, or visit the Pocket PC web site at:
http://www.microsoft.com/MOBILE/developer/technicalarticles/shortcuts1.asp
WEBConn…
Activating a Merchant Account
Introduction
When you first launch WEB Connect, you will be required to activate at least one merchant account. To do this,
you must submit your Merchant Account paperwork in order to be issued a Merchant ID and password. In
addition, activation requires a serial number that is located on the inside flap of the Product Guide (Account
Activation).
If you already sent in your application and are waiting for your Merchant ID and password, you can still
activate a test account. This tutorial shows the test account 10600, but your can also use the test account
10011. This account will allow you to try most of the features that WEB Connect has to offer. It is
recommended however, that if you can, use your own account with the examples in this tutorial. The card
numbers and amounts used in this tutorial for credit card transactions are for testing purposes only. They are
special test cards that will provide valid responses, but will not
be processed on your account.
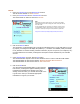
When you first run WEB Connect, you will be asked to activate an account. Click the OK button to show the
Account Activation screen.
Message Box Prompt.
Click OK to continue.
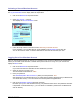
ACCOUNT ACTIVATION