
User guide


WEB Connect for Pocket PC page 17
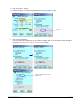
8. Click on the Next… button.
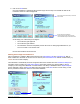
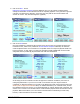
Bank Account Transfer Verification screen is displayed. Here you can request a signature before
sending the information to the transaction server for requesting payment. It is a good idea to give the
customer your PDA device at this time, so that they can verify that the account information and
amount are correct. They also add a signature (optional).
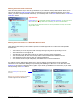
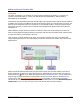
9. Click on the Send button.
Once the information is verified and the customer signs, the next step is to transmit the data to the
transaction server, which in turn, initiates an Account Transfer Request. Remember, the electronic
check acceptance feature is a convenience for a reputable vendor to accept non-physical checks from
honest customers. To date, there is no electronic verification system available that can offer all the
safeguards that are provided by physical checks and credit card transactions.
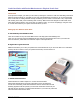
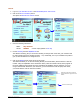
At this stage, the account transfer can either be approved or declined. In addition, if the server is
undergoing maintenance or you are in an a weak or non-wireless area, the request cannot be
completed. For approved transfers you can click on the Memo button then issue a printed receipt (See
Working with an Approved Credit Card above, for detailed information). For a declined event, such as
Non-Sufficient Funds in an account, it is recommended that you request another form of payment. The
same is true in a weak or non-wireless location. Credit Cards and physical checks are the best forms of
payment. WEB Connect allows you to store Account Transfer data for transmitting at a later time,
however, credit card sales are much more reliable.