
User guide


WEB Connect for Pocket PC page 9
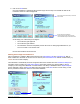
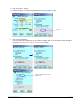
9. Click on the Send button.
Once the information is verified and the customer signs, the next step in to transmit the data to the
transaction server for credit card approval.
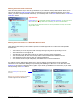
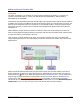
At this stage, one of three things can happen:
• The credit card gets approved.
• The credit card gets declined.
• The transaction cannot be completed, because the server is undergoing maintenance or you
are in an a weak or non-wireless area.
Each of these situations are shown next.
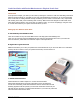
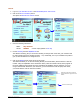
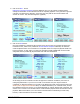
Working with an Approved Credit Card
Once a transaction is complete, WEB Connect will return an Authorization Code and Transaction ID. Both of
these numbers are numerical. In the case of a test account, the Authorization Code will also contain letters (i.e.,
VITAL6 as in the current example).
The transaction is automatically stored as an approval and can be accessed from the Transaction Manager for
processing Voids or Credits. The Credit Card: Approval screen also provides you with the ability to print a
receipt if you are using Pocket Merchant or Pocket Printer4. Print Setup is available from the IR/Serial Options
screen. Otherwise, click on the New Sale button and return back to the Menu screen. In some cases, you will
also be permitted to delete the order from the internal database.
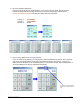
Buttons that need to establish a
communications link with the Internet are
color-coded differently from all other buttons.
After clicking on the Send button, communica-
tion will start.