
User's Manual

21
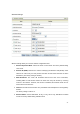
1. Account: Enter the new User Name for your PC card here, you can contact to your ISP to
get it.
2. Password: Enter the new Password for your PC card here, you can contact to your ISP to
get it.
3. Primary DNS/Secondary DNS: Optional, This feature allows you to assign a DNS Servers
4. Connection Control: There are 3 modes to select:
Connect-on-demand: The device will link up with ISP when the clients send outgoing
packets.
Auto Reconnect (Always-on): The device will link with ISP until the connection is ʳʳ
established.
Manually: The device will not make the link until someone clicks the ʳ
Connect-button in the Status-page.
5. Maximum Idle Time: the amount of time of inactivity before disconnecting your PPPoE
session. Set it to zero or enable ϘAuto-reconnectϙ to disable this feature.
6. Service Name: optional. Input the service name if your ISP requires it. Otherwise, leave it
blank.
7. Assigned IP Address: Optional, Input the IP address you want. Usually, leave it blank.
8. Maximum Transmission Unit (MTU): Most ISP offers MTU value to users. The default
MTU value is 0(auto).
9. NAT disable: the option bridges data form WAN port to LAN port.
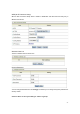
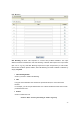
Wi-Fi HotSpot Types: This WAN type allows you to share one Wi-Fi Hotspot account with your
friends or colleagues. Local clients connect to this device via Wi-Fi connection, and surfing
Internet by connecting to remote Wi-Fi Hotspot. Just follow a few steps below to connect to remote
Wi-Fi HotSpot.
Note. If choosing Wi-Fi HotSpot WAN type, the wireless channel of WLAN will be set to as same
as wireless channel of remote Wi-Fi HotSpot.
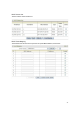
Step 1: Click “Wi-Fi HotSpot” Search” button to search any available Wi-Fi Hotspot or Wi-Fi AP
(Access Point) in your environment.