
Technical data


90362-01 Using the Setup Utility 3-11
3.
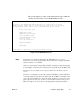
When you are done configuring your applications, use the Tab key
or the Arrow keys to move to
Register/Update
and press Enter to
register your NetBlazer or to get software patches and updates. See
Chapter 11, “Registering and Updating,” for more information.
4.
Once you have registered your NetBlazer, move to the
Save/Exit
menu item and press Enter to save your configuration and/or exit the
Setup Utility. For more information on the items on the Save/Exit
screen, see “Working on the Save/Exit Screen” on page 3-16.
5.
After you have saved your configuration and have exited the Setup
Utility, you should back up your configuration. For information on
backing up your configuration to the network, see Appendix F,
“NetBlazer Backup.”
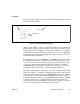
Dedicated
LAN-to-LAN
(Chapter 8)
Configure the NetBlazer for any dedicated or
leased line routing between the local network and a
remote network. This includes Frame Relay con-
nections.
Worksheet 11
Worksheet 12
Worksheet 13
Worksheet 14
Worksheet 15
Dial-in users
(Chapter 9)
Configure the NetBlazer for Client-to-LAN routing
as a terminal server or ARA server for dial-in users.
Worksheet 16
Worksheet 17
Worksheet 18
Worksheet 19
Dial-out modem pool
(Chapter 10)
Configure the NetBlazer so local IP users can use
the NetBlazer’s modem pool to dial out.
Worksheet 20
Warning:
You may run into memory problems during configuration depending on the
number of interfaces, number of users, and size of routing tables for your
configuration. See the Release Notes that came with your NetBlazer for the
latest information on memory management. Appendix G, “Troubleshooting
and Customer Support” has information on contacting customer support if
you run into problems.
Select: To:
Using this
worksheet from
Appendix B: