
Operation Manual


Adjust the framing of shots with pan and scan
To the top
Create a pan and scan track
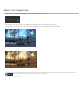
Change pan-and-scan adjustments along a clip
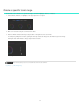
Pan and scan preview options
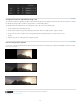
Use pan and scan to adjust the framing of your shots for different output formats. You can reposition, scale, rotate, and skew your image to fit best
into other frame format.
Use keyframing to make adjustments within a shot or from shot to shot. For more information, see Work with keyframes.
Create a pan and scan track
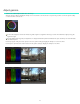
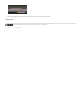
1. Drag the Pan & Scan button on the timeline to create a pan and scan track. The Pan & Scan button is on the Timeline panel,
under Timeline Elements.
A green Pan & Scan track appears on the Timeline.
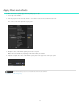
2. Click the pan and scan track to open the Pan and Scan panel.
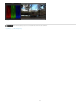
3. Select the output format from the Crop Preset menu.
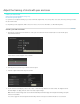
4. Use the Pan and Scan widget to position, scale, rotate, or skew the image within the new frame format. The widget works like
the Mask Widget. See Apply a Mask to learn more about using the widget.
Note: The Pan and Scan widget does not have all the functionality of the Mask widget. For example, the feathering and spline
nodes are not available.
You can also apply Pan and Scan adjustment numerically in the Pan & Scan panel. Click the R button to reset to default.
57