
Operation Manual


To the top
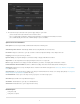
Apply masks to individual layers, for example to create a vignette.
Add unlimited layers and reorder as required. Changes are applied non-destructively.
Each layer has its own opacity slider where its influence on the overall look can be adjusted.
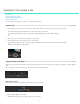
3. Animate masks or grades to match movement and changing light in your frames.
Add keyframes to your masks or grading tracks.
Adjust masks or grading at keyframe positions.
SpeedGrade CS6 animates transitions smoothly between keyframes.
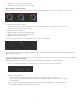
4. Save grades as Look files and apply those looks to footage. To apply a look to footage, select the footage and then click a
Look file.
The Look file preserves all the layers and settings of the grade.
Click a Look file to apply it to selected footage on the Timeline.
Edit existing looks in the Look panel.
Export looks as LUTs for use in other applications or devices.
5. While working on a project, save your Timeline, including all clips and grading settings, as a SpeedGrade CS6 project.
Press Ctrl+S (Windows) or Cmd+S (Macintosh) to bring up the Save Timeline As dialog box.
For help and tutorials, see Color grading.
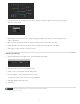
Render out content
Render out content to create digital dailies for review, proxy media for offline editing, or masters for final delivery.
1. Start with the content you want to render on the Timeline and click the Output tab to display the Output panel.
3