
Operation Manual

Detect scene changes
Twitter™ and Facebook posts are not covered under the terms of Creative Commons.
Legal Notices | Online Privacy Policy
To the top
To the top
To the top
Detect scene changes
Prepare the footage for grading or editing
Save or export the footage
You can automatically detect scene changes in footage that does not have an EDL, such as archived material. Once SpeedGrade CS6 has
identified scene changes, you can add keyframes to scene changes, or split your footage up into separate clips.
The workflow consists of the following steps:
1. Detect the scene changes.
2. Prepare the footage for grading or editing.
3. Save or export the footage.
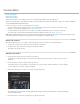
Detect scene changes
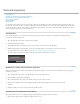
1. Select your footage on the Timeline.
2. Click the Timeline tab and select the Setup panel.
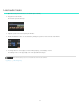
3. Under Tools, click Scene Change Detect.
4. When the scan is complete, you can review the results using the arrow buttons on the left side of the dialog box.
5. If necessary, you can adjust scene detection sensitivity and click Rescan Clip.
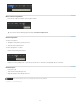
Prepare the footage for grading or editing
After marking your scene changes, prepare the footage for grading or editing as follows:
To separate the footage into individual shots or scenes, click Split into Clips.
To flag the scene changes, click Add Keyframes to Clip.
Save or export the footage
Once you split into clips or add keyframes, you can save the scene-detected content as a SpeedGrade CS6 project or create an Edit Decision List
(EDL).
In the Setup Panel under the Timeline tab, do one of the following:
To save the content as a SpeedGrade project, click Save IRCP.
To export an Edit Decision List, click Save EDL.
38