
Operation Manual


Timeline basics
To the top
To the top
Footage
Grading
Audio
Pan & scan
To the top
Playhead
Tracks
Manage tracks
Play a part of the Timeline
Navigate along the Timeline
Zoom the Timeline
Change the Timeline view
Delete the Timeline
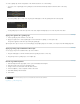
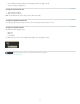
Playhead
The playhead displays a frame in the Monitor at any given position on the Timeline.
Drag the playhead to move it along the Timeline.
Playhead controller
To view more than one frame at a time, create additional playheads. Multiple playheads are useful for comparing different parts of the same shot
or scene. For more information, see Compare frames with multiple playheads.
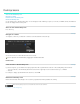
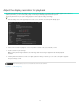
Tracks
Add tracks to the Timeline to generate layers for grading, add audio to the project, or to adjust the framing with pan and scan.
Multiple tracks
You can add the following tracks to the Timeline:
Blue track. To add footage to the timeline, see Select a clip.
Red track. To add a grading track, see Create a grading track.
Solid green track. To add an audio track, open the Desktop, locate the audio file (wav or aiff file), and drag it on the Timeline. Repeat this
procedure with additional audio files.
To change values for sound output, such as the mixing frequency, select Settings > Sound. The Settings menu is on the upper-right corner of the
SpeedGrade workspace.
Transparent green track. To add a pan & scan track, see Create a pan and scan track.
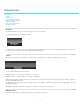
Manage tracks
You can manage the tracks on the Timeline with the tools on the left side of each track.
13