
Operation Manual


Twitter™ and Facebook posts are not covered under the terms of Creative Commons.
Legal Notices | Online Privacy Policy
To the top
To the top
To the top
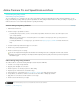
To create a grading clip, click the Setup button on the Timeline tab and do one of the following:
To create a series of grading clips in the grading track, click the Extract Grade Clips button in the third column of the Setup
window.
To create a grading clip for a single video clip, drag the Grading Clip tool into the grading track above the target clip.
To add grading clips for all the video clips in the video track, drag the Grading Clip tool on a video clip in the video track.
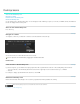
Apply color grades to a grading clip
1. Select a grading clip in the Timeline, not a video clip.
2. Apply color grades to the selected grading clip. For more information on grading, see Color grade a clip.
The grade is applied to all the video clips sharing the grading clip.
Tip: Compare video clips for shot-to-shot color matching by using multiple playheads. For details, see Compare shots with multiple playheads.
Apply a grading clip to additional video clips
You can apply a single look to additional video clips on the Timeline.
1. Drag the Grading Clip tool from the Timeline tab into the grading track above a video clip.
2. Drag the right side of a grading clip to cover multiple clips.
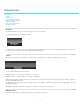
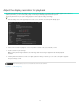
Render a graded sequence
1. Click the Output tab in the upper-right corner to open the Metadata Render Engine.
2. Click the Desktop menu and select a destination folder.
3. Assign a name to the rendered file in the File Name text box.
4. In Format & Options, select an output file format for the render.
5. Click Online Quality in the Render tab.
6. Click Render.
9