ADOBE® SPEEDGRADE™ Help and tutorials February 2013
Contents Getting Started tutorials.................................................................................................................................1 Basic workflow.........................................................................................................................................................................2 Quickstart: Color grade a clip....................................................................................................................................
Getting Started tutorials To learn more, view these recommended resources online. SpeedGrade CS6 FAQ troubleshooting (May. 14, 2012) What is SpeedGrade? Video2Brain (May. 7, 2012) video-tutorial What's new in SpeedGrade CS6 Patrick Palmer (May. 7, 2012) video-tutorial Tips and tricks for using SpeedGrade CS6 Patrick Palmer (May.
Basic workflow Load footage Apply color grading Render out content Special tools and workflows Related topics The SpeedGrade workflow consists of three steps: load footage, color grade, and render out finished content. Use the following views to perform the workflow: Desktop view for loading footage Monitor view for applying color grading Output view for rendering out the completed project Each view is accessible from a tab at the top of the SpeedGrade CS6 application window. To the top Load footage 1.
Apply masks to individual layers, for example to create a vignette. Add unlimited layers and reorder as required. Changes are applied non-destructively. Each layer has its own opacity slider where its influence on the overall look can be adjusted. 3. Animate masks or grades to match movement and changing light in your frames. Add keyframes to your masks or grading tracks. Adjust masks or grading at keyframe positions. SpeedGrade CS6 animates transitions smoothly between keyframes. 4.
2. Proceed from the top to the bottom of the panel to apply settings for your render. Select a location and create a filename for the rendered content. Choose output format and whether to include burn-in information. See Display burn-in information on frames. Choose Online Quality for final masters or Offline Quality for proxies and dailies. To the top Special tools and workflows Color spaces Use Color Space Defaults for different file formats in the Timeline panel.
Quickstart: Color grade a clip Select a clip Apply a primary color grade Apply a secondary color grade Render a graded clip To load an EDL and color grade a sequence, see Color grade a sequence. To the top Select a clip 1. In SpeedGrade, select a folder that contains video clips using the file browser in the upper-left corner of the user interface. The Desktop window shows thumbnail versions of the content in the selected folder.
2. Swipe the mouse left or right to change the value. 3. Right-click the triangle icon again to accept the setting. Make changes to specific regions Modify color and luminance values in the image's shadow, midtone, and highlight regions using the color control wheels on the Look panel. Color control wheels To adjust the luminance, do the following: Left-click the triangle icon on a wheel and drag the mouse left or right in a straight line. Don't drag the mouse in a circle.
3. View the portion of the image targeted by the hue range selection by selecting an option from the Gray-out menu at upperright corner of the Look tab. 4. Make adjustments and refinements to the selection using the upper triangles of the sliders. Use the lower triangles of the sliders to adjust fall-off. 5. Make secondary corrections with the Off-set and Gain control wheels in the center of the Look window. 6.
Quickstart: Color grade a sequence The workflow for color grading a sequence consists of the following steps: Load an EDL Reconnect the source clips in the reels Create a grading clip Apply color grades to a grading clip Apply a grading clip to additional video clips Render a graded sequence To the top Load an EDL Edit Decision Lists (EDLs) are metadata documents used to migrate project timelines from editing tools like Adobe Premiere Pro to post-production tools like SpeedGrade.
To create a grading clip, click the Setup button on the Timeline tab and do one of the following: To create a series of grading clips in the grading track, click the Extract Grade Clips button in the third column of the Setup window. To create a grading clip for a single video clip, drag the Grading Clip tool into the grading track above the target clip. To add grading clips for all the video clips in the video track, drag the Grading Clip tool on a video clip in the video track.
Adobe Premiere Pro and SpeedGrade workflows General editing and grading workflow Offline editing and grading workflow The color grading process is usually the last step in the post-production workflow. If working with high-resolution material or RAW files, you can begin your workflow by creating smaller proxy files in SpeedGrade for offline editing in Adobe Premiere Pro. After your editing is complete, you can relink the edits to the source material in SpeedGrade for grading and finishing.
Workspace 11
Desktop basics Show or hide the Desktop view Navigate to a folder Filter the files in the Desktop view Refresh the Desktop view Use the Desktop view to find and load footage. You can navigate to folders with image sequences, movie files, or RAW file formats. Thumbnails of the files are displayed in the Desktop view. To the top Show or hide the Desktop view Press the D key. To the top Navigate to a folder To navigate to a folder on your hard disk or network, use the breadcrumb control at the top.
Timeline basics Playhead Tracks Manage tracks Play a part of the Timeline Navigate along the Timeline Zoom the Timeline Change the Timeline view Delete the Timeline To the top Playhead The playhead displays a frame in the Monitor at any given position on the Timeline. Drag the playhead to move it along the Timeline. Playhead controller To view more than one frame at a time, create additional playheads. Multiple playheads are useful for comparing different parts of the same shot or scene.
Drag, lock, and eye icons To show or hide the track, click the Eye icon. To lock or unlock the track, click the Lock icon. To delete the track, click the Drag icon and drag the track off the Timeline. To the top Play a part of the Timeline Specify the part of the Timeline to play by repositioning in- and out-points. The two points are located above the tracks, at either end of the clip or playlist. In-point Note: In- and out-points in SpeedGrade are not used to edit clips as in Adobe Premiere Pro.
Timeline views All Shows all content and playheads on the Timeline. In/Out Shows all content between the in- and out-points. Selected Shows all content in the selected track. Master Keeps the Timeline centered on the Master playhead. On the Timeline, the playhead controller with the orange number box is the Master playhead. Playhead Keeps the Timeline centered on the numbered playhead. The number on the playhead controller identifies the playhead.
Playback basics Playback shortcuts Playback controls Playback indicators Change the base frame rate Change the playback frame rate Change the playback mode To the top Playback shortcuts Note: Close the Desktop before playback (press D).
An issue with the real-time performance of the grading operations you apply to the clip A sync issue with your display device. To the top Change the base frame rate 1. Select Settings > Playback. 2. Enter a new base frame rate. Note: The Timeline timecode values reflect your base frame rate setting. To the top Change the playback frame rate Press the Page Up or Page Down key to increase or decrease the frame rate by 1 frame per second.
Adjust the display resolution for playback SpeedGrade dynamically adjusts the quality of video to ensure smooth playback on computers with less capable graphic cards or CPUs. To optimize performance, you can set the quality settings for the image both during playback and when paused. Test the performance of your system during playback and then adjust the settings accordingly. 1. Click the Settings menu on the upper-right corner of the screen, and then select the Dynamic Quality option. 2.
Compare frames with multiple playheads Create an additional playhead Select a master playhead Adjust the interval between playheads Delete a playhead Work in split-screen mode Keyboard shortcuts Use multiple playheads to compare two or more frames for color matching. To the top Create an additional playhead Hold the Control (Windows) or Command (Macintosh) key down and drag the Move Playhead icon anywhere in the Timeline.
Up to nine playheads can be viewed at once. When using more than nine playheads, click a number in one of the channels and select a desired playhead to view. To the top Keyboard shortcuts Result Windows Mac OS Change the current split-screen mode F9 Cmd+F9 Change the horizontal or vertical orientation of split-screen mode. F10 Cmd+F10 Flip the channel position of the splitscreen mode. F11 Cmd+F11 Note: The default F key assignments must be disabled on Mac OS systems.
Set up dual displays Standard dual-monitor setup Advanced dual-monitor setup You can use a dual-monitor setup to work with SpeedGrade. The SpeedGrade workspace is displayed on one monitor and the footage is displayed on the other. To the top Standard dual-monitor setup A standard dual-monitor setup uses two monitors connected with two DVI or two DP outputs from your graphics card. 1. Connect the DVI or DP outputs to the two monitors. Tip: Use a calibrated monitor or projector for the footage monitor. 2.
Keyboard shortcuts Application shortcuts Playback shortcuts Pan and zoom view shortcuts Splitscreen view shortcuts Timeline and navigation shortcuts In- and out-point shortcuts Grading shortcuts Look browser shortcuts Gray-out shortcuts Editorial shortcuts Analysis tools shortcuts Channel view shortcuts Stereoscopic viewing shortcuts To the top Application shortcuts Result Windows Mac OS Show Help F1 F1 Show or hide grading panels P P Show or hide Settings window S S Show Desktop D D Save Ti
Flip sequence when reaching the end point (AutoMirror) Ctrl+M Cmd+M Mirror image horizontally Alt+M Alt+M Mirror image vertically Shift+M Shift+M Clear memory (unload all frames) Shift+Ctrl+F5 Shift+Cmd+F5 Reload changed frames from disk F5 F5 Playback forward L L Playback backward J J Stop K K To the top Pan and zoom view shortcuts Result Windows Mac OS Pan up/down Shift+Up/Down Arrow Shift+Up/Down Arrow Pan left/right Shift+Left/Right Arrow Shift+Left/Right Arrow Reset pa
Set in-point at current master playhead position Shift+I Set out-point at current master playhead position Shift+O Move master playhead to current in-point I or Home Move master playhead to current out-point O or End Reset in- and out-points to default positions Shift+Ctrl+Alt+O Reload replaced frames on disk Shift+F5 To the top Grading shortcuts Result Windows Mac OS Apply previewed preset to the timeline Enter Enter Reject previewed preset Backspace Backspace Change color selector mo
Toggle selected dissolve clip’s direction (bottom-to-top/top-to-bottom) Shift+D Shift+D Split currently active clip and all clips directly above it at the master playhead position Shift+Alt+S Shift+Alt+S Splits currently active clip at the master playhead position Ctrl+Alt+S Cmd+Alt+S To the top Analysis tools shortcuts Result Windows, Mac OS Toggle Histogram H Toggle Waveform W Toggle Vectorscope V To the top Channel view shortcuts Result Windows, Mac OS Show alpha channel A Show red
Crop the display frame You can set the display size of your frames by cropping them in the monitor. Cropping frames in the monitor does not modify the source material. Instead, the frame hides parts of the image. Color corrections are still applied to the parts of the image hidden by the frame. If you want to resize the display frame and keep the entire image in the frame, see Adjust the display aspect ratio. 1. With a clip on the Timeline, click the View button on the Timeline panel. 2.
Adjust the display aspect ratio You can correctly display anamorphic and other non-square-pixel aspect ratio footage in the Monitor by changing the display aspect ratio. Note: Changing the display aspect ratio does not modify the source material. 1. With a clip on the Timeline, click the View button on the Timeline panel. 2. In the Display Options section, click the icon on the left side of the Aspect Ratio menu. The button toggles the Aspect Ratio menu. 3.
Image analysis tools Waveform panel Histogram panel Vectorscope panel Channel views Change tool settings SpeedGrade provides various tools for analyzing your image. To the top Waveform panel The Waveform panel shows RGB values. To display the Waveform panel in the Monitor view, press W. To adjust the size of the panel, use the drag handles. To undock the Waveform panel, click the lock icon. To the top Histogram panel The Histogram shows RGB values.
To the top Vectorscope panel The Vectorscope panel works in HLS mode. To activate the Vectorscope in the Monitor view, press V. To adjust the width of the panel, use the drag handle. To undock the Vectorscope panel, click the lock icon. To the top Channel views Use channel views to check specific color channels. For example, you can use it to check for compression artifacts or noise in the RGB channels.
Work with keyframes Add keyframes Workflow for creating dissolves between keyframes Automatically record keyframes when editing Move between keyframes Delete keyframes Related topics Use keyframes to transform the state of a grade, mask, or pan-and-scan adjustment over time. A keyframe marks the point in time where you specify a state, such as the position of a mask. You typically use at least two keyframes—one for the state at the beginning of the change, and one for the new state at the end of the change.
To the top Move between keyframes Press the left or right arrow buttons on the keyframe toolbar. Tip: You can also use the following keyboard shortcut: Ctrl+Shift+Left/Right Arrow. To the top Delete keyframes To delete one keyframe: 1. Navigate to the keyframe you want to remove. 2. Click the delete keyframe button. To delete all keyframes on a track: Click the Delete All Keyframes button. Keyframes on other grading, mask, or pan-and-scan tracks above or below the current grading clip are not affected.
Loading footage To learn more, view these recommended resources online. Loading and conforming material Patrick Palmer (May. 7, 2012) video-tutorial Using scene change detection Patrick Palmer (Mar.
Supported file formats Frame sequence formats Movie file formats RAW file formats To the top Frame sequence formats Format Read Write Cineon Yes Yes DPX, DPX 2.
Load footage Load items Load multiple items at once Insert items between clips To the top Load items Add items to the Timeline as follows. Navigate to the item in Desktop view, then double-click the thumbnail. You can also drag an item to the Timeline. Repeat the process to add more items. Each item is placed after the last item on the Timeline.
Conform EDLs Master-clip workflow Multiple-clip workflow Supported EDL features Edit Decision Lists (EDLs) are metadata documents used to migrate project timelines from other editing tools. Timelines created from EDLs in SpeedGrade CS6 adhere to the Sony CMX 3600 standard. SpeedGrade also supports the extended 16-digit EDL to work with ARRIRAW and Red R3D material.
About footage references An EDL can reference footage with a clip name and reel ID. If the reel ID information is not present, SpeedGrade can use the clip name. If both are present, SpeedGrade references the reel ID first Sometimes, the reel ID and clip name information don’t match and the footage can't be associated automatically. In this case, you can drop material manually from the Desktop on the placeholder reels.
Load audio tracks 1. Open the Desktop view and browse to an audio file (wav or aiff file). 2. Drag the file on the Timeline. Green tracks represent audio clips. 3. Adjust the position of the audio clip along the Timeline. 4. Enable and disable the audio of a selected track by clicking the speaker icon on the left side of the Timeline. 5. To change values for sound output, such as the mixing frequency, select Settings > Sound. The Settings menu is on the upper-right corner of the SpeedGrade workspace.
Detect scene changes Detect scene changes Prepare the footage for grading or editing Save or export the footage You can automatically detect scene changes in footage that does not have an EDL, such as archived material. Once SpeedGrade CS6 has identified scene changes, you can add keyframes to scene changes, or split your footage up into separate clips. The workflow consists of the following steps: 1. Detect the scene changes. 2. Prepare the footage for grading or editing. 3. Save or export the footage.
Display burn-in information on frames Display burn-in information during playback Display burn-in information on the rendered output You can "burn" (overlay) metadata information on your frames during playback or on the rendered output.
Color grading To learn more, view these recommended resources online. Secondary color correction Patrick Palmer (May. 7, 2012) video-tutorial Adding impact to your footage Patrick Palmer (Jun. 28, 2012) video-tutorial Two approaches to structuring your grade Patrick Palmer (May. 7, 2012) video-tutorial Stereoscopic workflows Patrick Palmer (May.
Quickstart: Color grade a clip Select a clip Apply a primary color grade Apply a secondary color grade Render a graded clip To load an EDL and color grade a sequence, see Color grade a sequence. To the top Select a clip 1. In SpeedGrade, select a folder that contains video clips using the file browser in the upper-left corner of the user interface. The Desktop window shows thumbnail versions of the content in the selected folder.
2. Swipe the mouse left or right to change the value. 3. Right-click the triangle icon again to accept the setting. Make changes to specific regions Modify color and luminance values in the image's shadow, midtone, and highlight regions using the color control wheels on the Look panel. Color control wheels To adjust the luminance, do the following: Left-click the triangle icon on a wheel and drag the mouse left or right in a straight line. Don't drag the mouse in a circle.
3. View the portion of the image targeted by the hue range selection by selecting an option from the Gray-out menu at upperright corner of the Look tab. 4. Make adjustments and refinements to the selection using the upper triangles of the sliders. Use the lower triangles of the sliders to adjust fall-off. 5. Make secondary corrections with the Off-set and Gain control wheels in the center of the Look window. 6.
Quickstart: Color grade a sequence The workflow for color grading a sequence consists of the following steps: Load an EDL Reconnect the source clips in the reels Create a grading clip Apply color grades to a grading clip Apply a grading clip to additional video clips Render a graded sequence To the top Load an EDL Edit Decision Lists (EDLs) are metadata documents used to migrate project timelines from editing tools like Adobe Premiere Pro to post-production tools like SpeedGrade.
To create a grading clip, click the Setup button on the Timeline tab and do one of the following: To create a series of grading clips in the grading track, click the Extract Grade Clips button in the third column of the Setup window. To create a grading clip for a single video clip, drag the Grading Clip tool into the grading track above the target clip. To add grading clips for all the video clips in the video track, drag the Grading Clip tool on a video clip in the video track.
Balance blacks and whites Set Set Set Set black black white white balance level balance level Balancing blacks is the first step in the color correction workflow. Use the Offset color wheel in the Look panel to balance blacks. Once the blacks look good, move on to balancing the whites. Use the Gain color wheel in the Look panel to balance whites. Note: You can use RGB sliders instead of the color wheels. Click the Sliders mode button on the upper-left of the coloring tools.
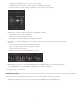
Before adjusting black balance After adjusting black balance To the top Set black level In the Look panel, drag the triangle icon on the Offset control wheel until the valleys of the waveform rest on the 0 level of the waveform display. Drag clockwise to raise the valleys or counter-clockwise to lower the valleys. Offset color wheel To move the triangle icon on the color wheel, drag it left or right in a straight line. Don't drag in a circle. The further left or right you drag, the larger the change.
Use the RGB waveform as a guide to adjust highlight color values. In the following example, the blue waveform is lower than the red and green ones. Before adjusting white balance Pushing the gain hue control tool toward cyan and blue balances out the shadows. After adjusting white balance To the top Set white level In the Look panel, drag the triangle icon on the Gain control wheel until the peaks of the waveform touch the 100 level of the RGB waveform display.
Adjust gamma Gamma is the relative bright and dark value of the image. Adjust the gamma setting by dragging the triangle icon on the Gamma color wheel in the Look panel. Drag clockwise to lower the gamma setting or counter-clockwise to increase it. Gamma color wheel To move the triangle icon on the color wheel, drag it left or right in a straight line. Don't drag in a circle. The further left or right you drag, the larger the change. Use the RGB waveform to guide your adjustments.
High gamma Twitter™ and Facebook posts are not covered under the terms of Creative Commons.
Adjust color temperature Adjust the color temperature by dragging the Color Temperature slider in the Look panel. If the image is too warm, lower the color temperature by dragging the Color Temperature slider to the left. If the image is too cool, increase the color temperature by dragging the Color Temperature slider tool to the right. Low temperature High temperature Twitter™ and Facebook posts are not covered under the terms of Creative Commons.
Grade a specific tonal range You can make color corrections to a specific tonal range, such as the highlights, shadows, or midtones. 1. Select Shadows, Midtones, or Highlights on the upper part of the Look panel. 2. Make color corrections using the color wheels and sliders. 3. Extend or limit the affected tonal range using the slider on the right side of the color wheels. For example, if grading in the shadows, pushing the slider up extends the changes into the midtone region of the image.
Apply filters and effects Use filters and effects to quickly apply advanced grading styles to clips. 1. Load a clip on the Timeline. 2. In the Layers panel on the Look tab, click the + icon and then select an effect or filter from the menu. The + icon is on the lower part of the Layers panel. 3. Modify the effect or filter with the grading tools in the Look panel. Note: The tools available vary depending on the effect or filter you selected. 4.
Work with masks Apply a mask Apply additional masks To the top Apply a mask A mask isolates a region of an image so that you can selectively grade the region. In SpeedGrade, a mask is attached to a grading clip. 1. Add a grading clip to a video clip in the video track. See Create a grading clip. 2. Click the Mask tab and select one of the mask presets. 3. Do any of the following to adjust the location, size, and shape of the mask: To reposition the center of the mask, drag the center cross-hair.
Track a masked object through a shot Track the masked object automatically Control the movement of a mask manually To the top Track the masked object automatically 1. On the first frame of the track, apply a mask on the target object and grade it. For instructions, see Apply a mask. 2. In the Mask panel, click the Track Object button. The button is on the lower-right side of the Mask panel. You might need to scroll the panel down to see it. The mask automatically tracks the target object through the shot.
6. If necessary, add more keyframes and adjust the position of the mask at each keyframe. Related links Twitter™ and Facebook posts are not covered under the terms of Creative Commons.
Adjust the framing of shots with pan and scan Create a pan and scan track Change pan-and-scan adjustments along a clip Pan and scan preview options Use pan and scan to adjust the framing of your shots for different output formats. You can reposition, scale, rotate, and skew your image to fit best into other frame format. Use keyframing to make adjustments within a shot or from shot to shot. For more information, see Work with keyframes. To the top Create a pan and scan track 1.
To the top Change pan-and-scan adjustments along a clip The pan and scan track is a global track along the entire timeline. Any pan-and-scan adjustments affect the whole clip. Use keyframes to change the adjustments along the clip. For details on using keyframes, see Work with keyframes. The typical workflow for making pan-and-scan adjustments along a clip consists of the following steps. 1. Create a keyframe at the beginning of the clip. 2.
Grade a specific color range Select and grade a color range Example: Isolating skin tones with secondaries Secondary color corrections are applied to specific color ranges within your images. They let you accent, modify, or tone down parts of an image. For a video, see Secondary Color Correction by Patrick Palmer. To the top Select and grade a color range 1. In the Look panel, click the +S icon to add a secondary grading layer. 2. Select a color range to target.
b. Sample a color range in the image. Click the sample range button (the eyedropper icon with the plus sign), hold down the left mouse button, and move over the color range you’d like to sample. Release the mouse button when you're done. 3. Use the Grey-out options in the right corner of the Look panel to view the selected region of the image. 4. Expand or restrict the target color range by dragging the Hue, Lightness, and Saturation sliders. The top sliders moves the entire selected range.
Managing looks To learn more, view these recommended resources online. Working with Looks Patrick Palmer (May.
Share and reuse looks Save a look Share a look Apply a look in SpeedGrade Apply a look in After Effects Apply a look in Photoshop Save a look for Premiere Pro and third-party applications Delete .Look files SpeedGrade can save color grading information in .Look files for reuse. Because the files are small, you can easily store them or share them with others. To the top Save a look 1. Grade some material. 2. In the Look tab, click the Save Look button on the lower right side of the Layers panel.
To the top Apply a look in After Effects Adobe After Effects supports native .Look files. 1. With footage open in After Effects, select Effect > Utility > Apply Color LUT. 2. Select the .Look file from your hard disk. To blend the look in After Effects, create an adjustment layer above the clip in the Timeline, then apply the look (Effect > Utility > Apply Color LUT). In the Timeline, select the adjustment layer, then press the T key to bring up the transparency control.
Rendering out To learn more, view these recommended resources online. Rendering out your project Patrick Palmer (May. 7, 2012) video-tutorial Creating dailies Patrick Palmer (May.
Create proxy files for offline editing For a faster workflow, you can work on low-bitrate proxy files (“proxies”) rendered from high-bitrate master files. This article describes how to create proxy files for offline editing while preserving both the original file naming and source time code. 1. Move all the source clips to the Timeline as follows: a. Browse to the source folder in the SpeedGrade Desktop. b. Click the Add All button on the lower-right side of the Desktop. 2.
Save an EDL You can export an Edit Decision List (EDL) of assembled clips from the Timeline. 1. With two or more clips on the Timeline, click the Setup button on the Timeline panel. 2. In the Tools panel on the right side of the panel, click Save EDL. 3. Name the EDL, select a folder, and click Save. Twitter™ and Facebook posts are not covered under the terms of Creative Commons.
Display burn-in information on frames Display burn-in information during playback Display burn-in information on the rendered output You can "burn" (overlay) metadata information on your frames during playback or on the rendered output.