
Operation Manual


56
Color grading
Last updated 11/30/2015
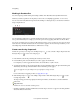
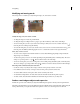
2 In the Mask panel, click the Track Object button.
The button is on the lower-right side of the Mask panel. You might need to scroll the panel down to see it.
The mask automatically tracks the target object through the shot.
See the next section if the following applies:
• The mask can't follow the object after clicking the Track Object button
• You want the tracking to begin or end later in the shot
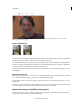
Control the movement of a mask manually
Use keyframes to manually control the position of a mask over time. A keyframe marks the point in time where you
specify the shape or position of the mask. You typically use at least two keyframes—one for the position at the
beginning of the change, and one for the new position at the end of the change. SpeedGrade animates the transition
between the keyframes. For more information, see
Work with ke y f r ames.
Keyframes are useful when the target object cannot be followed automatically. You can also use keyframes to change
the shape and feather of a mask over time.
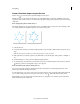
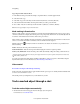
1 In the Mask panel, do the following:
a Move the playhead to the position on the timeline where you want the mask to start tracking the object.
b Click the Record Keyframe button to insert a keyframe.
Note: You don’t have to insert a starting keyframe if you want the mask to track the target object from the first frame of
the track. SpeedGrade adds a keyframe to the first frame as soon as you add a grading clip.
2 Apply a mask over the target object at the keyframe, and then grade the mask in the Look panel.
For instructions, see Work with masks.
If you want the mask to track the object automatically from that point forward in the shot, click the Track Object
button on the lower-right side of the Mask panel.
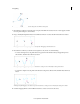
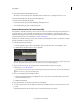
3 Insert a second keyframe in the timeline as follows:
a Switch to the Mask panel and move the playhead to the second position on the timeline where you want the
movement of the mask to end.
b Click Record Keyframe.
4 Reposition the mask over the target object at the second keyframe.
5 To create a dissolve between the two keyframes, click the Record Keyframe button a second time on the second
position.
SpeedGrade indicates the dissolve with an arrow on the track between the two positions.