
Operation Manual

41
Color grading
Last updated 11/30/2015
Tip: Before starting, place the source clips and the EDL file in a single folder. This organization makes the process
quicker and more efficient.
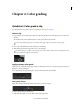
1 In SpeedGrade, select the folder containing the EDL file with the file browser in the upper-left corner of the user
interface.
2 Double-click the EDL file to load it.
Tip: If you have too many thumbnails, you can filter them for EDL files by selecting the EDL option from the All
Files menu in the upper-right corner.
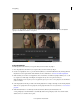
SpeedGrade places placeholder thumbnails in the video track and in the Reels panel. The Reels panel is on the Timeline
tab on the lower left of the screen.
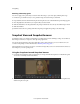
Reconnect the source clips in the reels
The Reels panel gives an overview of the reels in an EDL. When loading an EDL, SpeedGrade inserts placeholder
thumbnails of the source clips in the Reels panel. Reconnect the source clips to the placeholder thumbnails in the Reels
panel as follows.
1 If not already done, display the source clips on the Desktop window by selecting the folder containing the source
clips.
2 Filter the thumbnails for the media type of the source clips. Example: QuickTime movies.
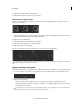
3 Click the Timeline tab and then click the Reels panel to view the source clip placeholders.
4 Reconnect the source clips to the thumbnails by clicking Load from Desktop. SpeedGrade reconnects the source
clips on the Desktop and the video track.
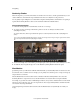
Create a grading clip
When color grading a sequence, work in a non-destructive grading clip associated with the video clips in the sequence.
Don't grade the video clips directly. The grading clip can be saved, moved, and applied to multiple video clips. Grading
clips are managed in the Timeline in a grading track above the video track.
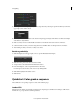
To create a grading clip, click the Setup button on the Timeline tab and do one of the following:
?
To create a series of grading clips in the grading track, click the Extract Grade Clips button in the third column of
the Setup window.