
Operation Manual

39
Color grading
Last updated 11/30/2015
2 Swipe the mouse left or right to change the value.
3 Right-click the triangle icon again to accept the setting.
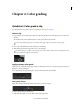
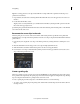
Make changes to specific regions
Modify color and luminance values in the image's shadow, midtone, and highlight regions using the color control
wheels on the Look panel.
To adjust the luminance, do the following:
• Left-click the triangle icon on a wheel and drag the mouse left or right in a straight line. Don't drag the mouse in a
circle. The further left or right you drag, the larger the change.
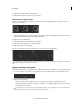
To adjust the color, do the following:
1 Right-click inside the circle and release the click button.
2 Swipe the mouse in any direction to change the value.
3 Right-click again to accept the setting.
You can use color sliders instead of control wheels. To access the sliders, press Shift+Enter.
Use the zero (0) key on the numeric keypad to toggle the grade on and off for a quick before and after view. Make sure
the NumLock key on your keyboard is selected.
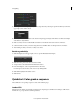
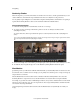
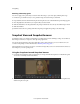
Apply a secondary color grade
Make targeted adjustments to a specific hue range in the image. The changes are applied to a secondary grading layer.
1 Access the secondary color grading tools by selecting the +S icon in the lower-left corner of the Layers window.
2 Select a hue range as follows:
• Select a preset hue option by clicking one of the colored buttons along the top of the Hue selection tool.
• Sample a hue range by clicking the eyedropper tool with the + icon and then dragging to select a portion of the
image in the Monitor window.
You may have to resize the lower border of the Desktop window to see the eyedropper tools. To resize the window,
use the drag resize tool located at the bottom center of the Timeline.