
Operation Manual

24
Workspace
Last updated 11/30/2015
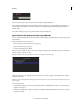
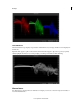
3 Change the display aspect ratio by selecting an option from the menu.
4 To switch to the default aspect ratio, click the icon again.
More Help topics
Crop the display frame
Work with keyframes
Use keyframes to transform the state of a grade, mask, or pan-and-scan adjustment over time. A keyframe marks the
point in time where you specify a state, such as the position of a mask. You typically use at least two keyframes—one
for the state at the beginning of the change, and one for the new state at the end of the change. You can add as many
keyframes as you need on a track. SpeedGrade interpolates the values between keyframes and creates dissolves between
them.
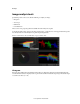
Add keyframes
Every new grading track has one keyframe at its start position. If you don’t add more keyframes, any adjustments affect
the whole clip.
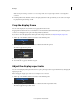
To add more keyframes along a track:
1 Move the playhead to the position you’d like to add a keyframe.
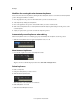
2 Click the Record Keyframe button.
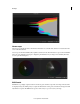
3 Apply adjustments at the new keyframe position, such as a grade, mask, or pan-and-scan adjustment.
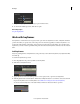
4 With the playhead at the current keyframe, click the Record Keyframe button a second time to create a dissolve from
the previous keyframe to the current keyframe. See
Workflow for creating dissolves between keyframes.
An arrow between the keyframes on the track indicates a linear dissolve between the two positions.