
Operation Manual

69
Importing and adding media
Last updated 10/4/2016
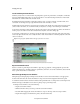
Adobe Photoshop Elements and Premiere Elements are designed to work together, whether you purchase the products
separately or bundled in one package. These programs seamlessly combine digital photography and video editing,
letting you create exciting video projects. The two programs support many of the same file types, which makes the
transfer of most files between them easy and efficient. For example, you can catalog PSD files in Photoshop Elements
and then add them to the Quick view/Expert view timeline directly from the Elements Organizer in Premiere
Elements.note: The Photoshop Elements Organizer shows clips of audio AVI files with broken video thumbnail icons.
However, they play correctly. The Photoshop Elements Editor can import individual video frames from ASF, AVI, MPEG,
and Windows Media files. (Choose File > Import > Frame From Video.)
Here are a few ways you can share files between Photoshop Elements and Premiere Elements:
• Organize your photos, video clips, and audio clips in either Premiere Elements or Photoshop Elements. Find the
as
sets using Elements Organizer in either application and add them to a project.
• Capture video in Premiere Elements and open it from the Elements Organizer and create and edit still images from
the video.
• (Windows only) Create a slideshow in Photoshop Elements 6.0 or later with captions, transitions, effects, music,
na
rration, graphics, and titles. Import the slideshow into Premiere Elements to edit further or burn to DVD.
Alternatively, import individual photos into Premiere Elements and create the slideshow there.note: The Send To
Adobe Premiere Elements command in Photoshop Elements works only when you use Photoshop Elements 6.0 or late
r
w
ith Adobe Premiere Elements 4.0 or later.
• Customize menu templates in Photoshop Elements, and then use them in your Premiere Elements project. (Menu
t
emplates are PSD files stored in the Premiere Elements application folder.)
• Create a Photoshop Elements file with your video project’s settings, enhance it in Photoshop Elements, and then use
it in Premiere Elemen
ts.
Working with offline files
About offline files
An offline file is a placeholder for a source file that Premiere Elements cannot currently find on your hard drive. Offline
files remember information about the missing source files they represent. If an offline file appears in the Quick
view/Expert view timeline, a “Media Offline” message appears in the monitor and in the Quick view/Expert view
timeline.
Edit an offline file
1 In the Expert view, click Project Assets.
2 In the Project Assets panel, double-click the offline file. Where Is The File [name of the file] dialog box appears.
Locate the source file, select the file, and click Select.
3 Right-click/Ctrl-click the file and select Edit Original to edit the file.
Replace an offline file with a file on your computer
1 In the Expert view, click Project Assets.
2 In the Project Assets panel, select one or more offline files.