
Operation Manual

67
Importing and adding media
Last updated 10/4/2016
4 In the Pixel Aspect Ratio section, select Use Pixel Aspect Ratio From File to use the original ratio of the file.
Alternatively, choose one of the following from the Conform To menu:
Square Pixels Uses a 1.0 pixel aspect ratio. Use this setting if your source clip has a 640 x 480 or 648 x 486 frame size.
You can also use this setting if the file was exported from an application that supports only square pixels.
D1/DV NTSC Uses a 0.9 pixel aspect ratio. Use this setting if your source clip has a 720 x 480 or 720 x 486 frame size.
This setting lets you maintain a 4:3 frame aspect ratio for the clip. Use this setting for clips exported from an
application that works with nonsquare pixels, such as a 3D animation application.
note:
For more information about D1, see the Glossary in Premiere Elements Help.
D1/DV NTSC Widescreen Uses a 1.2 pixel aspect ratio. Use this setting if your source clip has a 720 x 480 or 720 x 486
frame size. This setting lets you maintain a 16:9 frame aspect ratio.
D1/DV PAL Uses a 1.0666 pixel aspect ratio. Use this setting if your source clip has a 720 x 576 frame size and you
want it to maintain a 4:3 frame aspect ratio.
D1/DV PAL Widescreen Uses a 1.4222 pixel aspect ratio. Use this setting if your source clip has a 720 x 576 frame size
and you want it to maintain a 16:9 frame aspect ratio.
Anamorphic 2:1 Uses a 2.0 pixel aspect ratio. Use this setting if your source clip was amorphically transferred from
a film frame with a 2:1 aspect ratio.
HD Anamorphic 1080 Uses a 1.333 pixel aspect ratio.
Use square-pixel files in a D1 or DV project
You can use square-pixel footage in a DV project and generate output that does not appear distorted. Premiere Elements
either “upsamples” (increases) or “downsamples” (decreases) the resolution of a file that does not match the project
frame size. Downsampling results in a higher-quality image. Create files that are larger than the project’s frame size so
that Premiere Elements need not upsample and enlarge them.
Prepare the file by using one of the following methods, and then capture or add the file to Premiere Elements:
• If your final output is DV (NTSC), create and save it at a 720 x 540 frame size. Saving at this frame size prevents
u
psampling or 640 x 480 to prevent field distortion on a field-rendered file
.
• If your final output is DV (PAL), create and save it at a 768 x 576 frame size. Saving at this frame size prevents
u
psampling and field distortion on a field-rendered file.
• If your final output is D1 (NTSC), create and save it at a 720 x 540 frame size.
• The frame size of a square-pixel image can match the frame size of your project (for example 720 x 480).
H
owever, if they have different pixel aspect ratios, redesign the image using a different frame size (such as 720 x
540). Redesigning is necessary when the application you use to prepare the file doesn’t support nonsquare pixels.
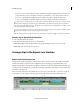
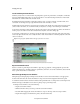
Set field options for imported interlaced video
In most video, each frame consists of two fields. One field contains the odd-numbered lines in the frame, and the other
contains the even-numbered lines. The fields are interlaced, or combined, to create the complete image. Adobe
Photoshop Elements includes a reverse field order preset for video imported from a hard disk or Flash memory
camcorder that uses upper fields first. You can capture source footage with upper fields first. For this footage, ensure
that your project uses either the Standard or Widescreen preset from the Flash Memory Camcorders presets folder.