
Operation Manual


57
Importing and adding media
Last updated 10/4/2016
Note: If you don’t intend to use all the files you add, you can delete them from the Project Assets panel. Deleting files from
the panel doesn’t delete them from your hard drive.
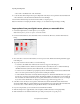
Import from Flip, AVCHD, cameras, phones, or removable drives
Many types of devices other than webcams and WDM devices record and store video.
Using the video importer, you can import video clips from tapeless camcorders, FLIP and AVCDHD camera,
r
emovable memory devices, and mobile devices.
You can also import files from removable media, such as DVDs, memory cards, and multimedia cards. These files are
co
pied to the hard drive location you specify. The files are also added to the Project Assets panel.
Note: O
n Mac OS, Video Importer does not list external DVD drives. Use internal Superdrive in this case.
You can add clips directly to the Quick view/Expert view timeline without first creating a project. When you add a clip
t
o either timeline, Adobe Premiere Elements automatically changes your project settings to match the clip properties.
However, if you add a clip to an existing project whose preset does not match the clip’s preset, a message appears. Click
Y
es to let Adobe Premiere Elements change the project’s settings to use the closest available preset.
Note: I
mage files cannot be imported using this option. To import images, use the Photos From Cameras Or Devices option
in the Add Media panel.
1 Do one of the following:
• Place the DVD into your computer’s DVD drive.
• Connect your card reader such as SD card or memory stick to your computer.
• Connect the digital camera, mobile phone, or other device to your computer using the USB 2.0 port.
Note: I
nstall any drivers your device requires. Consult the manual.
2 Click Add Media.
3 Click the device from which you want to import:
• Videos From Flip Or Camera
• DVD Camera Or Computer Drive
The Video Importer dialog box appears.
note:
Video Importer cannot import media from external hard drives. If you want to import media from an external
hard drive, use the Files And Folders option in the Add Media panel.
4 In the Source Menu, select the device from which you want to download movie clips.
The contents of the device or disk are displayed in the panel below the Source menu. The number of files, and the
si
ze of the content is displayed at the bottom of the panel containing the content.
5 Do one of the following:
• To imp ort all the content displayed in the panel, click Check All.
• To import a few clips, click deselect All, and select only those clips that you want to import.
Note: T
o preview the contents of a clip, click the clip. Click the Play button in the Preview panel.
6 To specify a location for the saved files, do one of the following:
• To save files to the default Adobe folder, leave the location as it appears in the dialog box.