
Operation Manual


39
Creating a video project
Last updated 10/4/2016
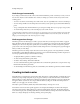
Project Assets panel overview
The Project Assets panel lets you preview source material for your projects. Select the Expert view and then click Project
Assets.
You can view the contents of a project using the list view or the grid view. Use the panel options menu to switch between
the
views.
The grid view displays a snapshot of the video you imported into the project. The Project Assets panel indicates files
th
a
t you use in the Expert view timeline with a green icon. Use the Search box to search for files within the panel.
Display and arrange media items
In the Project Assets panel, you can display items in the List view. The List view lets you view more items
simultaneously, search, and sort items by properties such as media type and duration.
• To sort items in List view, click the column heading by which you want to sort the items. (For example, click Media
Type to sort items by type.) If folders are expanded, items sort from the top level and down the Project Assets panel
hierarchy. To reverse the sort order, click the column heading again.
• To see more of the column headings in List view, drag the right side of the Project Assets panel to the right.
Alternatively, drag the scroll bar at the bottom of the panel to the right.
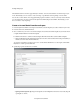
Organize clips in folders
The Project Assets panel can include folders into which you can organize project contents. Folders can contain media
files or subfolders. Consider using folders to organize media types, such as still images, audio files, and video clips.
In the Project Assets panel, do any of the following:
No
te: To access the Project Assets panel, select Project Assets in the Expert view.
• To add a folder, click the New Folder icon at the bottom of the Project Assets panel. In the list view, if you click
N
ew Folder multiple times in a row, each new folder is nested inside the previous new folder.
• To move an item into a folder, drag the item to the Folder icon. You can move folders into other folders to nest
them.
• To display the contents of a folder, double-click the folder. Alternatively, in List view, click the triangle beside the
Folder icon to expand the folder
.
• To navigate to parent folders, click the appropriate icon. You can click and hold this button to see a list of all the
folders above the one currently listed. You can also jump to a folder by highlighting it and releasing the mous
e
button.
Rename a source file in a project
• To rename a clip, select it, choose Clip > Rename, type the new name, and press Enter. (The change affects only
references used in the project; the name of the original source file remains the same in the Project workspace an
d
on your computer.)
• To rename an original source file, close Adobe Premiere Elements before you rename it. The next time you open the
project, Adobe Premiere Elements asks you to locate the file.
Tip: Y
ou can also rename a selected clip by clicking its name once to select the text, typing the new name, and
pres
sing Enter.