
Operation Manual


203
Creating titles
Last updated 10/4/2016
4 Choose one of the following:
Bring To Front Brings the object to the top of the stacking order.
Bring Forward Switches the object with the object directly in front of it.
Send To Back Moves the object to the bottom of the stacking order.
Send Backward Switches the object with the object directly behind it.
note:
If your text or shape elements are densely stacked, it may be difficult to select an element within the stack. You can
use the Text > Select or right-click/ctrl-click > Select command to navigate easily through the stacked elements to reach
the target element.
Center objects
1 If necessary, double-click the title in the Expert view timeline to open it in the Monitor panel.
2 Select one or more objects and do any of the following in the Adjust panel:
• To center the object vertically, click the Vertical Center button.
• To center the object horizontally, click the Horizontal Center button.
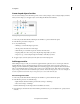
Align and distribute objects
Use the Align and Distribute commands to line up or evenly space selected objects within a title in the Monitor panel.
You can align or distribute objects (text boxes, shapes, or both) along the vertical or horizontal axis. When you choose
horizontal alignment, the selected objects align along the edge of the object’s horizontal axis closest to the edge you
choose. When you choose vertical alignment, the selected objects align along the edge of the object’s vertical axis closest
to the edge you choose.
When you align and distribute selected objects, keep the following in mind:
• An alignment option aligns selected objects to the object that most closely represents the new alignment. For
example, for right-alignment, all selected objects align to the selected object that is farthest to the right.
• A distribution option evenly spaces selected objects between the two most extreme objects. For example, for a
vertical distribution option, the selected objects are distributed between the highest and lowest selected objects.
• When you distribute objects of different sizes, the spaces between objects may not be uniform. For example,
distributing objects by their centers creates equal space between the centers. However, different-sized objects extend
by different amounts into the space between objects. To create uniform spacing between selected objects, use th
e
H
orizontal Even Spacing or Vertical Even Spacing option.
Align objects
1 If necessary, double-click the title in the Expert view timeline to open it in the Monitor panel.
2 In the Monitor panel, Shift-click two or more objects or drag a marquee over them.
3 Do one of the following:
• Right-click/ctrl-click any of the objects selected, and choose Align Objects.
• Choose Text > Align Objects.
4 Select the type of alignment you want.
Distribute objects
1 If necessary, double-click the title in the Expert view timeline to open it in the Monitor panel.