
Operation Manual


177
Applying transitions and special effects
Last updated 10/4/2016
Create an Image Mask transition
You can use a black-and-white bitmap image as a transition mask. The first clip replaces the black area in the image,
and the second clip replaces the white areas in the image. If you use a grayscale image for the mask, pixels containing
50% or more gray convert to black, and pixels containing less than 50% gray convert to white.
Apply an Image Mask transition
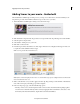
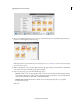
1 In the Expert view, click Transitions on the Action bar. The Transitions panel appears.
2 From the Transitions panel, select the Special Effect menu, and locate the Image Mask transition.
3 Drag the Image Mask transition to a cut between clips in the Expert view timeline.
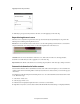
4 In the Image Mask Settings dialog box, click Select Image.
5 Locate and select the image file you want to use as a transition mask, and click Open. The image appears in the Image
Mask Settings dialog box.
6 Click OK. The Transitions contextual control appears. Adjust the properties of the transition, if necessary, and click
Done.
Change the image for an Image Mask transition
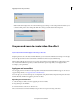
1 Double-click the transition in the Expert view timeline. The Transitions contextual control appears.
2 In the Transitions contextual control, click More and then click Custom. The Image Mask Settings dialog box
appears.
3 In the Image Mask Settings dialog box, click Select Image.
4 Locate and select the image file you want to use, click Open, and then click OK.
Create a Gradient Wipe transition
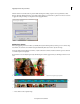
Adobe Premiere Elements can use any importable grayscale image as a gradient wipe. In a gradient wipe, the second
clip fills the black area of the grayscale image and then shows through each level of gray as the transition progresses
until the white area becomes transparent. When you create a Gradient Wipe transition, you can specify the softness of
the transition’s edges.
Apply a Gradient Wipe transition
1 In the Expert view, click Transitions on the Action bar. The Transitions panel appears.
2 From the Transitions panel, select the Wipe menu, and locate the Gradient Wipe transition.
3 Drag the Gradient Wipe transition to a cut between clips in the Expert view timeline.
4 In the Gradient Wipe Settings dialog box, click Select Image.