
Operation Manual


175
Applying transitions and special effects
Last updated 10/4/2016
Color Effects Create tints of varying color and intensity.
Drop Shadows Create either static or animated shadows. Shadow presets have suffixes that indicate the direction that
the shadow is cast or the direction that it moves. For example, LL indicates that the shadow is cast to the lower left. For
moving shadows, the appendix is hyphenated. Therefore, LR-LL indicates that the shadow moves from the lower right
to the lower left. To ensure that shadows are visible, apply shadows to images that are smaller than the project’s frame
size and make sure that the background image is not black.
Horizontal/Vertical Image Pans Create animations in which the entire image moves left and right or up and down as
the video plays. For example, an L-R horizontal pan moves the image from left to right.
Horizontal/Vertical Image Zooms Create animated zoom effects.
Mosaics, Solarizes, and Twirls Create animated effects that either decrease in intensity from the beginning of the clip
or increase in intensity as the clip ends.
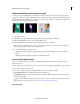
PiPs Create Picture-in-Picture effects by scaling the target clip so that you can superimpose it onto a full-sized clip. You
can also apply this effect to several clips in order to create a montage.
note:
For descriptions of the effects used in the presets, search for the effect name in Help.
Apply an effect preset
If you apply a preset to a clip, and the preset contains properties for an effect that is already applied to the clip, the clip
is modified using the following rules:
• If the effect preset contains a fixed effect (Motion, Opacity, or Volume), applying the preset replaces the existing
effect properties.
• If the effect preset contains a standard (non-fixed) effect, the effect is added to the bottom of the list of effects.
1 Click Effects in the Action bar to display the Applied Effects panel.
2 Expand the Presets category, and drag an effect preset to a clip in the Quick view timeline or the Expert view
timeline.
3 To preview the effect, click the Play button in the Monitor panel.
Create an effect preset
You can create presets containing one or multiple effects. After you create an effect preset, it appears under the My
Presets category in the Effects panel.
1 Select the clip that uses the effect you want to save as a preset.
2 Click Applied Effects to open the Applied Effects panel.
3 Right-click/ctrl-click one or more effects, and choose Save Preset.
4 In the Save Preset dialog box, specify a name for your preset.
5 (Optional) Enter a description for the preset.
6 Select one of the following preset types to specify how Premiere Elements will handle keyframes when you apply the
preset to a target clip, and then click OK:
Scale Scales the source keyframes proportionally to the length of the target clip. This action deletes any existing
keyframes on the target clip.
Anchor To In Point Positions the preset’s first keyframe at the same distance from the target clip’s In point as it was
from the original clip’s In point. For example, if the first keyframe was 1 second from the In point of the source clip