
Operation Manual

76
USING PHOTOSHOP
Understanding and opening images
Last updated 12/5/2011
Placing files
The Place command adds a photo, art, or any Photoshop-supported file as a Smart Object to your document. Smart
Objects can be scaled, positioned, skewed, rotated, or warped without degrading the image.
Place a file in Photoshop
1 Open the Photoshop document that is the destination for the placed art or photo.
2 Do one of the following:
• (Photoshop) Choose File > Place, select the file you want to place, and click Place.
You can also drag a file from Windows or Mac OS onto an open Photoshop image.
• (Bridge) Select the file and choose File > Place > In Photoshop.
3 If you are placing a PDF or Illustrator (AI) file, the Place PDF dialog box appears. Select the page or image you want
to place, set the Crop options, and click
OK. For more information on the Place PDF dialog box options, see “Place
PDF or Illustrator files in Photoshop” on page 77.
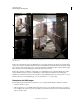
The placed artwork appears inside a bounding box at the center of the Photoshop image. The artwork maintains its
original aspect ratio; however, if the artwork is larger than the Photoshop image, it is resized to fit.
Note: In addition to the Place command, you can also add Adobe Illustrator art as a Smart Object by copying and pasting
the art from Illustrator into a Photoshop document. See
“Paste Adobe Illustrator art into Photoshop” on page 77.
4 (Optional) Reposition or transform the placed artwork by doing any of the following:
• To reposition the placed art, position the pointer inside the bounding box of the placed artwork and drag, or in the
options bar, enter a value for X to specify the distance between the center point of the placed artwork and the left
edge of the image. Enter a value for Y to specify the distance between the center point of the placed artwork and the
top edge of the image.
• To scale the placed art, drag one of the corner handles of the bounding box or enter values for W and H in the
options bar. When dragging, hold down the Shift key to constrain proportions.
• To rotate the placed art, position the pointer outside the bounding box (the pointer turns into a curved arrow) and
drag, or enter a value (in degrees) for the Rotation option
in the options bar. The artwork rotates around the
center point of the placed artwork. To adjust the center point, drag it to a new location, or click a handle on the
Center Point icon
in the options bar.
•
To skew the placed art, hold down Ctrl (Windows) or Command (Mac OS) and drag a side handle of the bounding box.
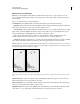
• To warp the placed art, choose Edit > Transform > Warp and then choose a warp from the Warp Style pop-up
menu in the options bar.
If you choose Custom from the Warp Style pop-up menu, drag the control points, a segment of the bounding box or
mesh, or an area within the mesh to warp the image.
5 If you’re placing a PDF, EPS, or Adobe Illustrator file, set the Anti-alias option in the options bar as desired. To
blend edge pixels during rasterization, select the Anti-alias option. To produce a hard-edged transition between
edge pixels during rasterization, deselect the Anti-alias option.
6 Do one of the following:
• Click Commit in the options bar or press Enter (Windows) or Return (Mac OS) to commit the placed artwork
to a new layer.